

Guide
How to use Orbis Mentor
Step by step, with real screens: for mentees who book sessions and for mentors who give them.
Start with step 1How to use Orbis Mentor
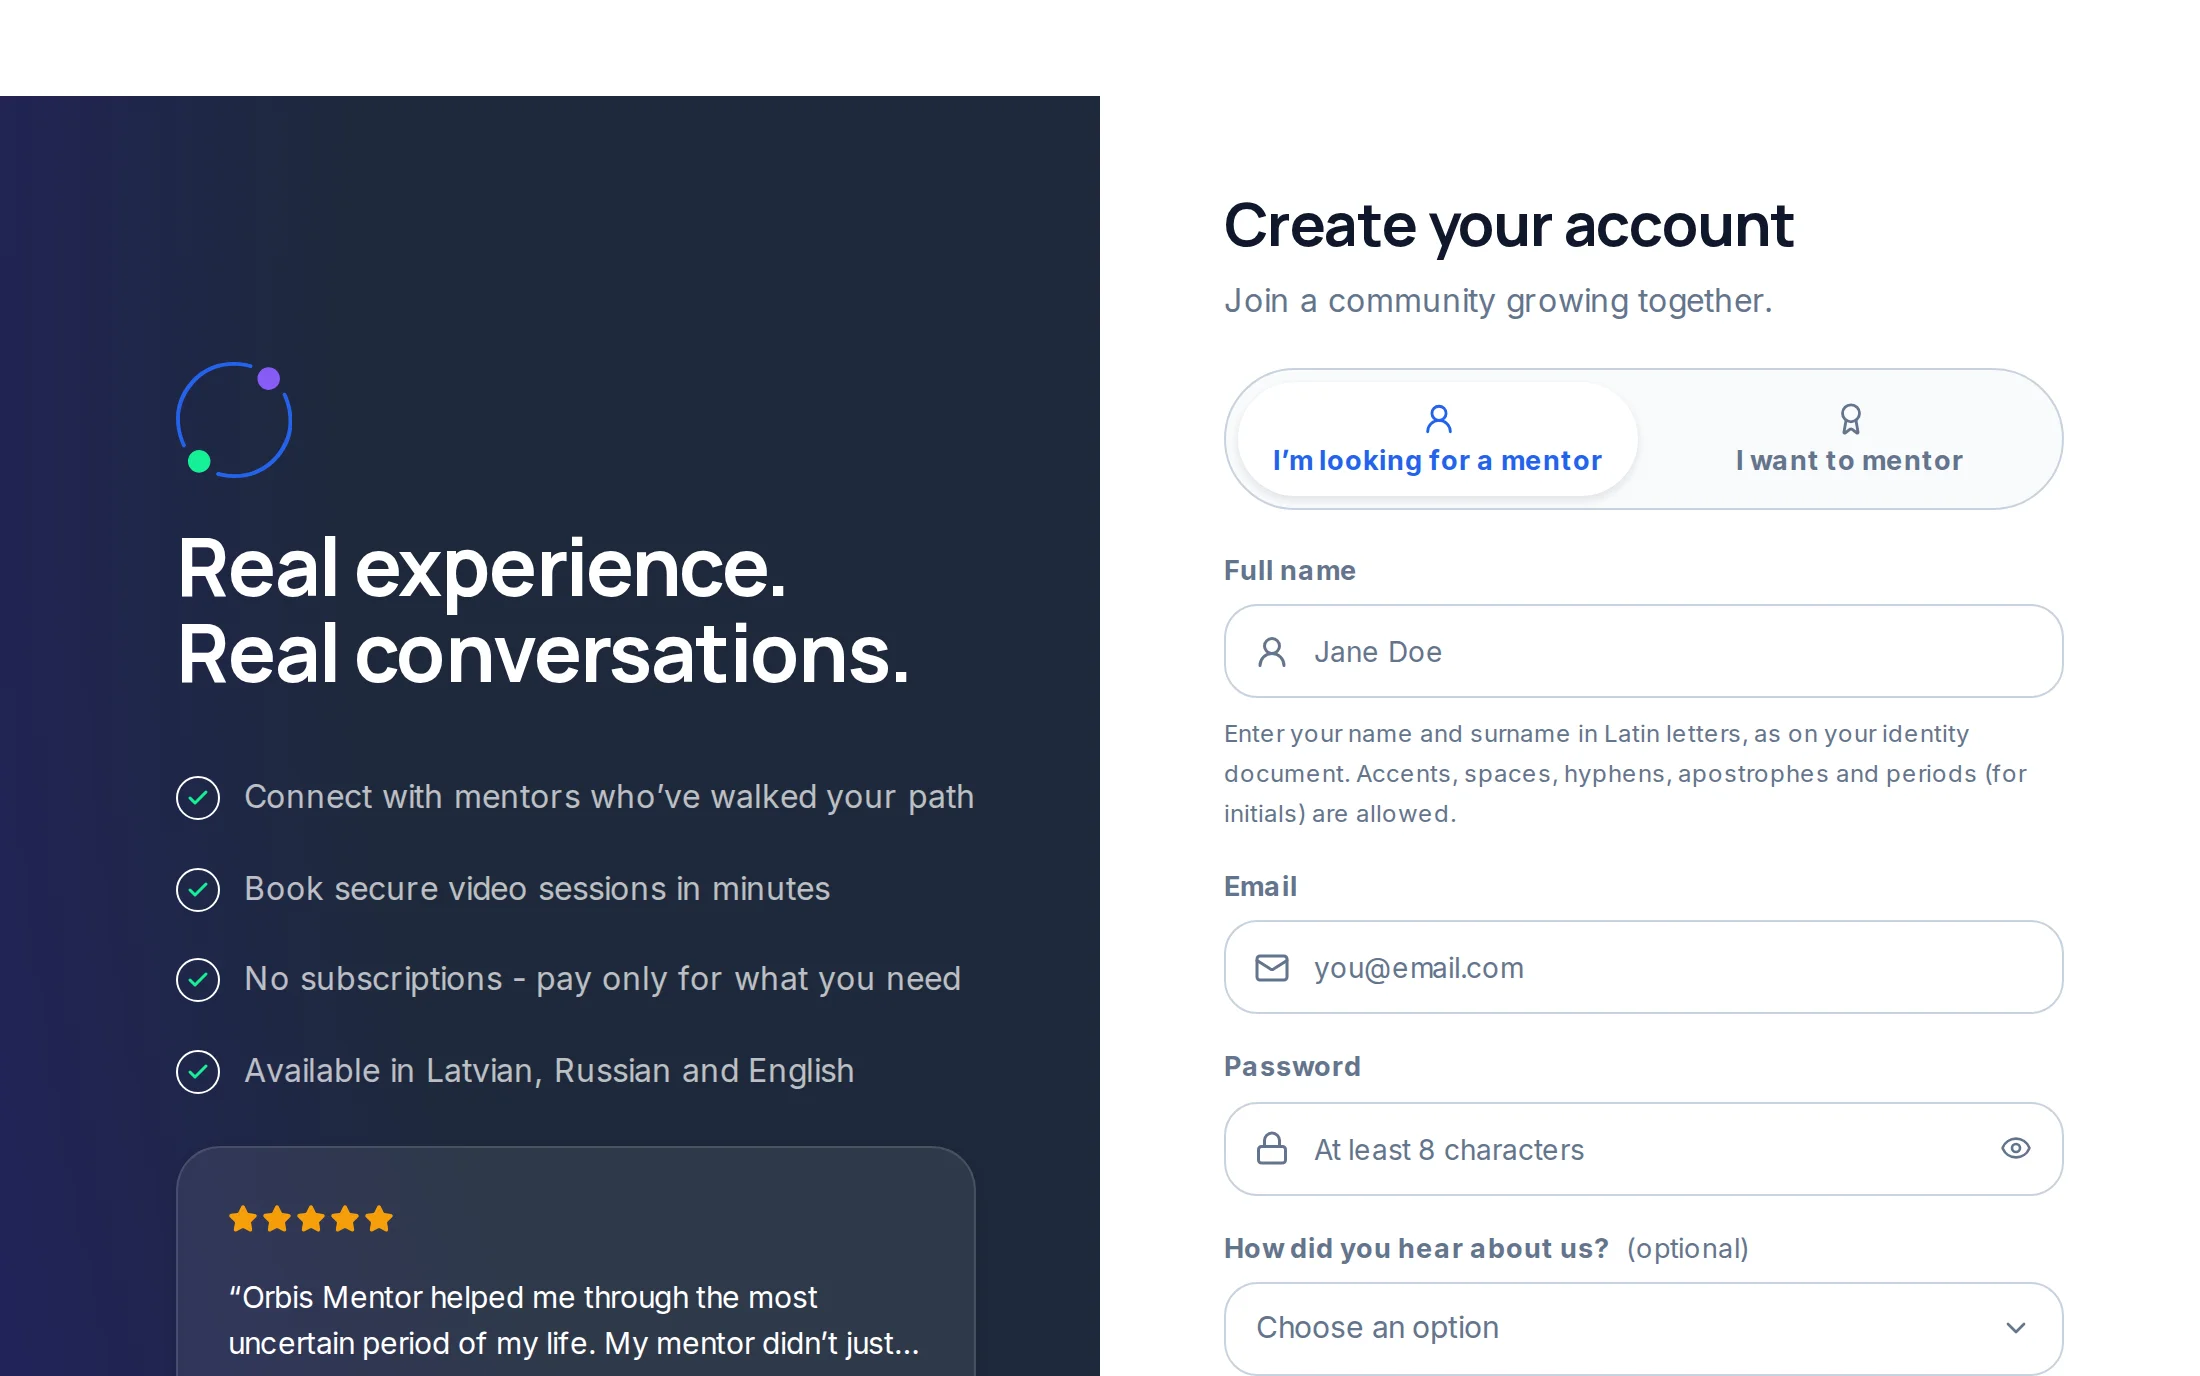
1Create an account
Press “Log in / Join”, choose “I’m looking for a mentor” and fill in your full name in Latin letters as on your ID, your email and a password of at least 8 characters. Agree to the Terms and Privacy Policy and press “Create account”. We send you an email: open the link in it to confirm the address - you can sign in only after that. Creating an account and browsing mentors is free.
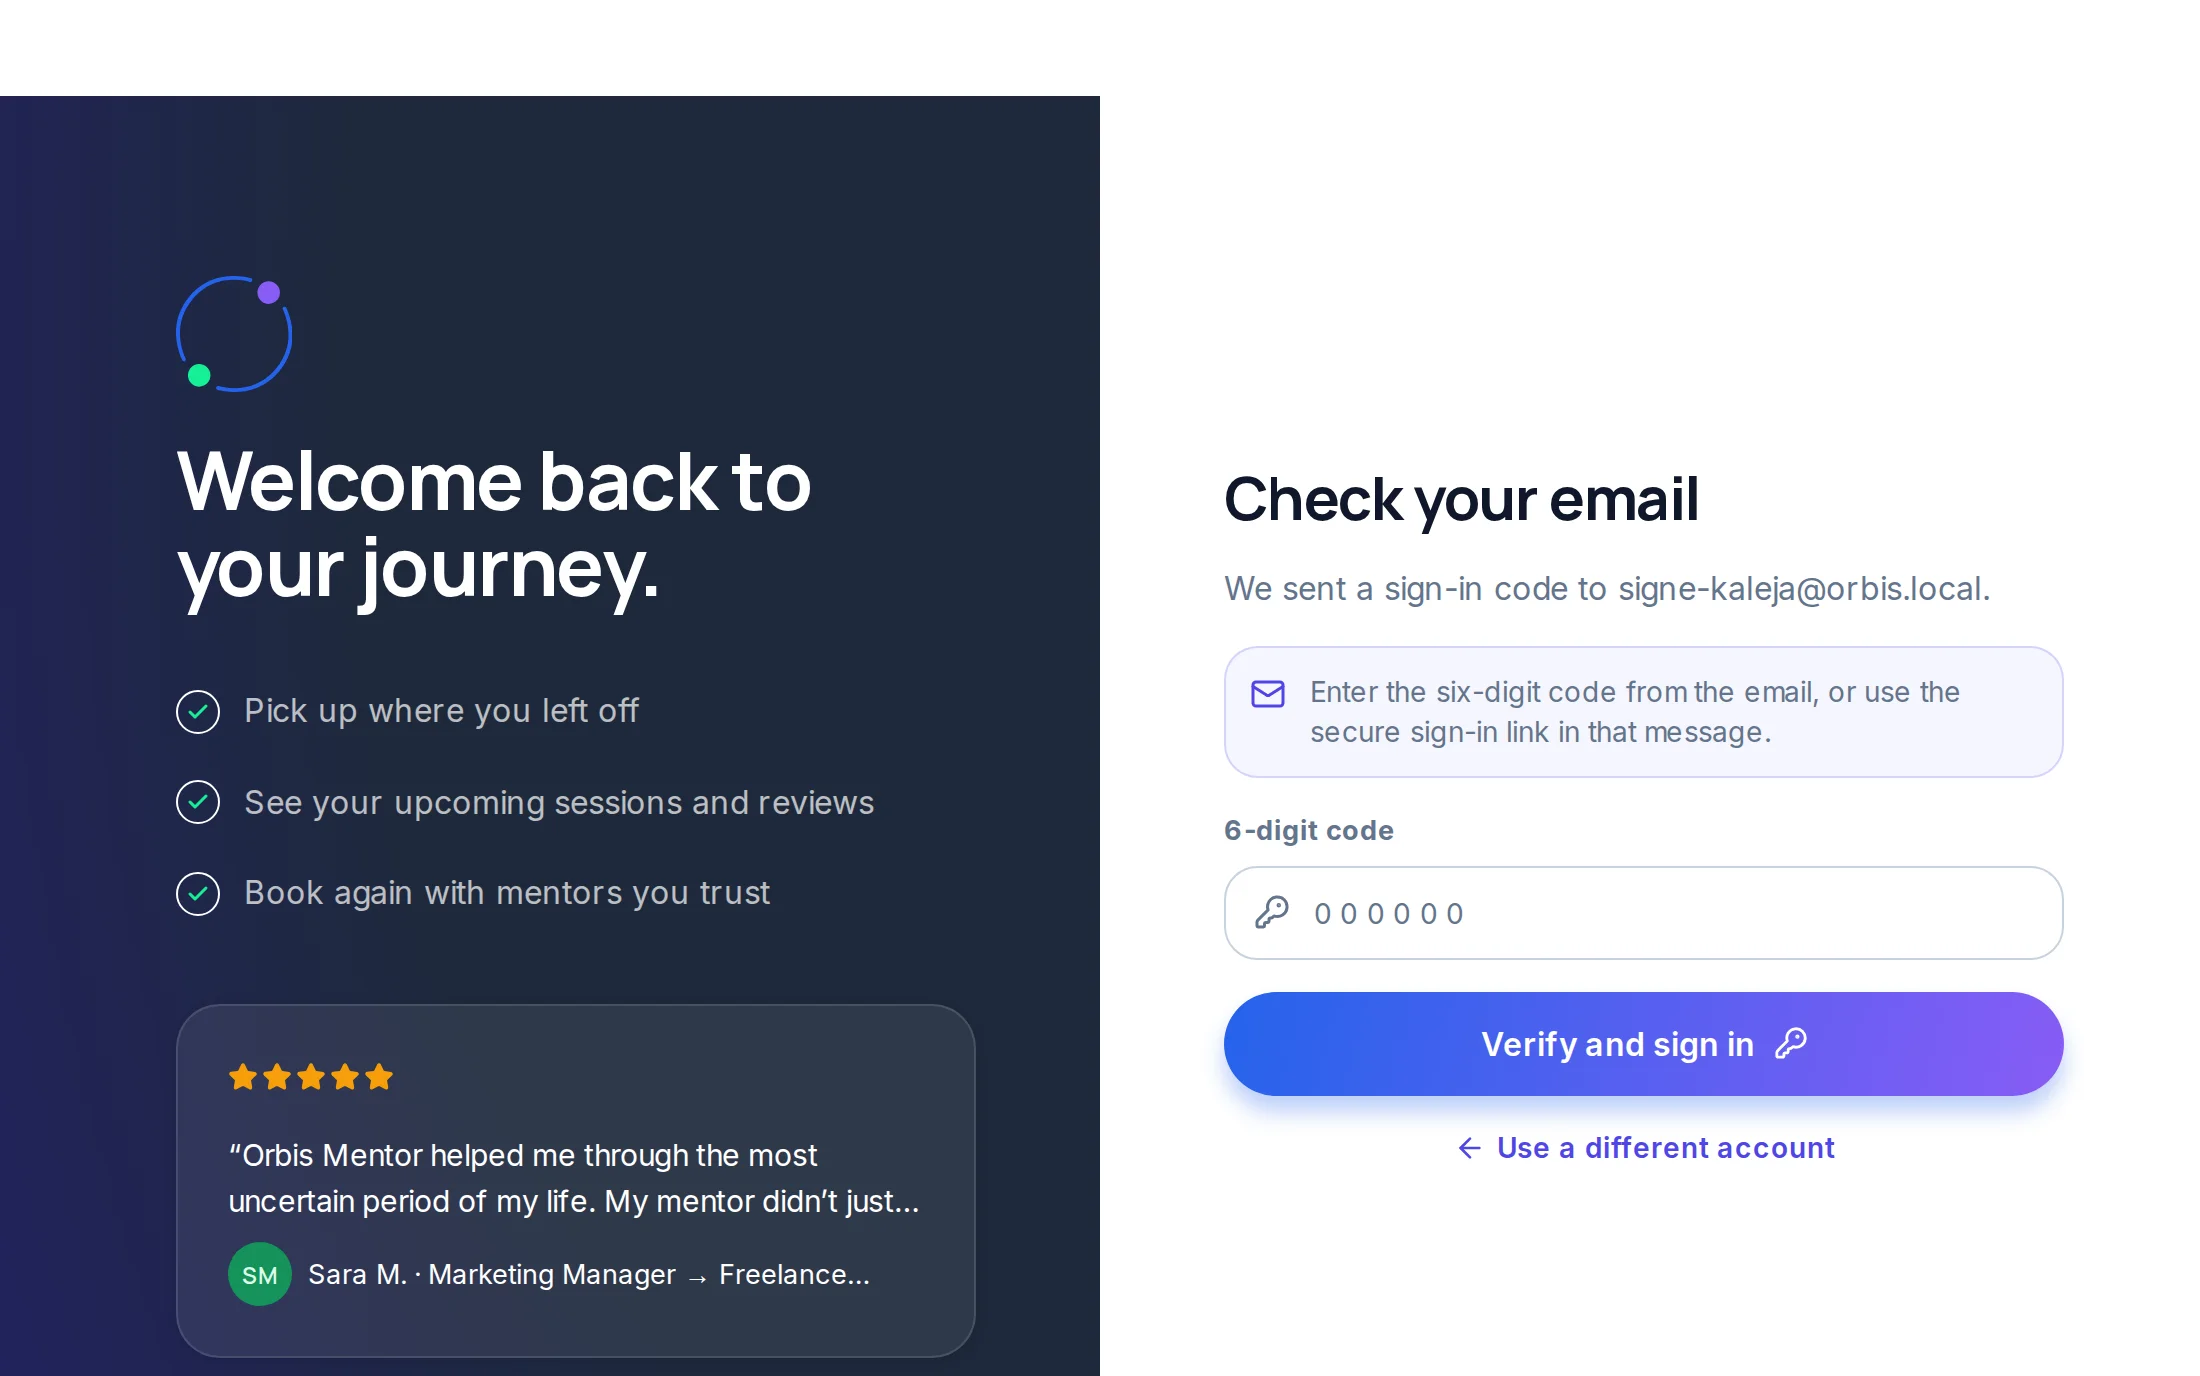
2Sign in with the code from your email
Enter your email and password. We then email you a 6-digit code (or a sign-in link); type the code and press “Verify and sign in”. The code works for 10 minutes. This second step protects your account every time you sign in.
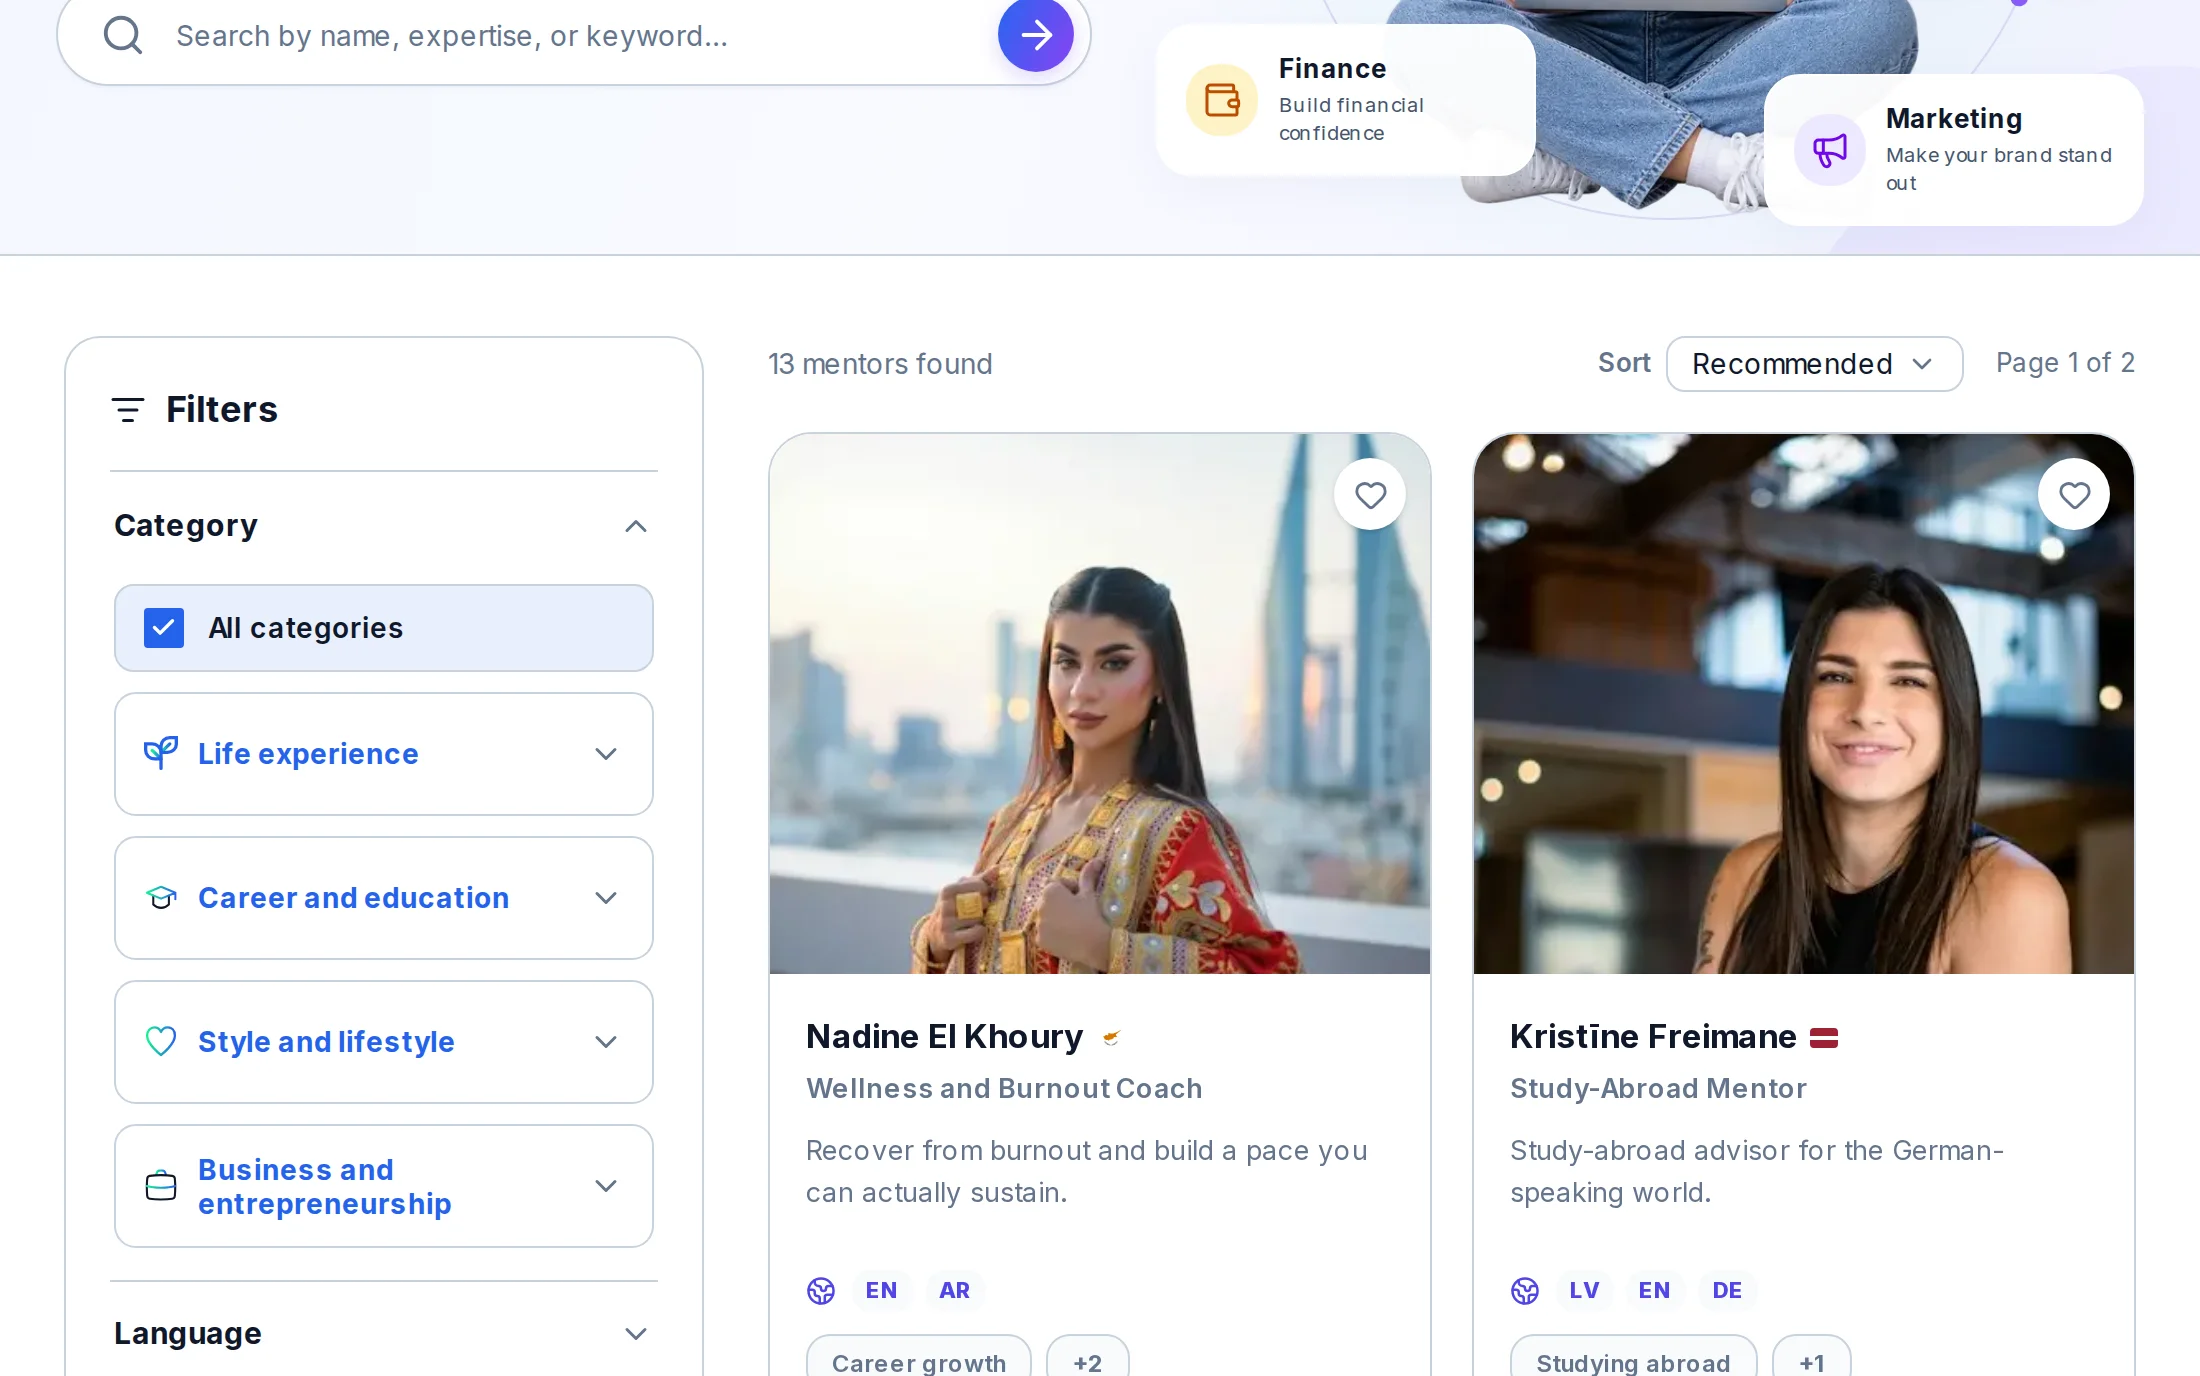
3Find a mentor
Open “Find a Mentor”. Search by name, expertise or keyword, and narrow the list by category and topic, language, country, price and rating. The heart on a card keeps the mentor in “Saved mentors”.
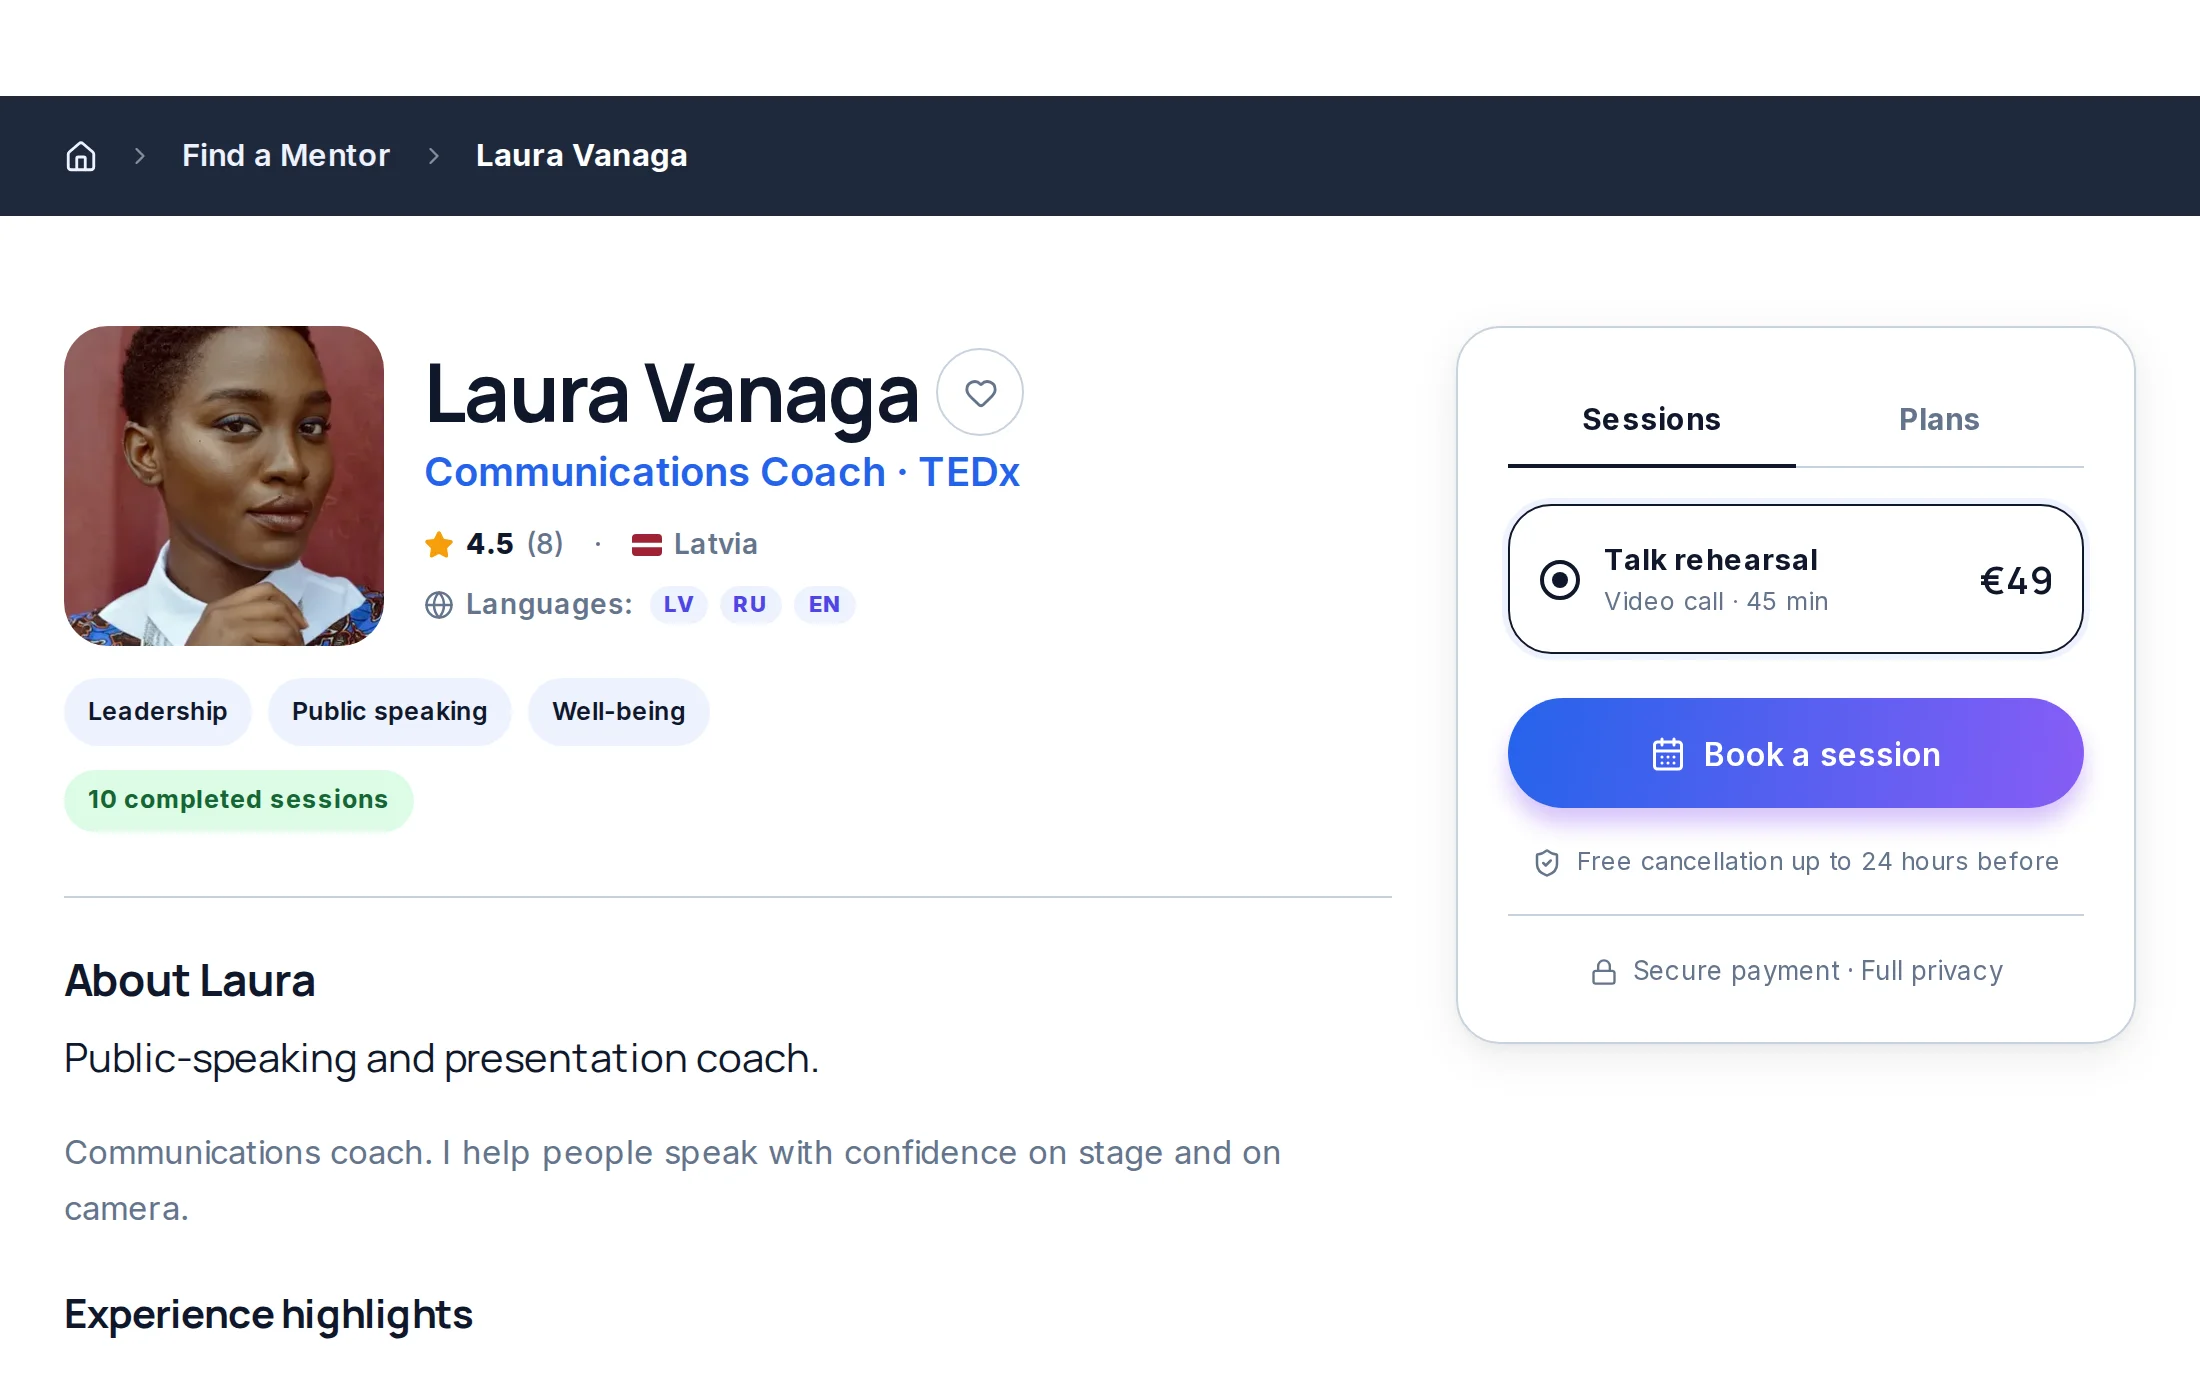
4Look at the mentor’s profile
The profile shows who the mentor is, their rating and reviews, languages, topics and how many sessions they have held. On the right, “Sessions” lists single sessions and “Plans” - packages of several sessions, each with its length and price. Press “Book a session”.
5Choose the format and the time
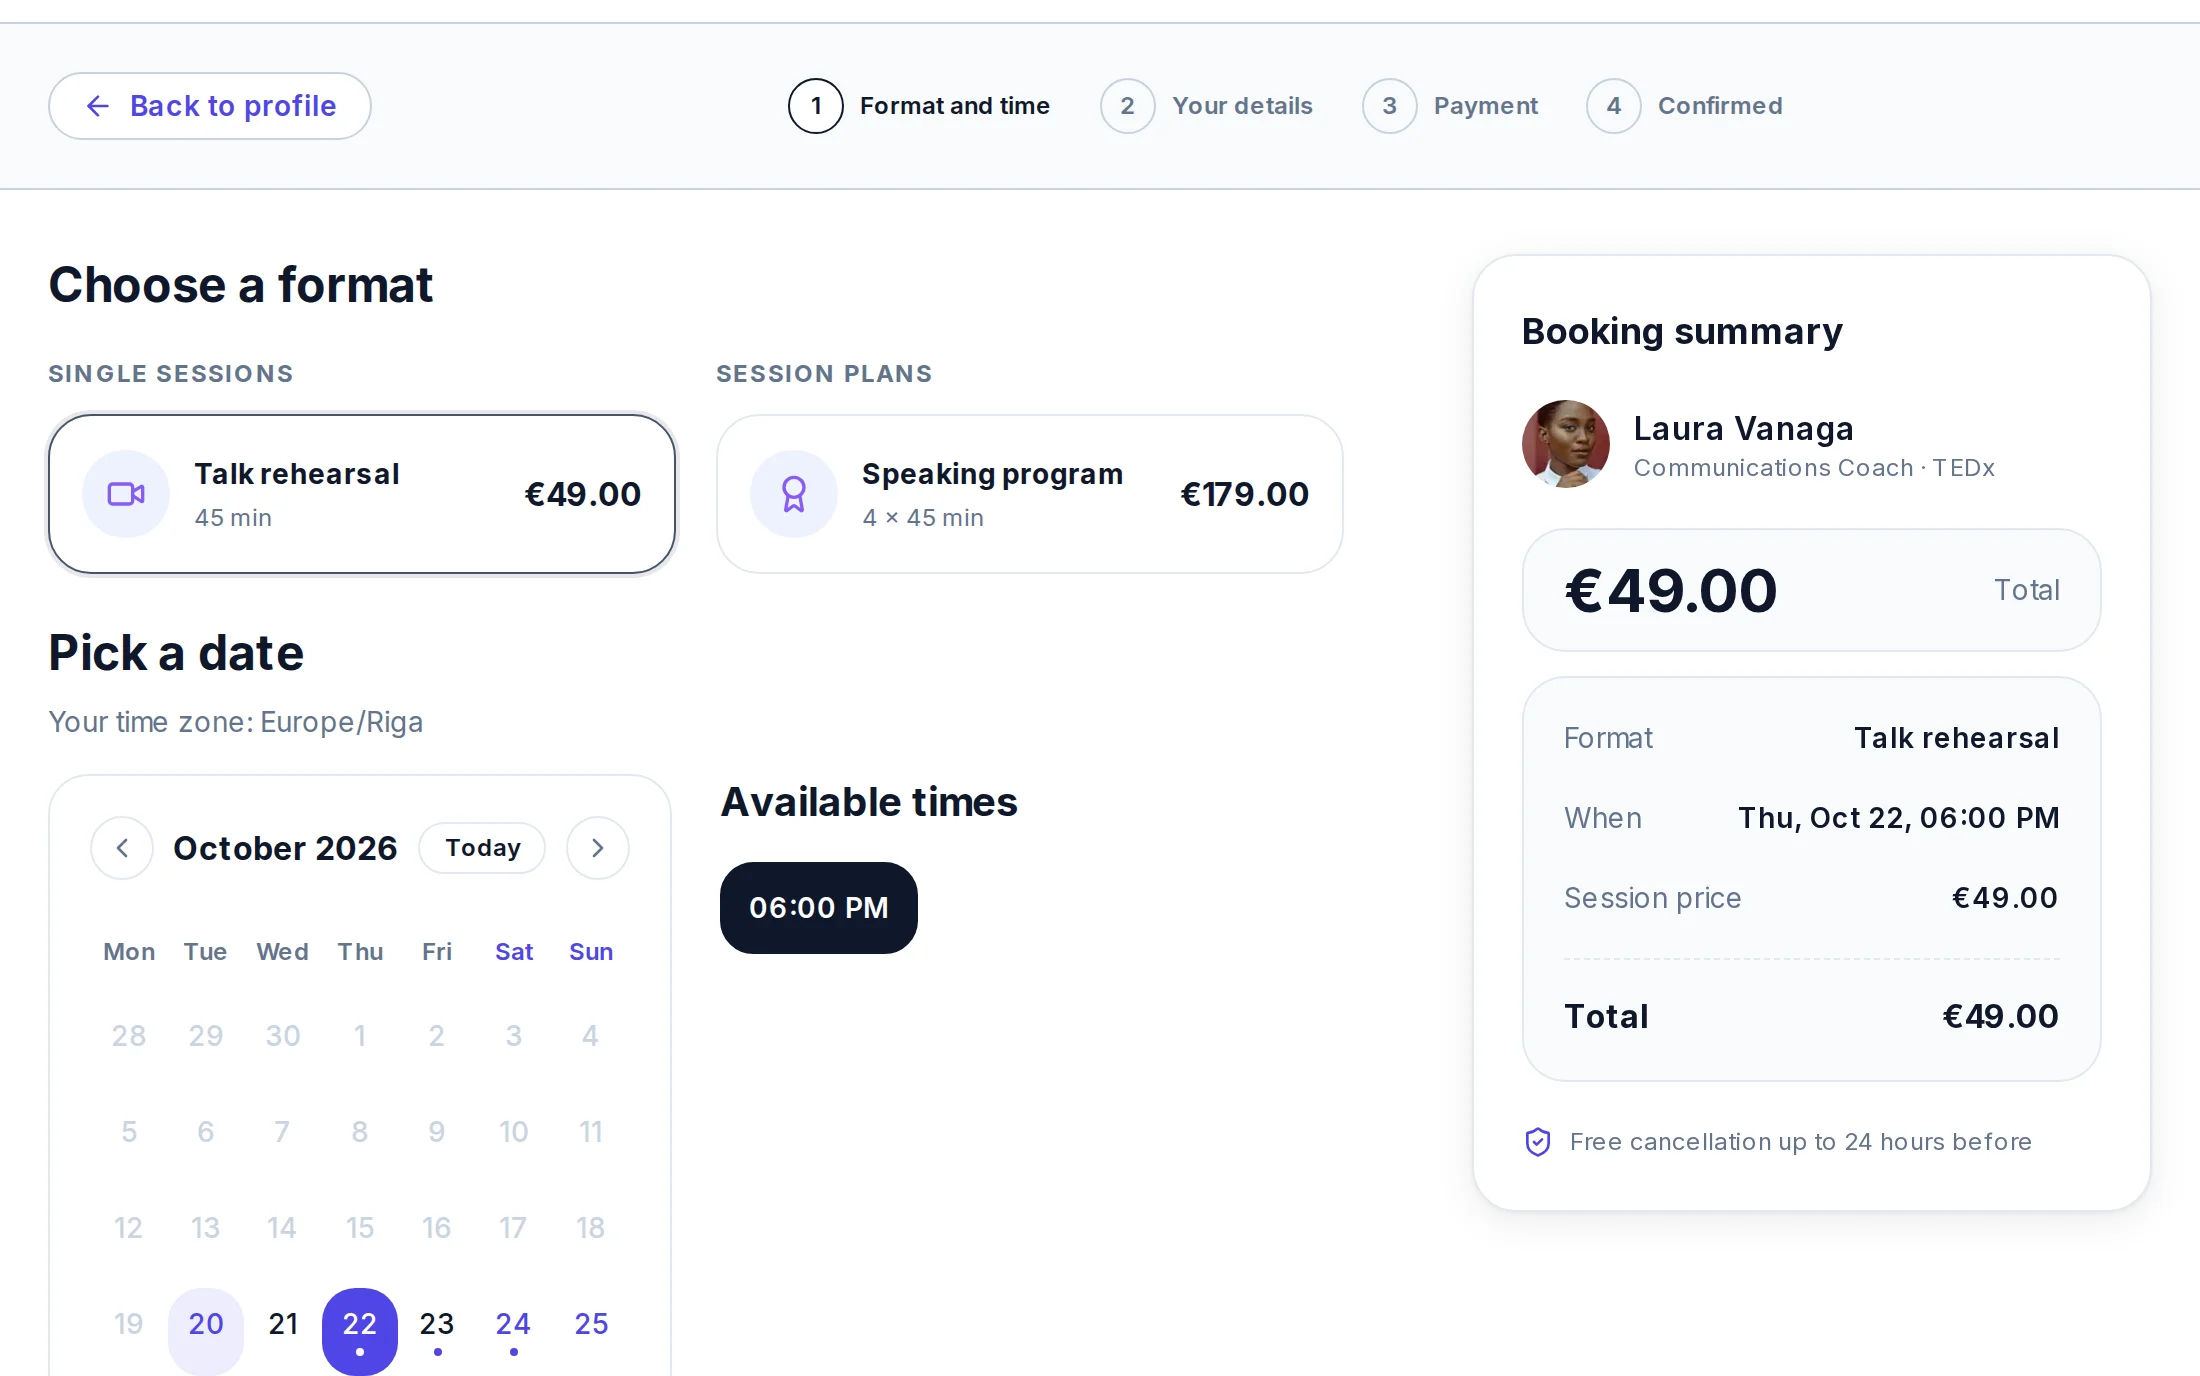
Pick a format, then a marked day in the calendar and a time. Times are shown in your own time zone. The summary on the right shows the price; press “Continue”, check your details, agree to the Terms and the cancellation policy and press “Continue to payment”.
6Pay securely
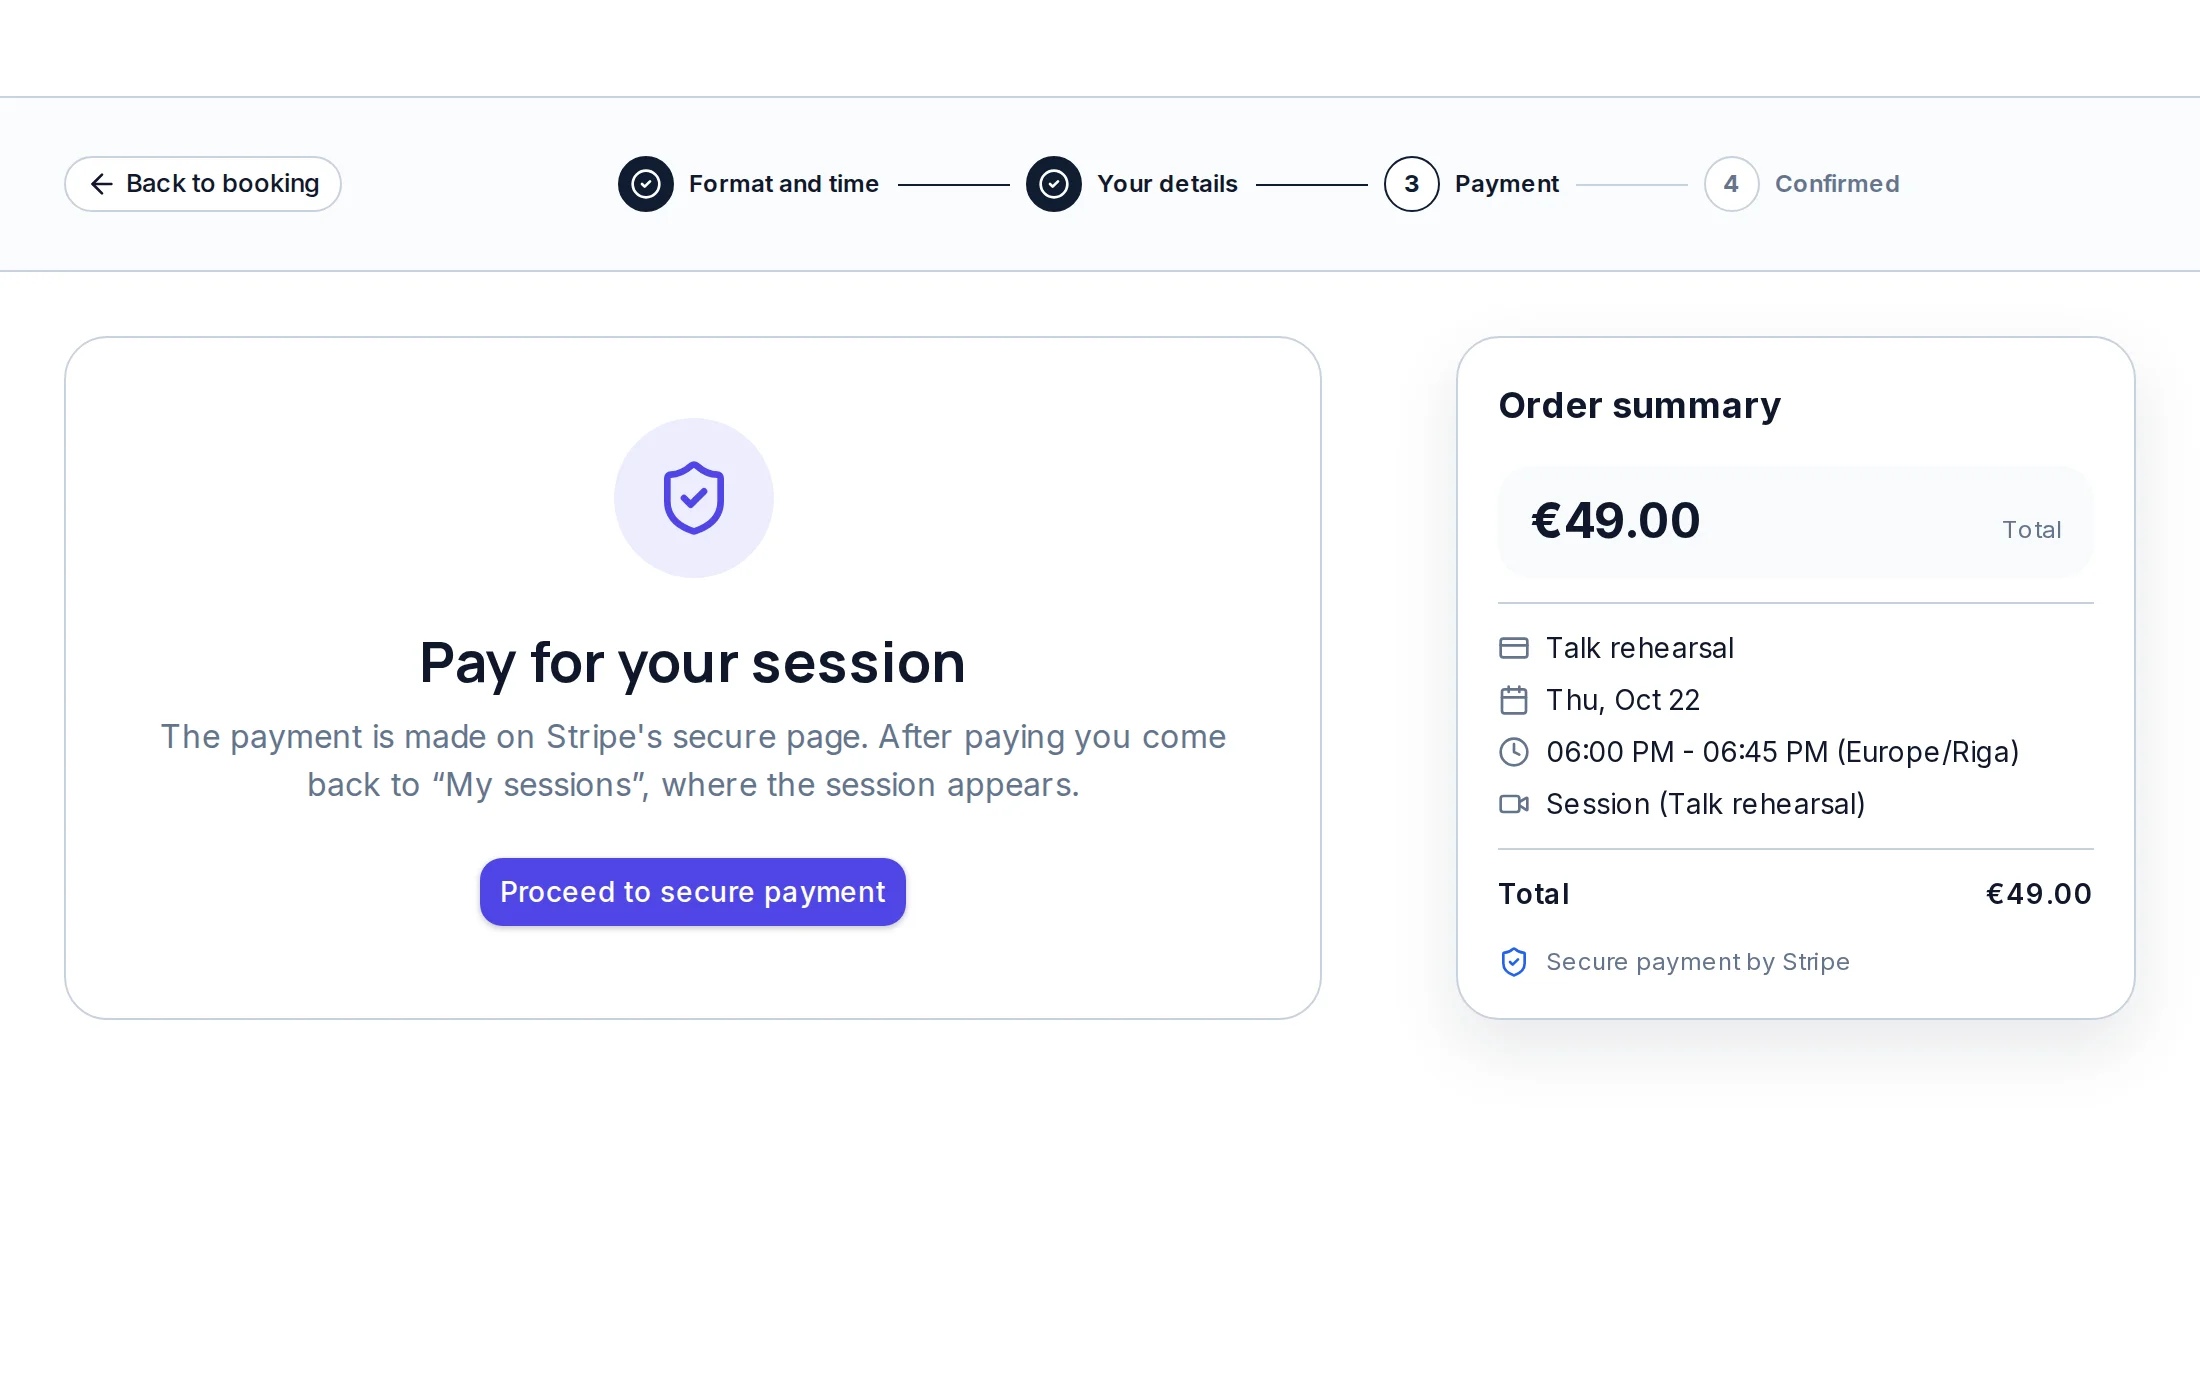
Press “Proceed to secure payment”: you go to Stripe's secure payment page, enter your card details and pay. Orbis Mentor never sees your card number. The time is held for you for 15 minutes while you pay.
7Your session is booked
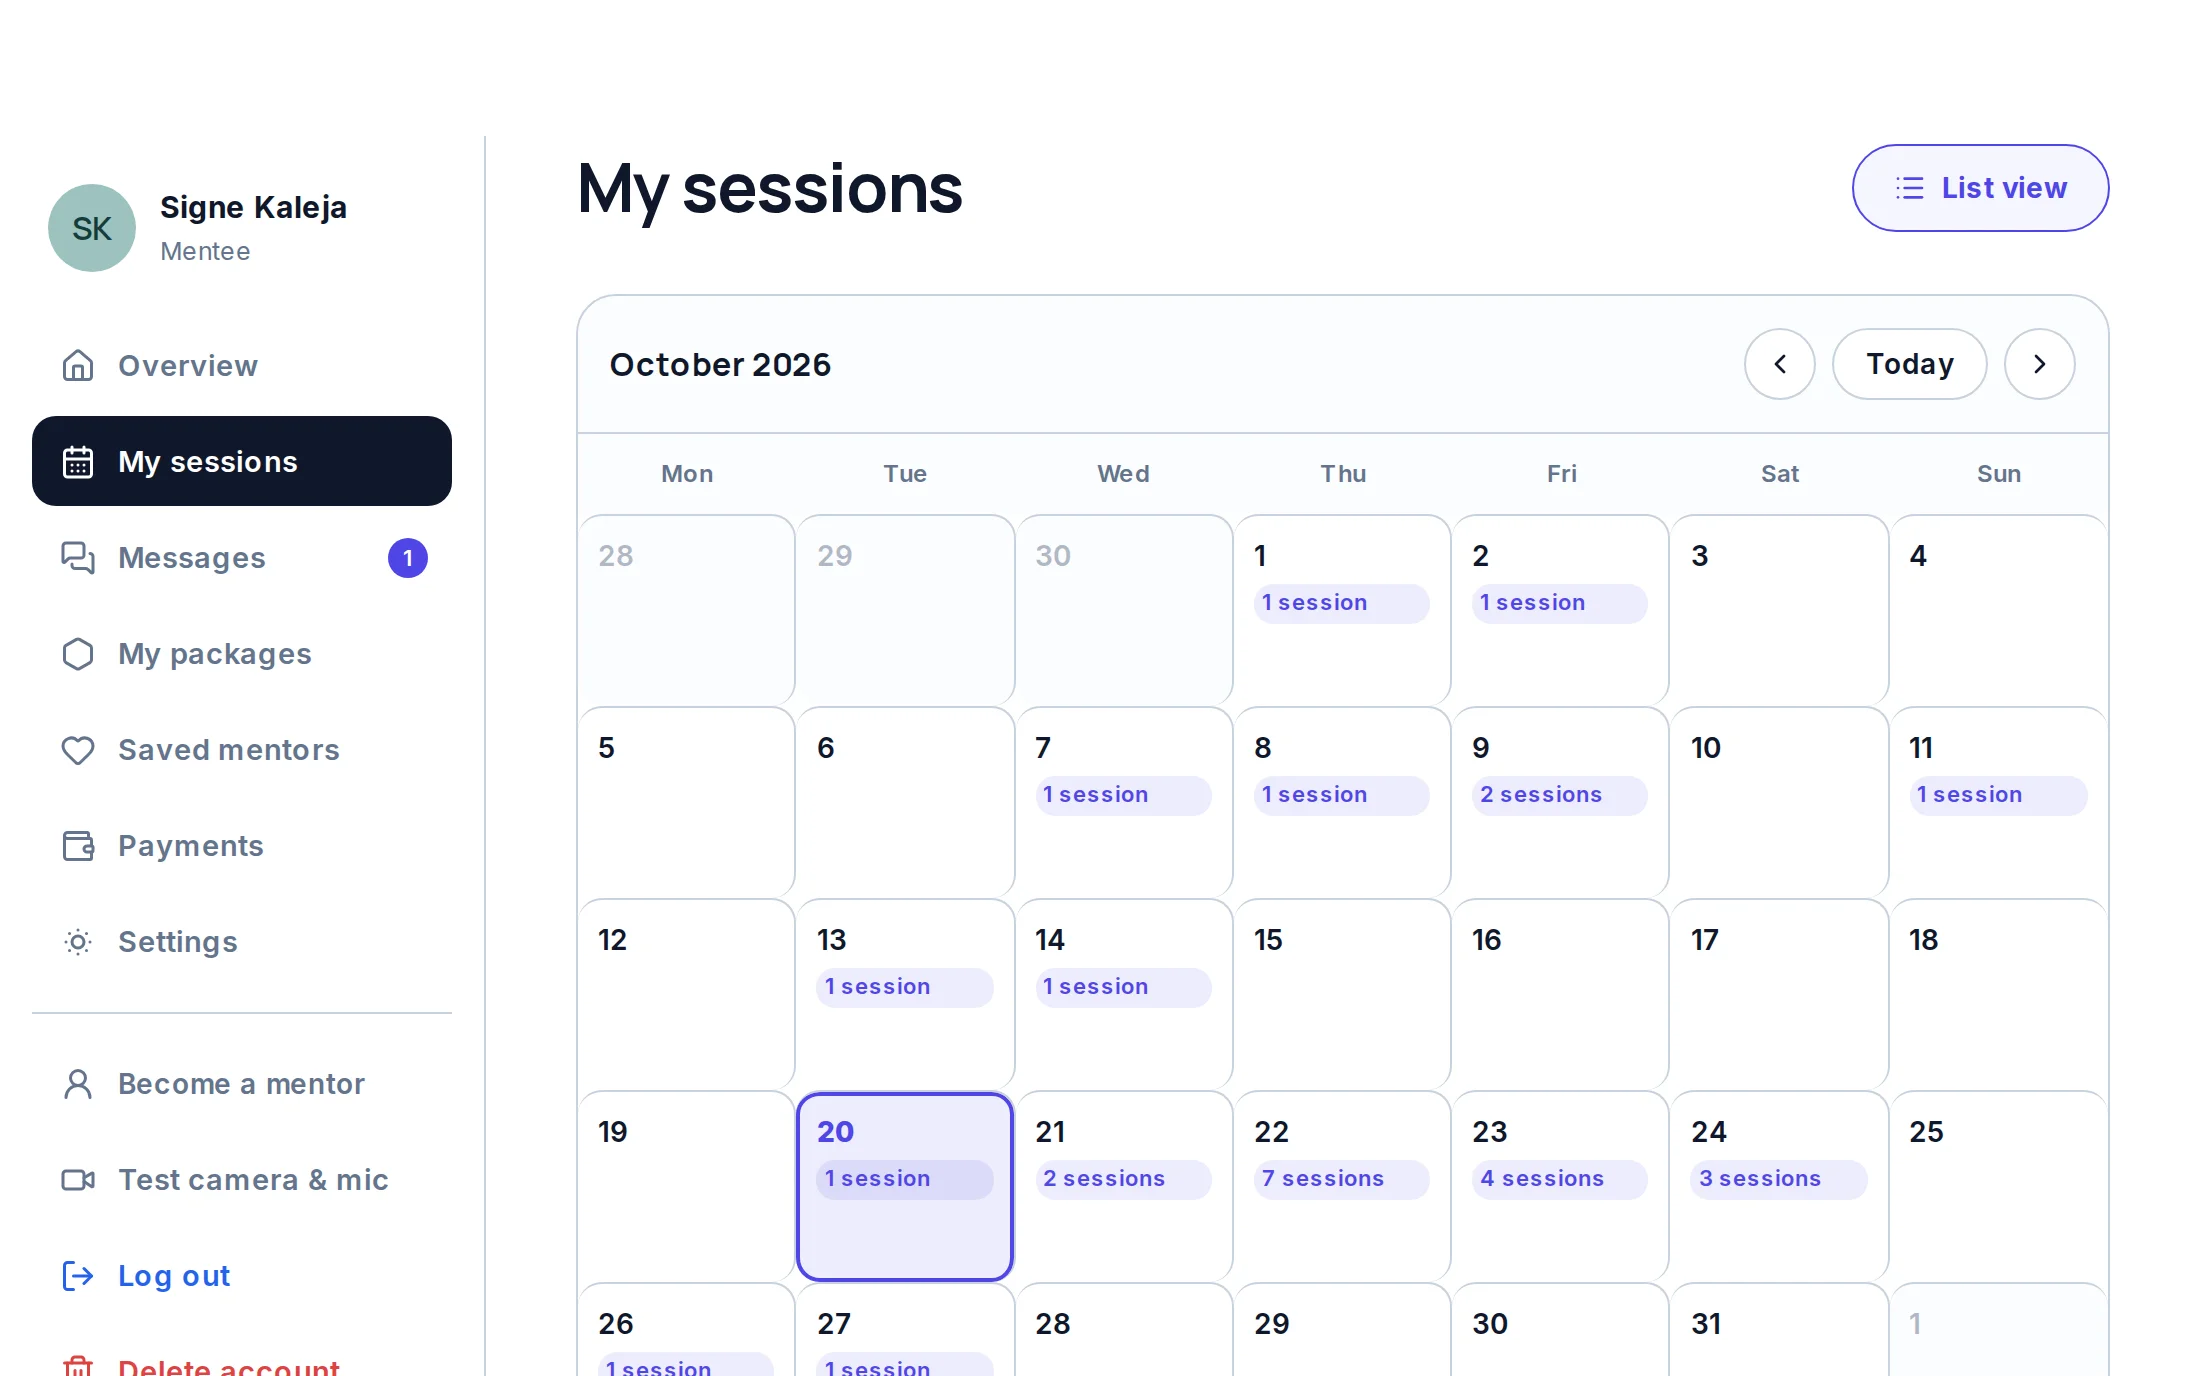
After the payment Stripe brings you back to “My sessions” on your dashboard, where the new session appears, and you get a confirmation email.
8Your sessions
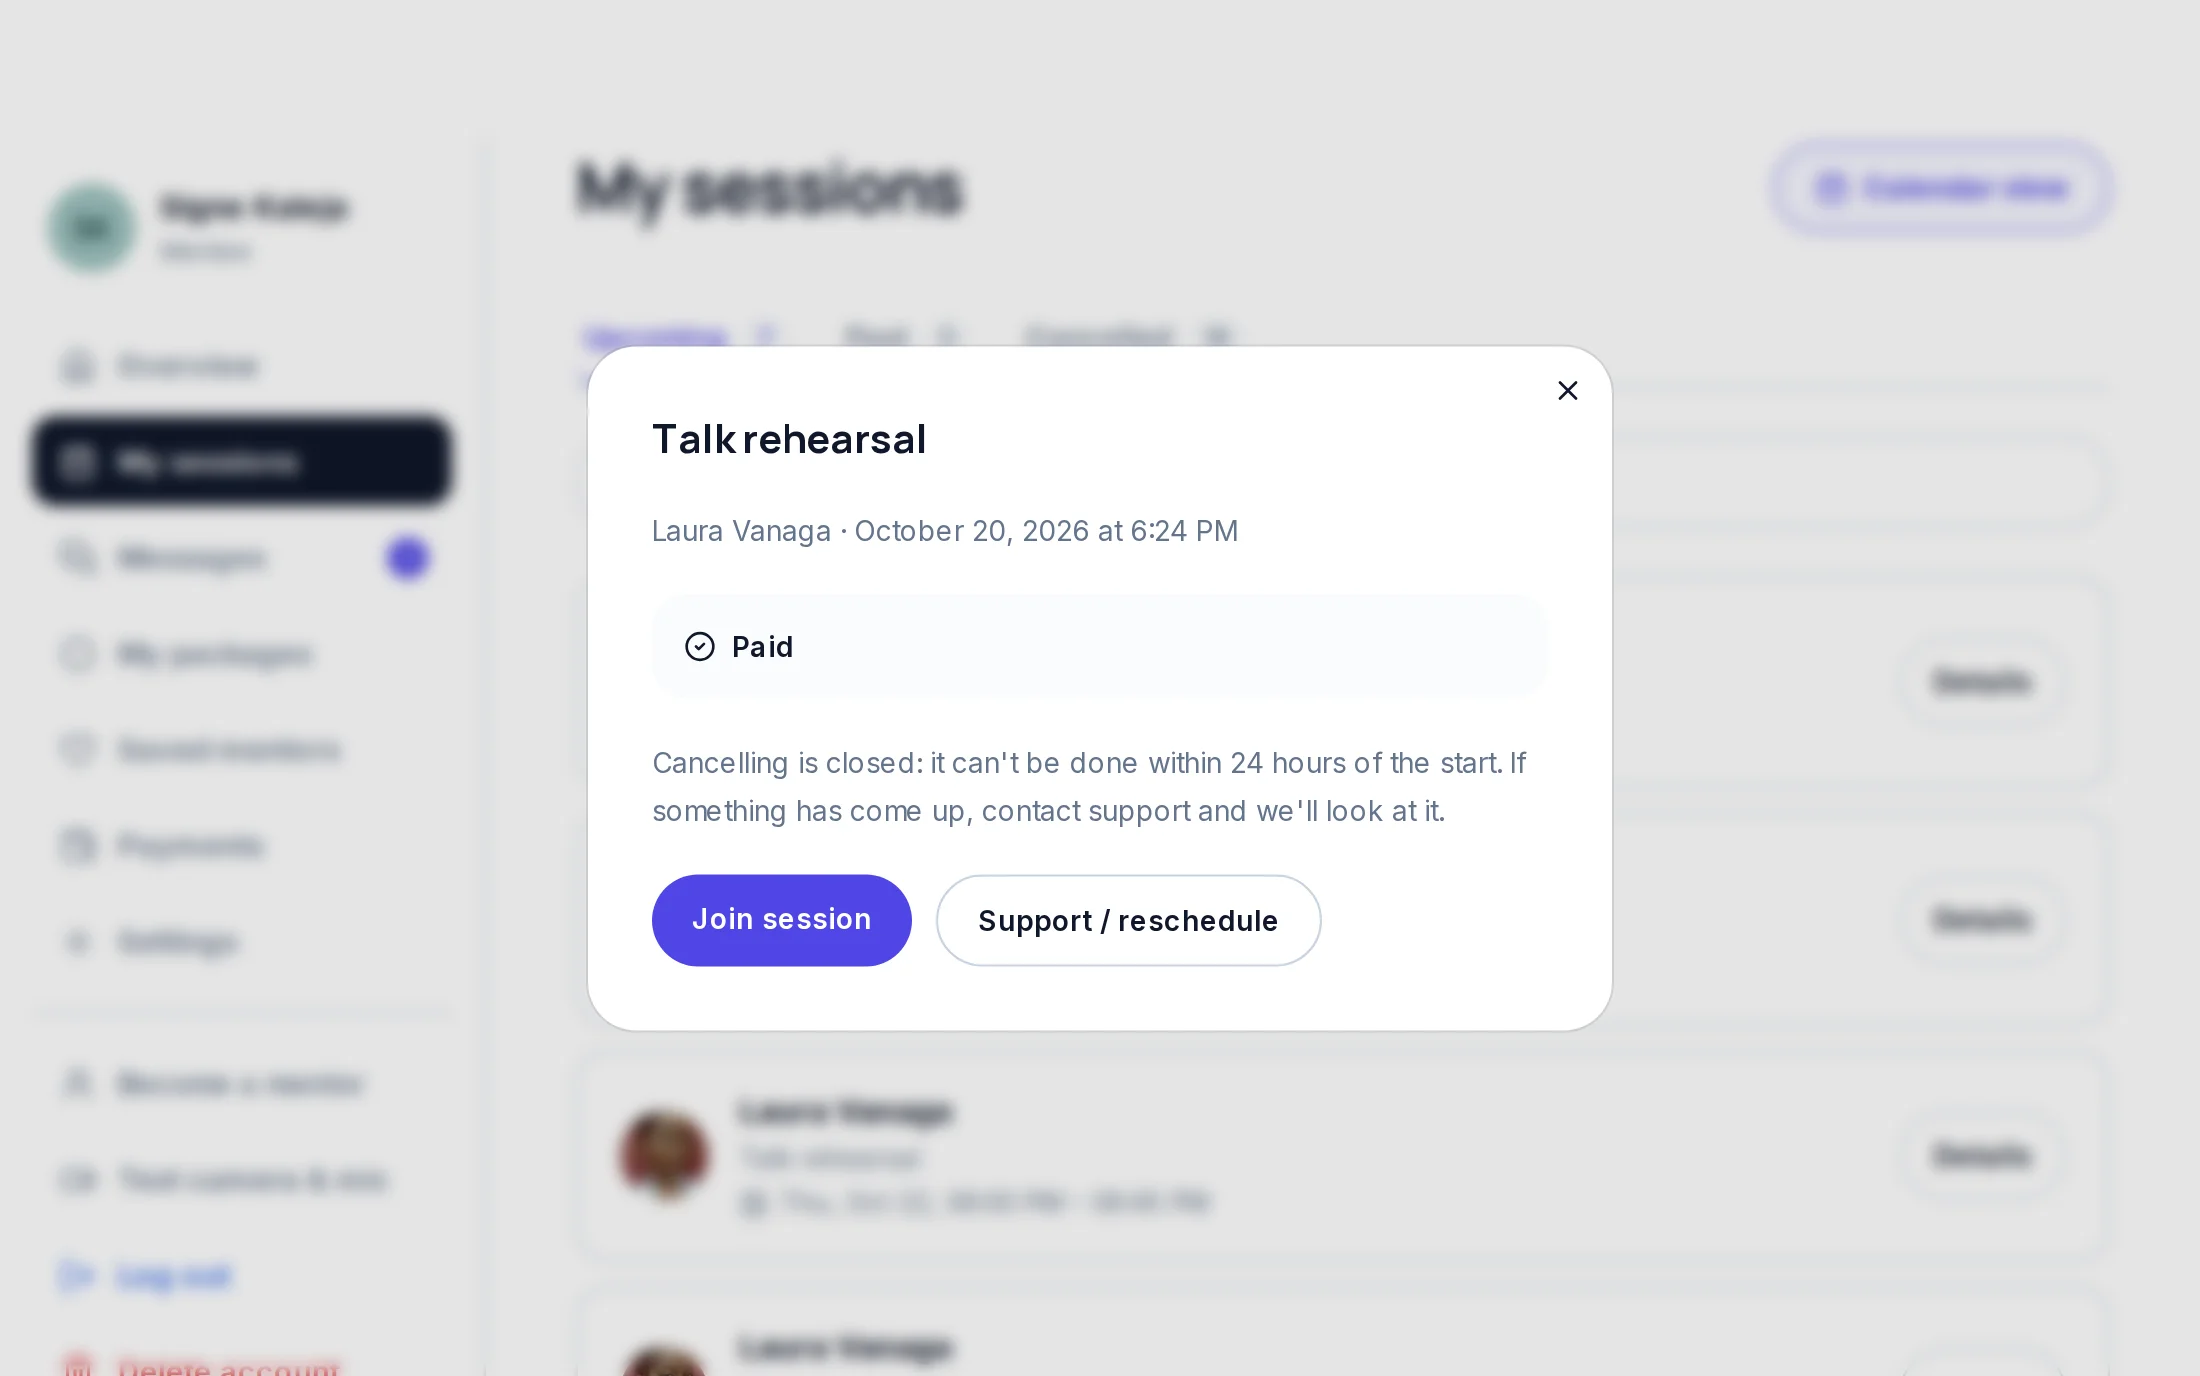
“My sessions” shows your sessions in a calendar or a list (“List view”): upcoming, past and cancelled. Press “Details” to see the session: here you join it, cancel it (“Cancel session”) or contact support (“Support / reschedule”). You can cancel for free until 24 hours before the start; after that, write to support and we will look at it.
9Join the video session
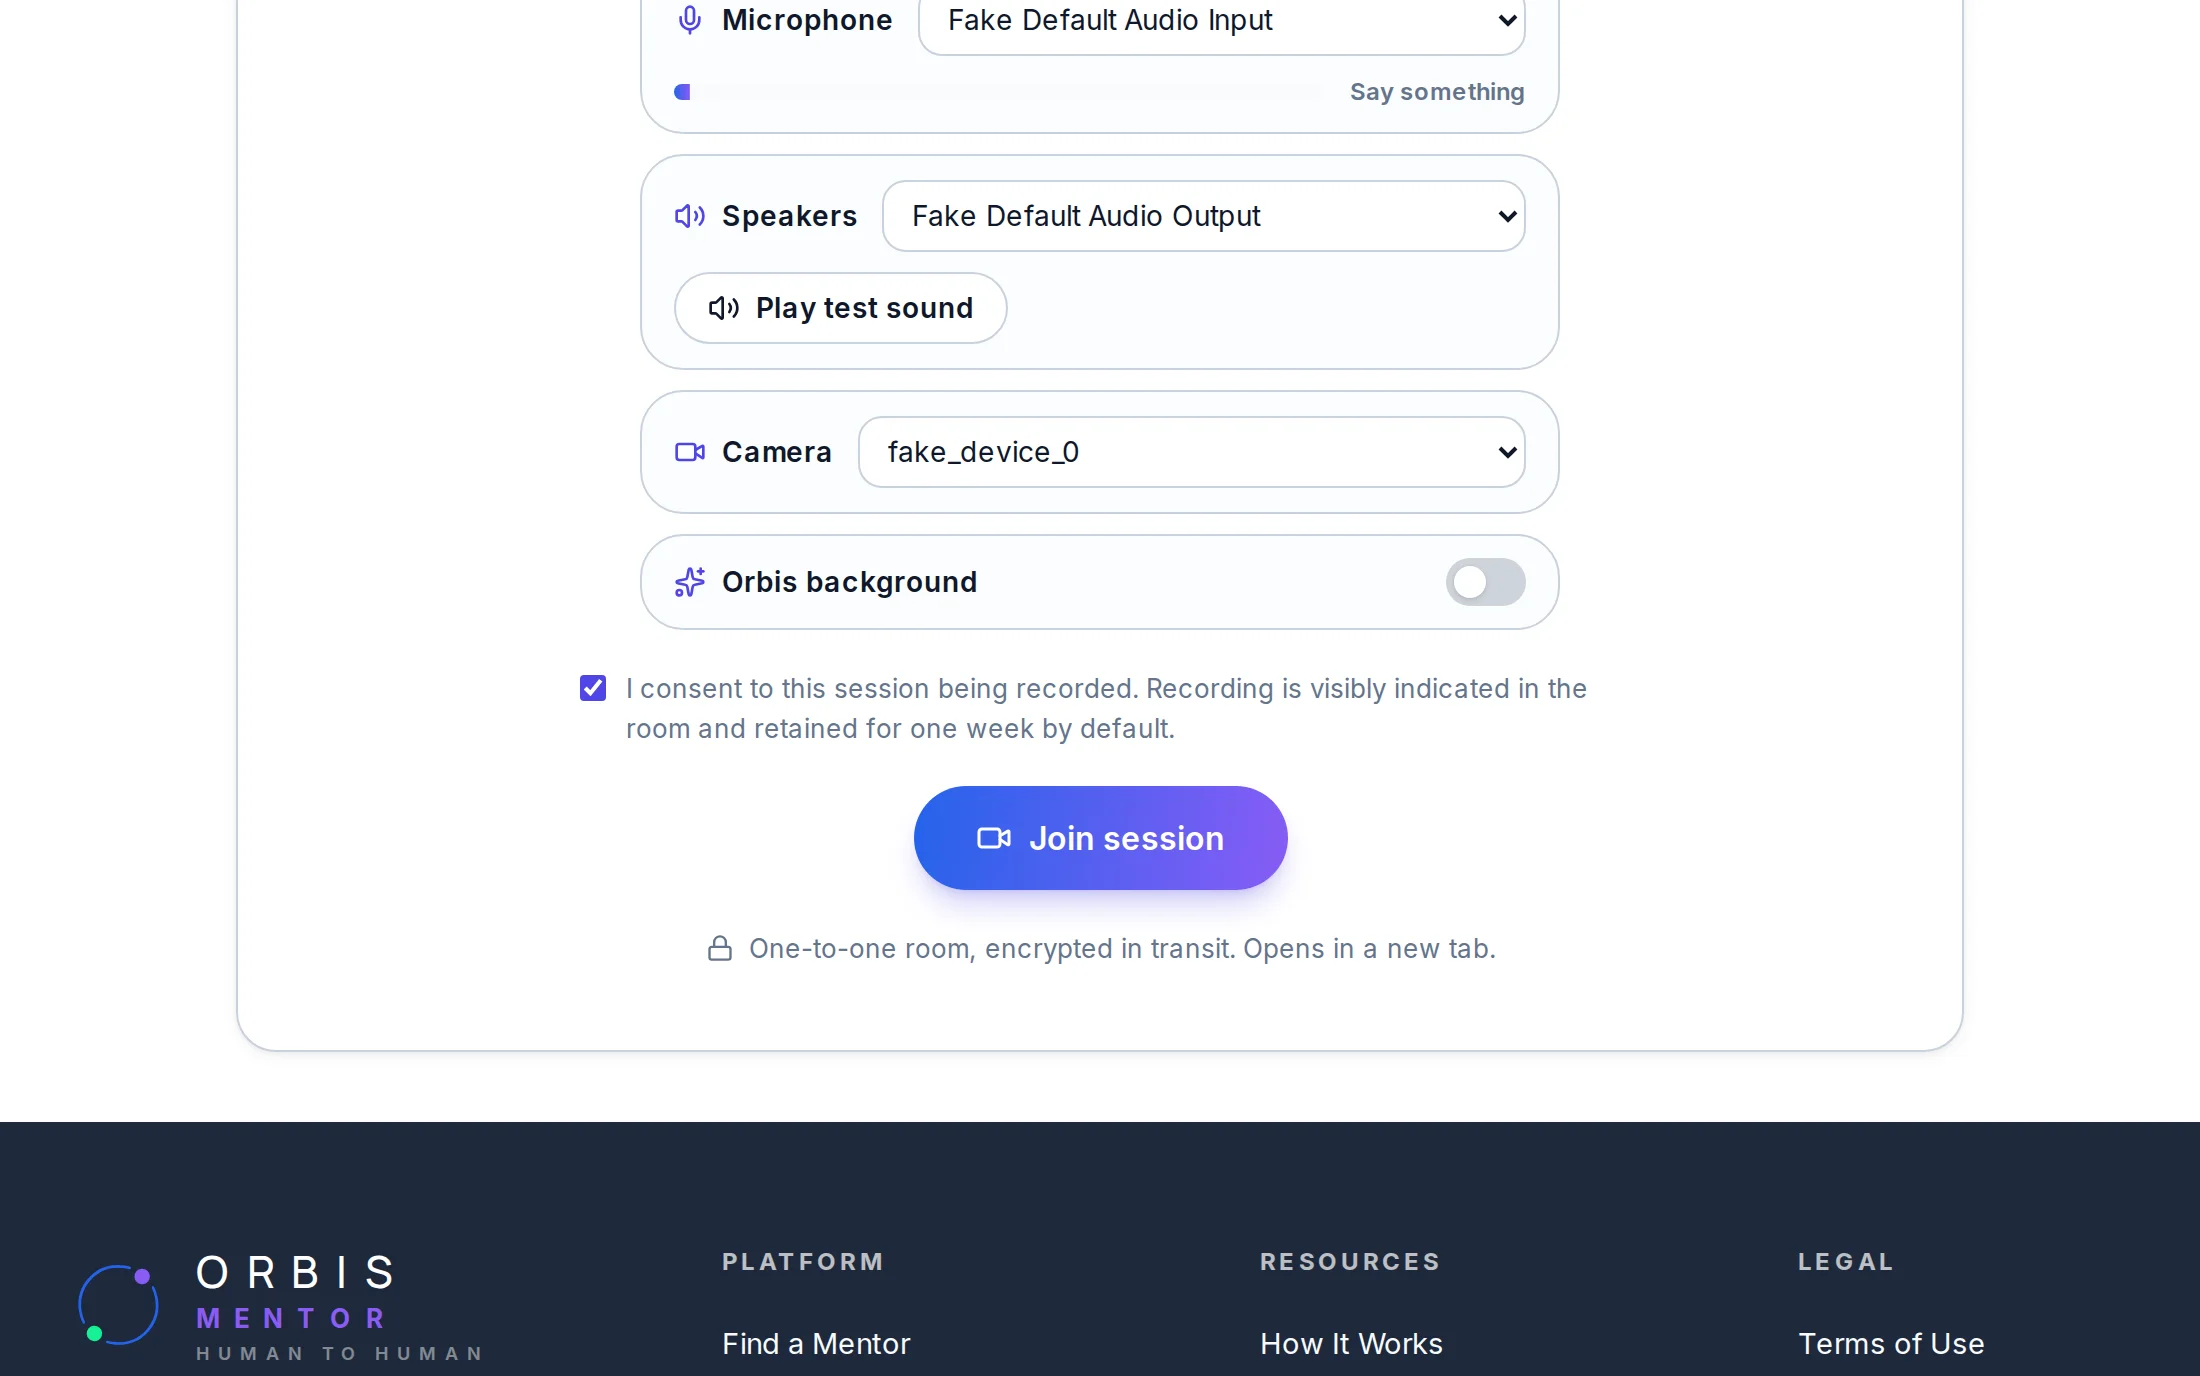
The room opens 10 minutes before the start: press “Join session” in “My sessions”. The page shows your camera image and microphone level, lets you choose the microphone, speakers (with “Play test sound”) and camera, and offers an optional Orbis background. Tick that you agree to the recording (the recording is kept for one week) and press “Join session” - the call opens in a new tab, right in your browser, no app needed. “Test camera & mic” on your dashboard lets you check your devices in advance.
10Leave a review
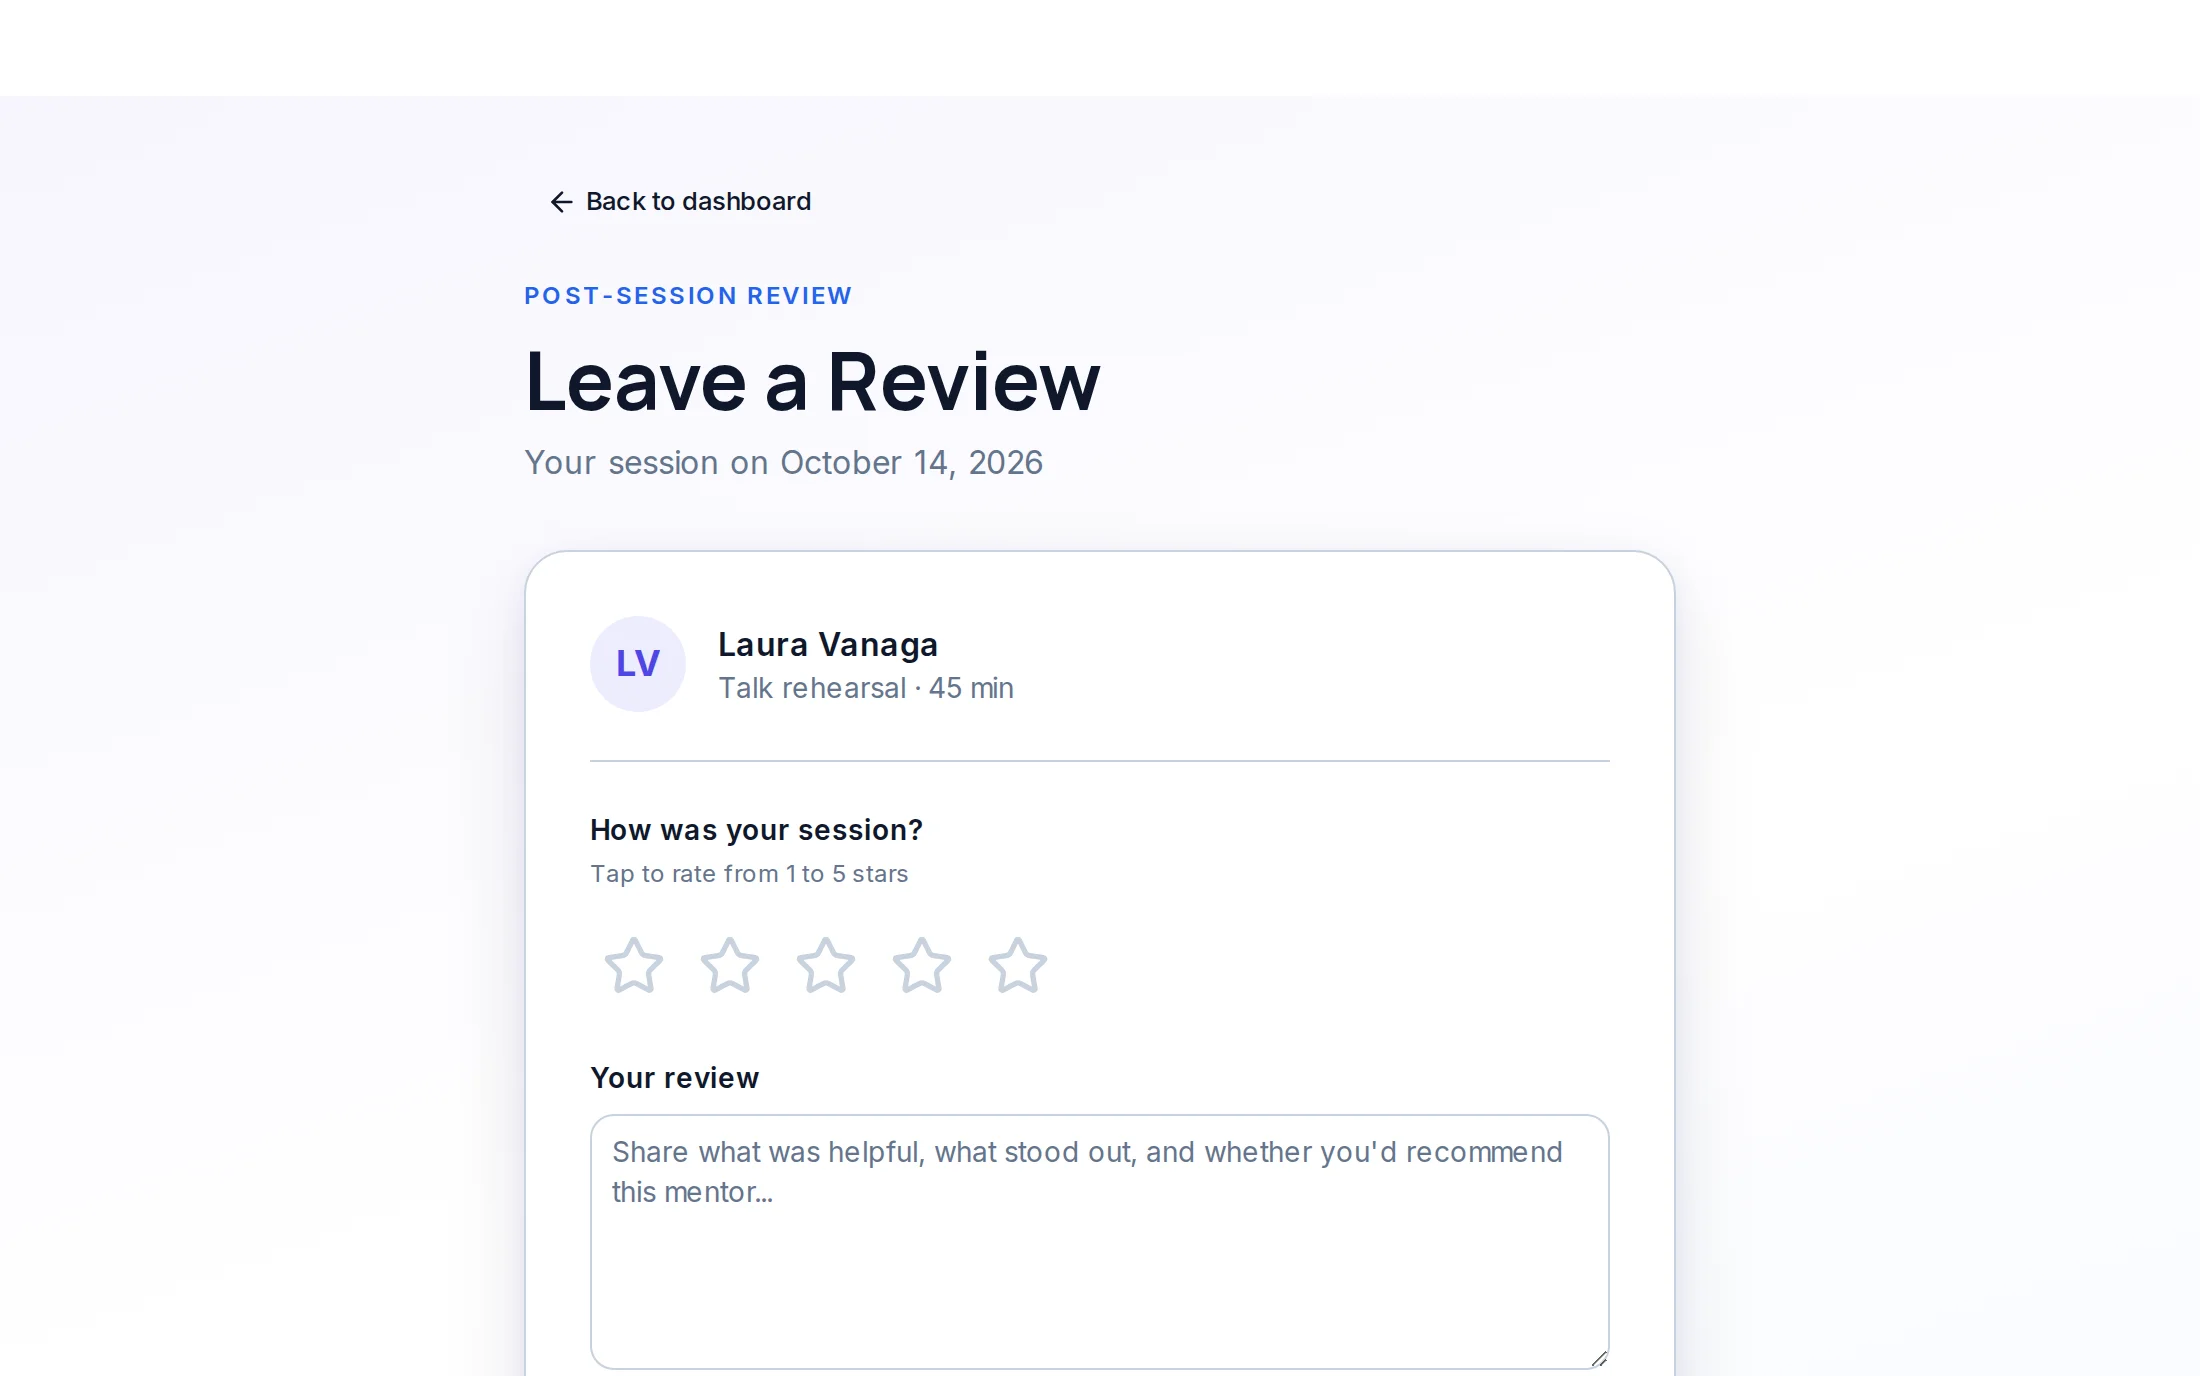
After the session, press “Leave a review” in “My sessions” (we also email you a link). Give 1 to 5 stars and write what helped. Your review appears on the mentor’s profile and helps other mentees choose.
11Session packages
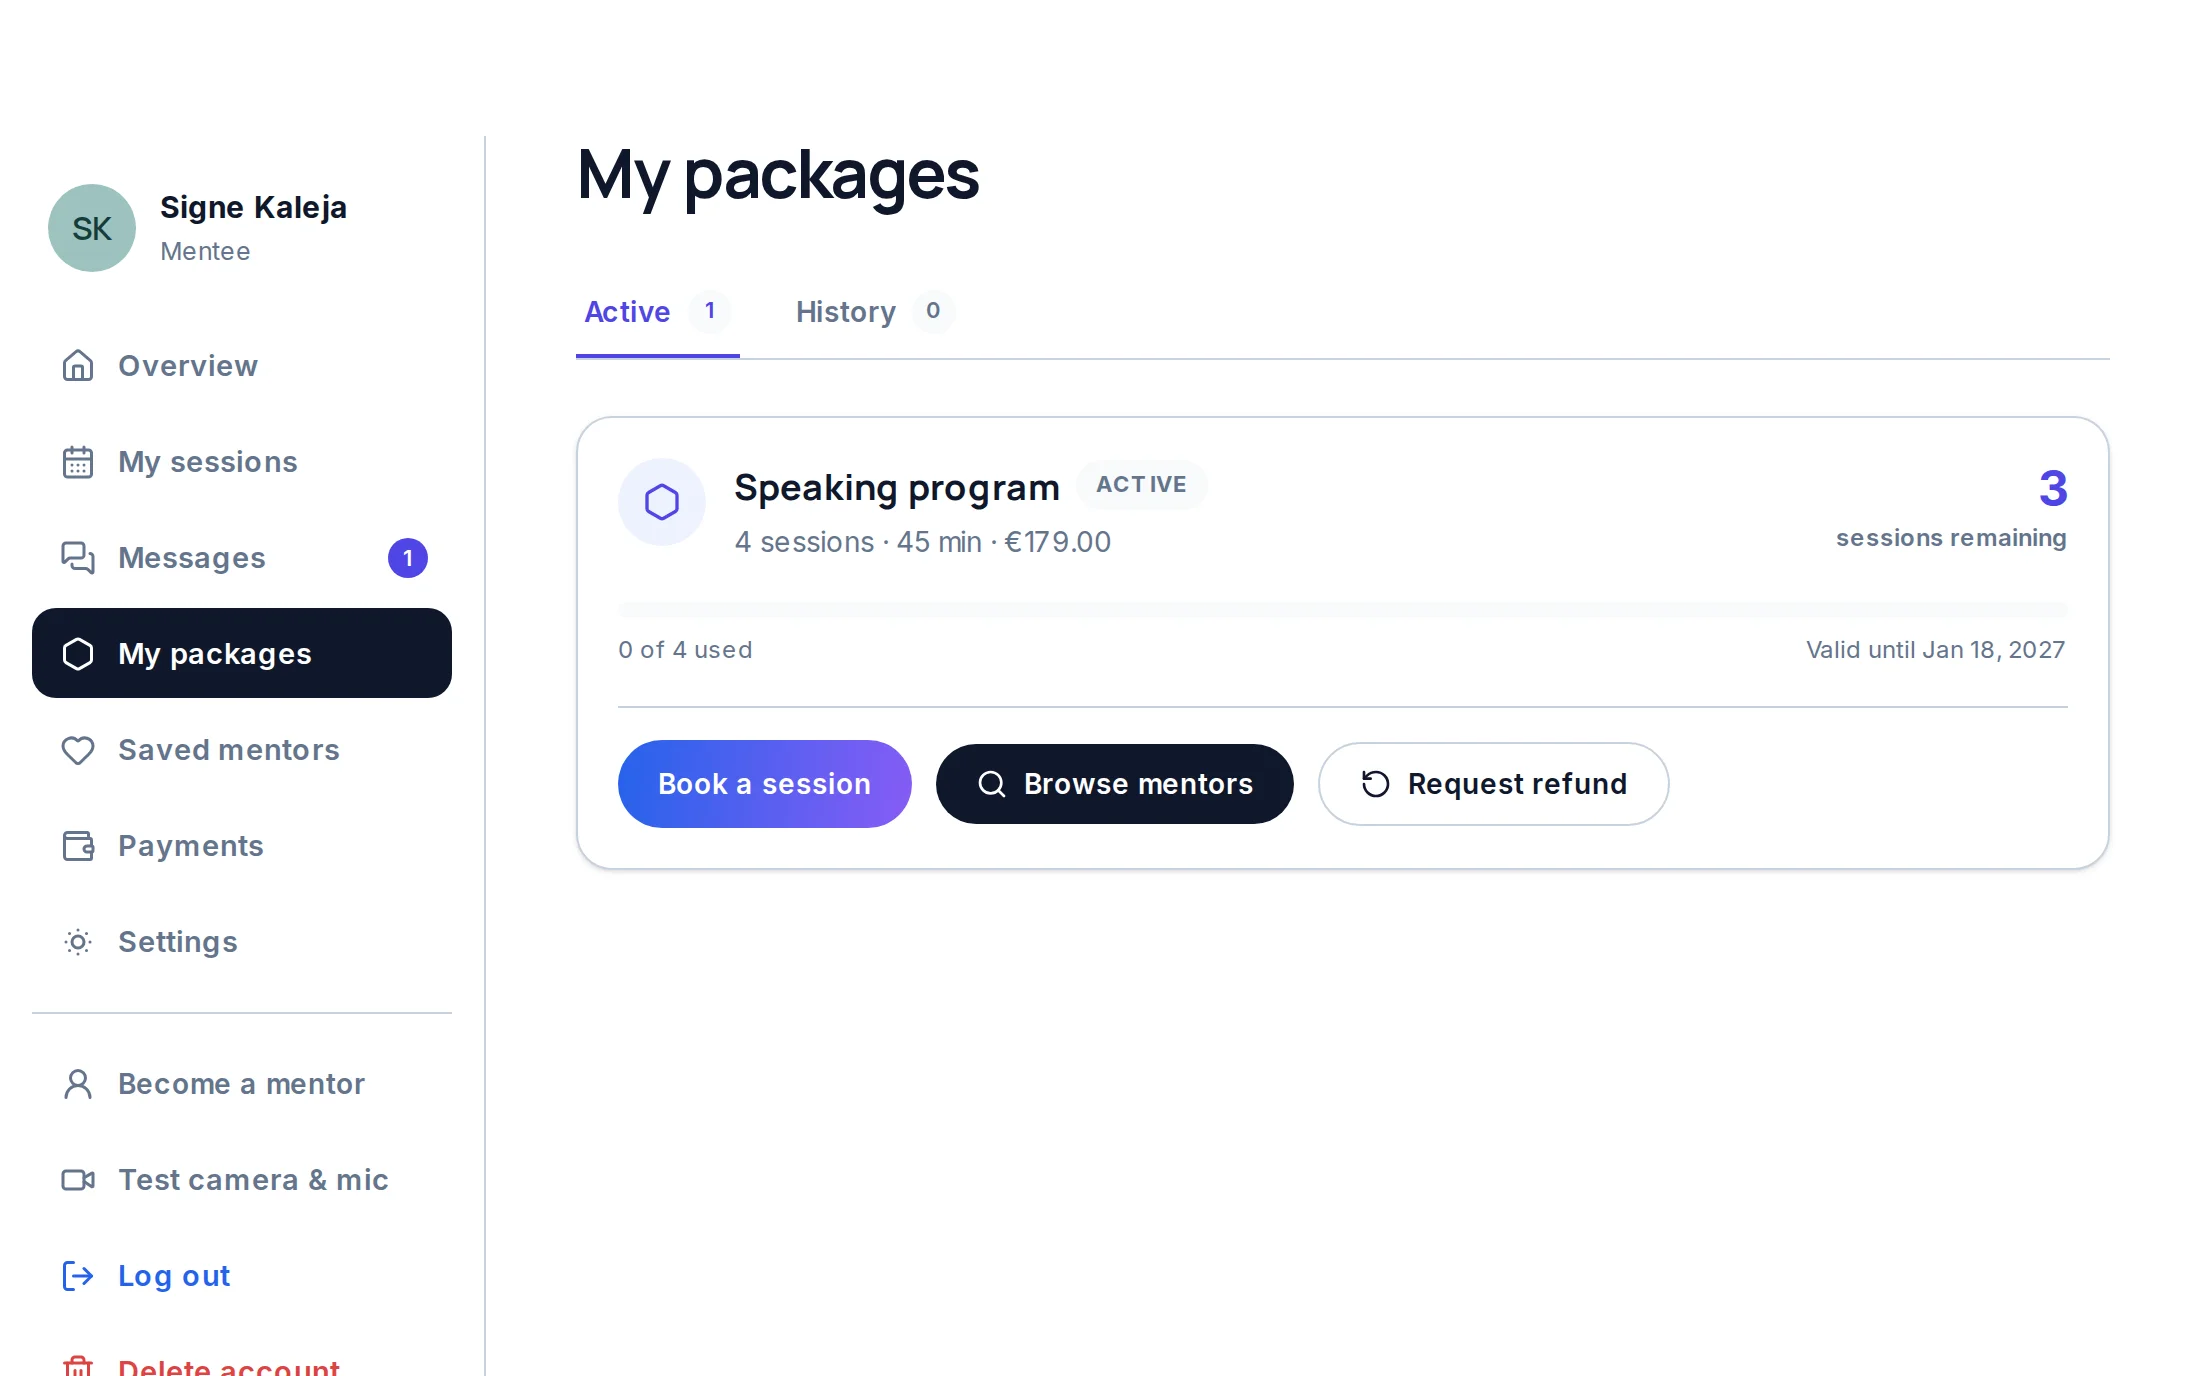
A plan is several sessions with one mentor, paid up front at a better price. You book each session of the package from “My packages” (“Book a session”); the package is valid until the date shown on it. “Request refund” returns the money for the unused sessions - straight away if none has taken place and none is booked within 24 hours, otherwise our team decides.
12Payments
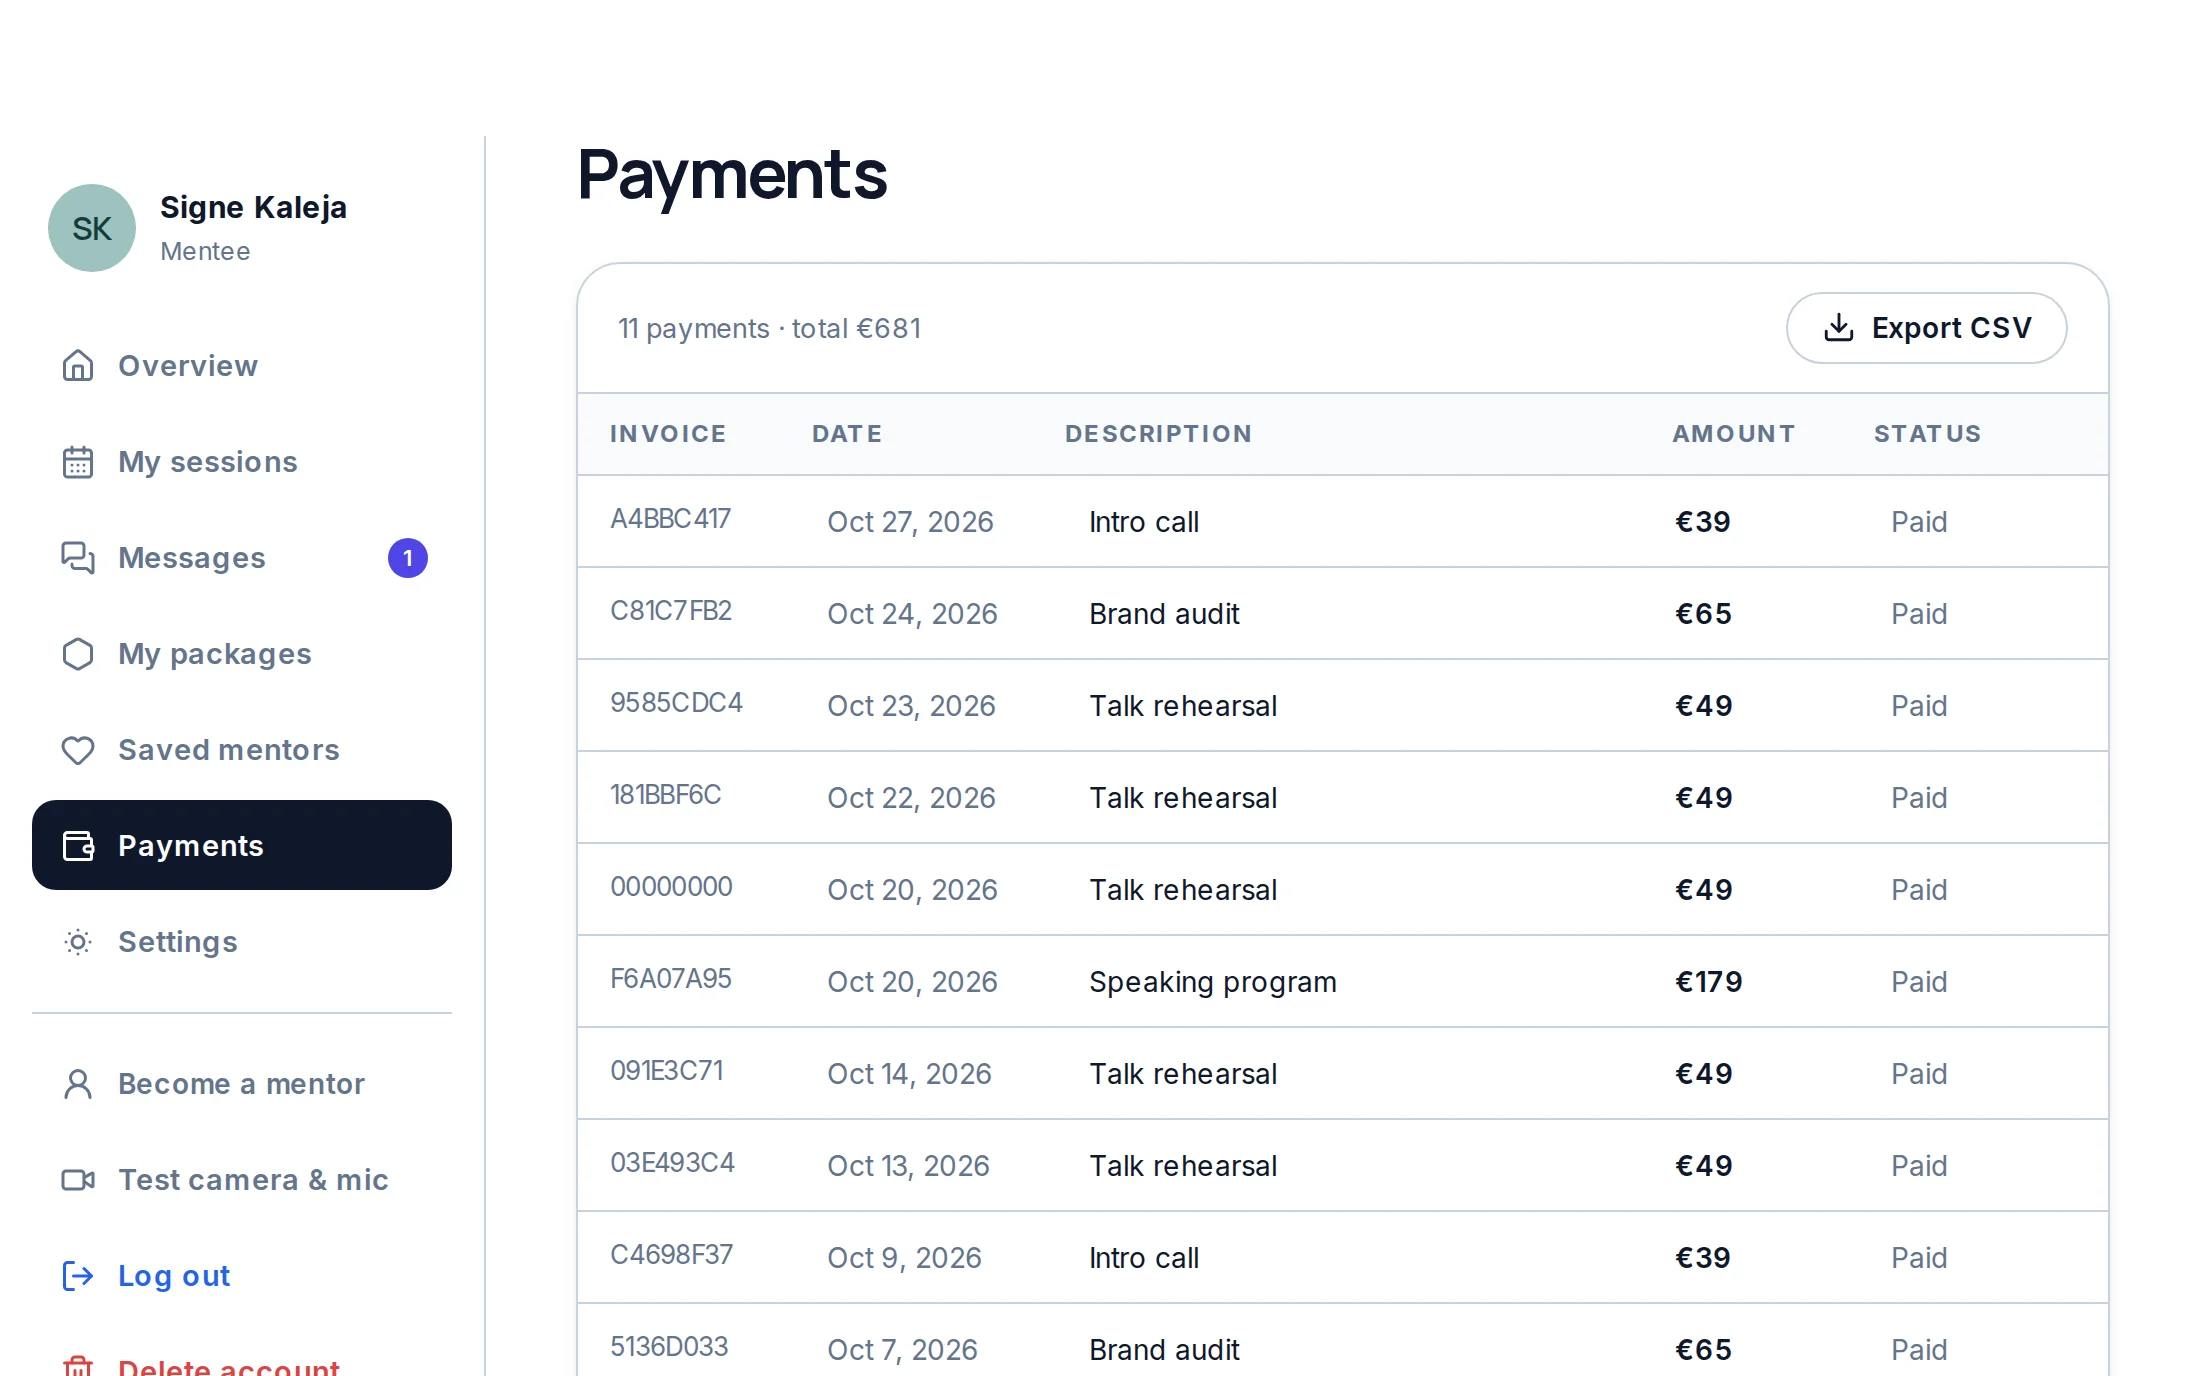
“Payments” lists every payment and refund with its invoice number and status. “Export CSV” saves the list as a table.
13Help and support
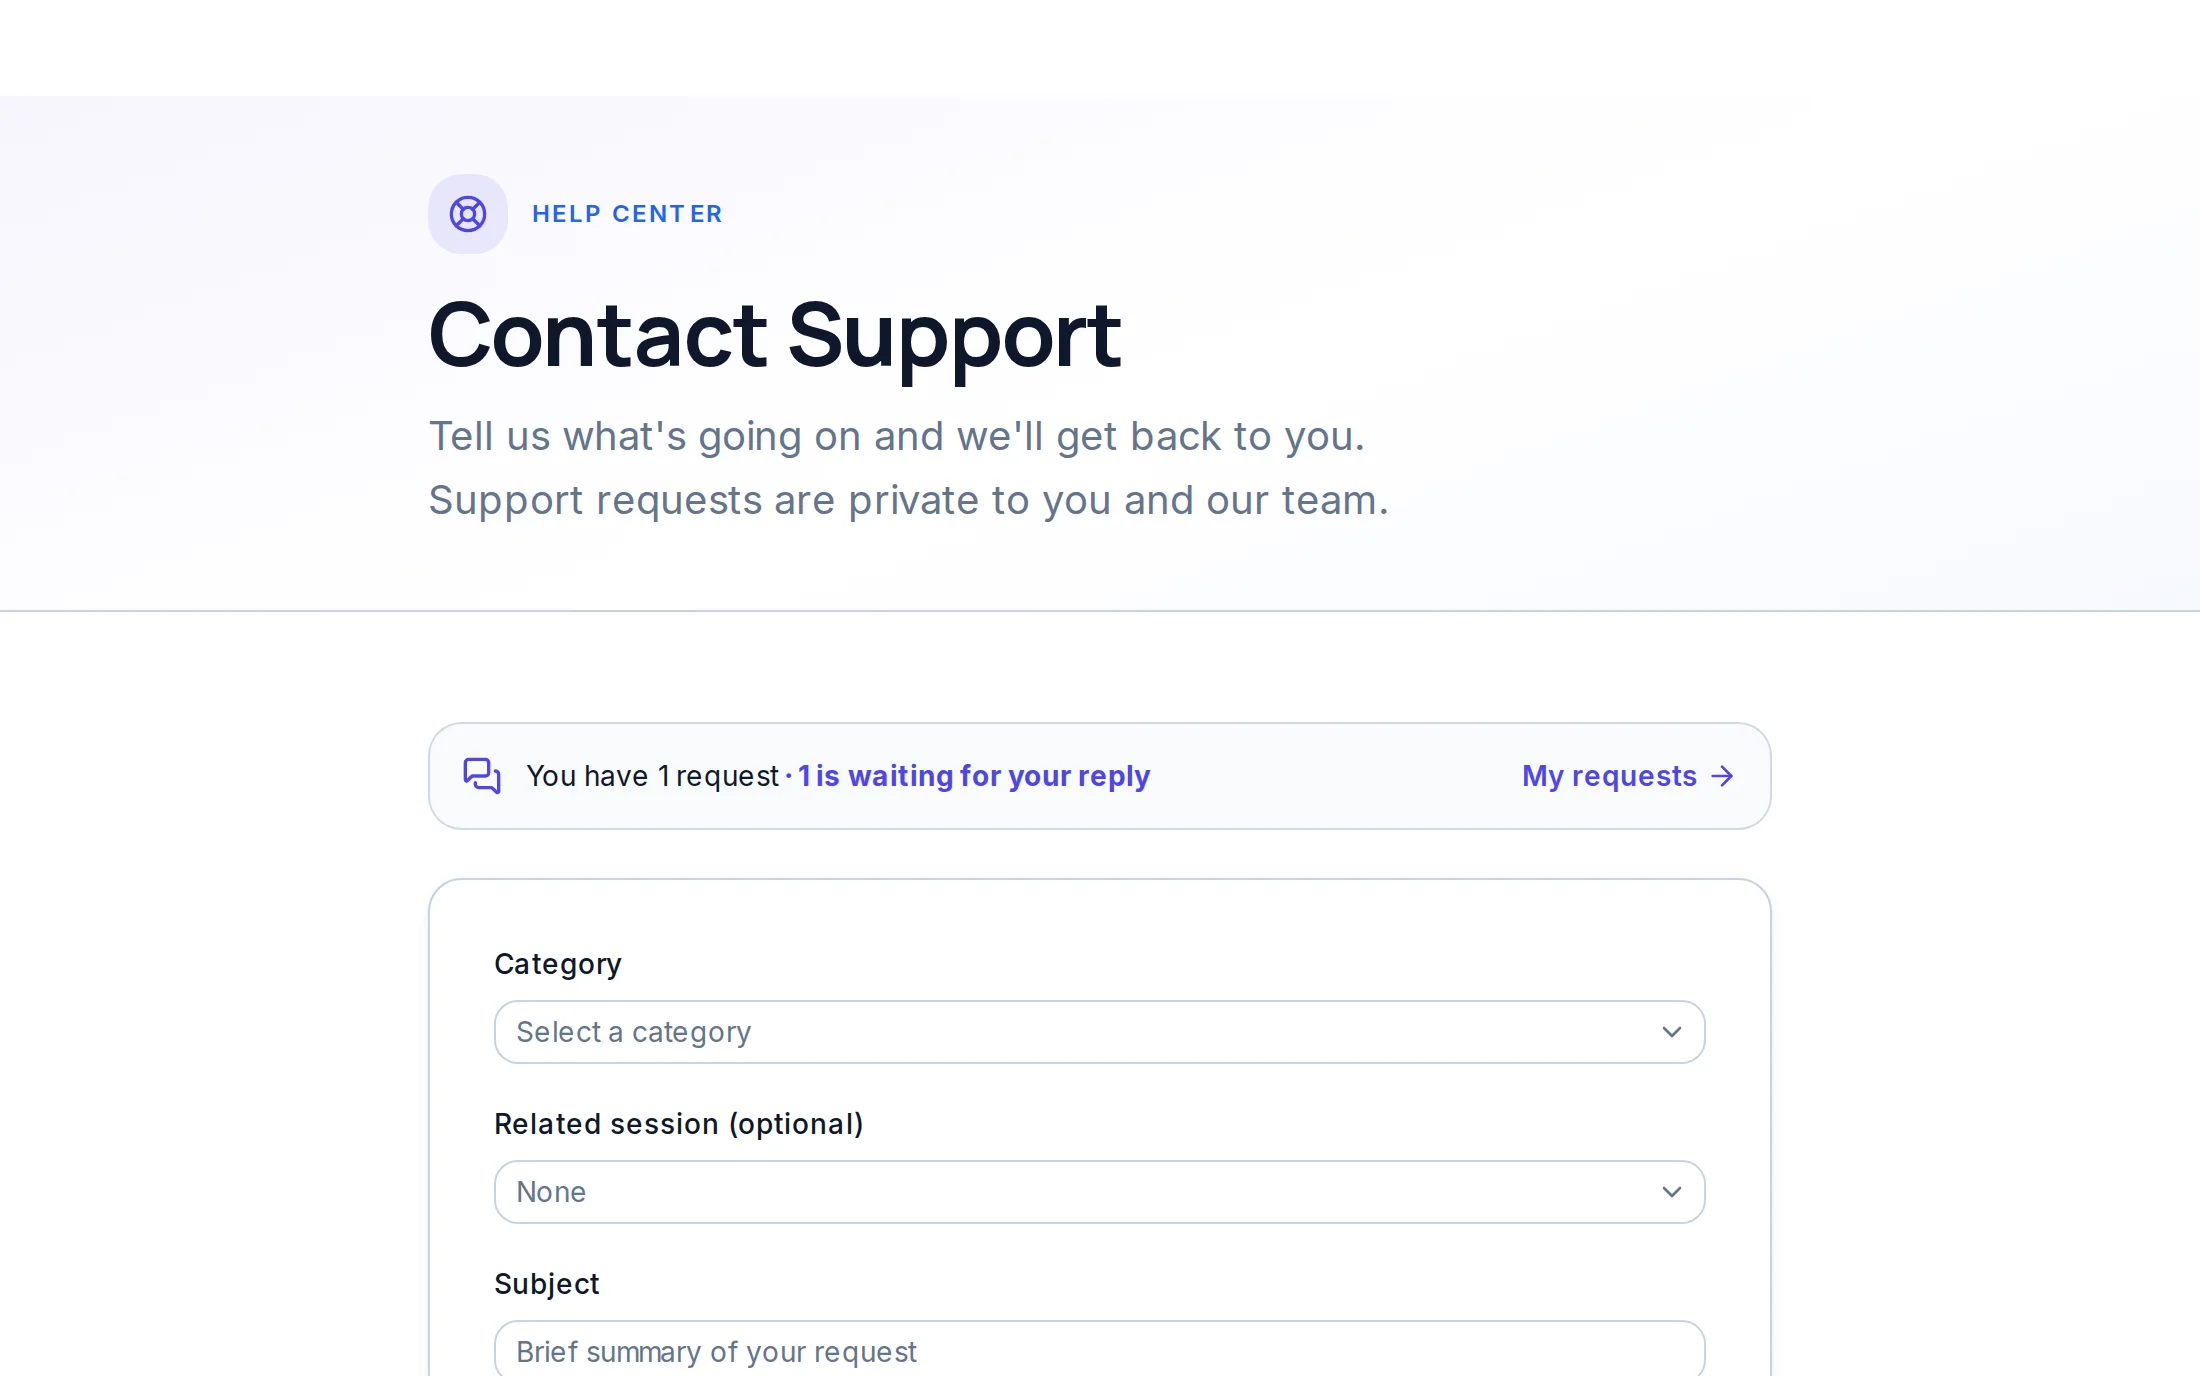
Open “Support”, choose a category and, if it is about a session, the session; then describe the problem and press “Submit Request”. Our answers come by email and in “My requests”. If the mentor does not join or a technical failure stops the session, you get a full refund.
1Create a mentor account
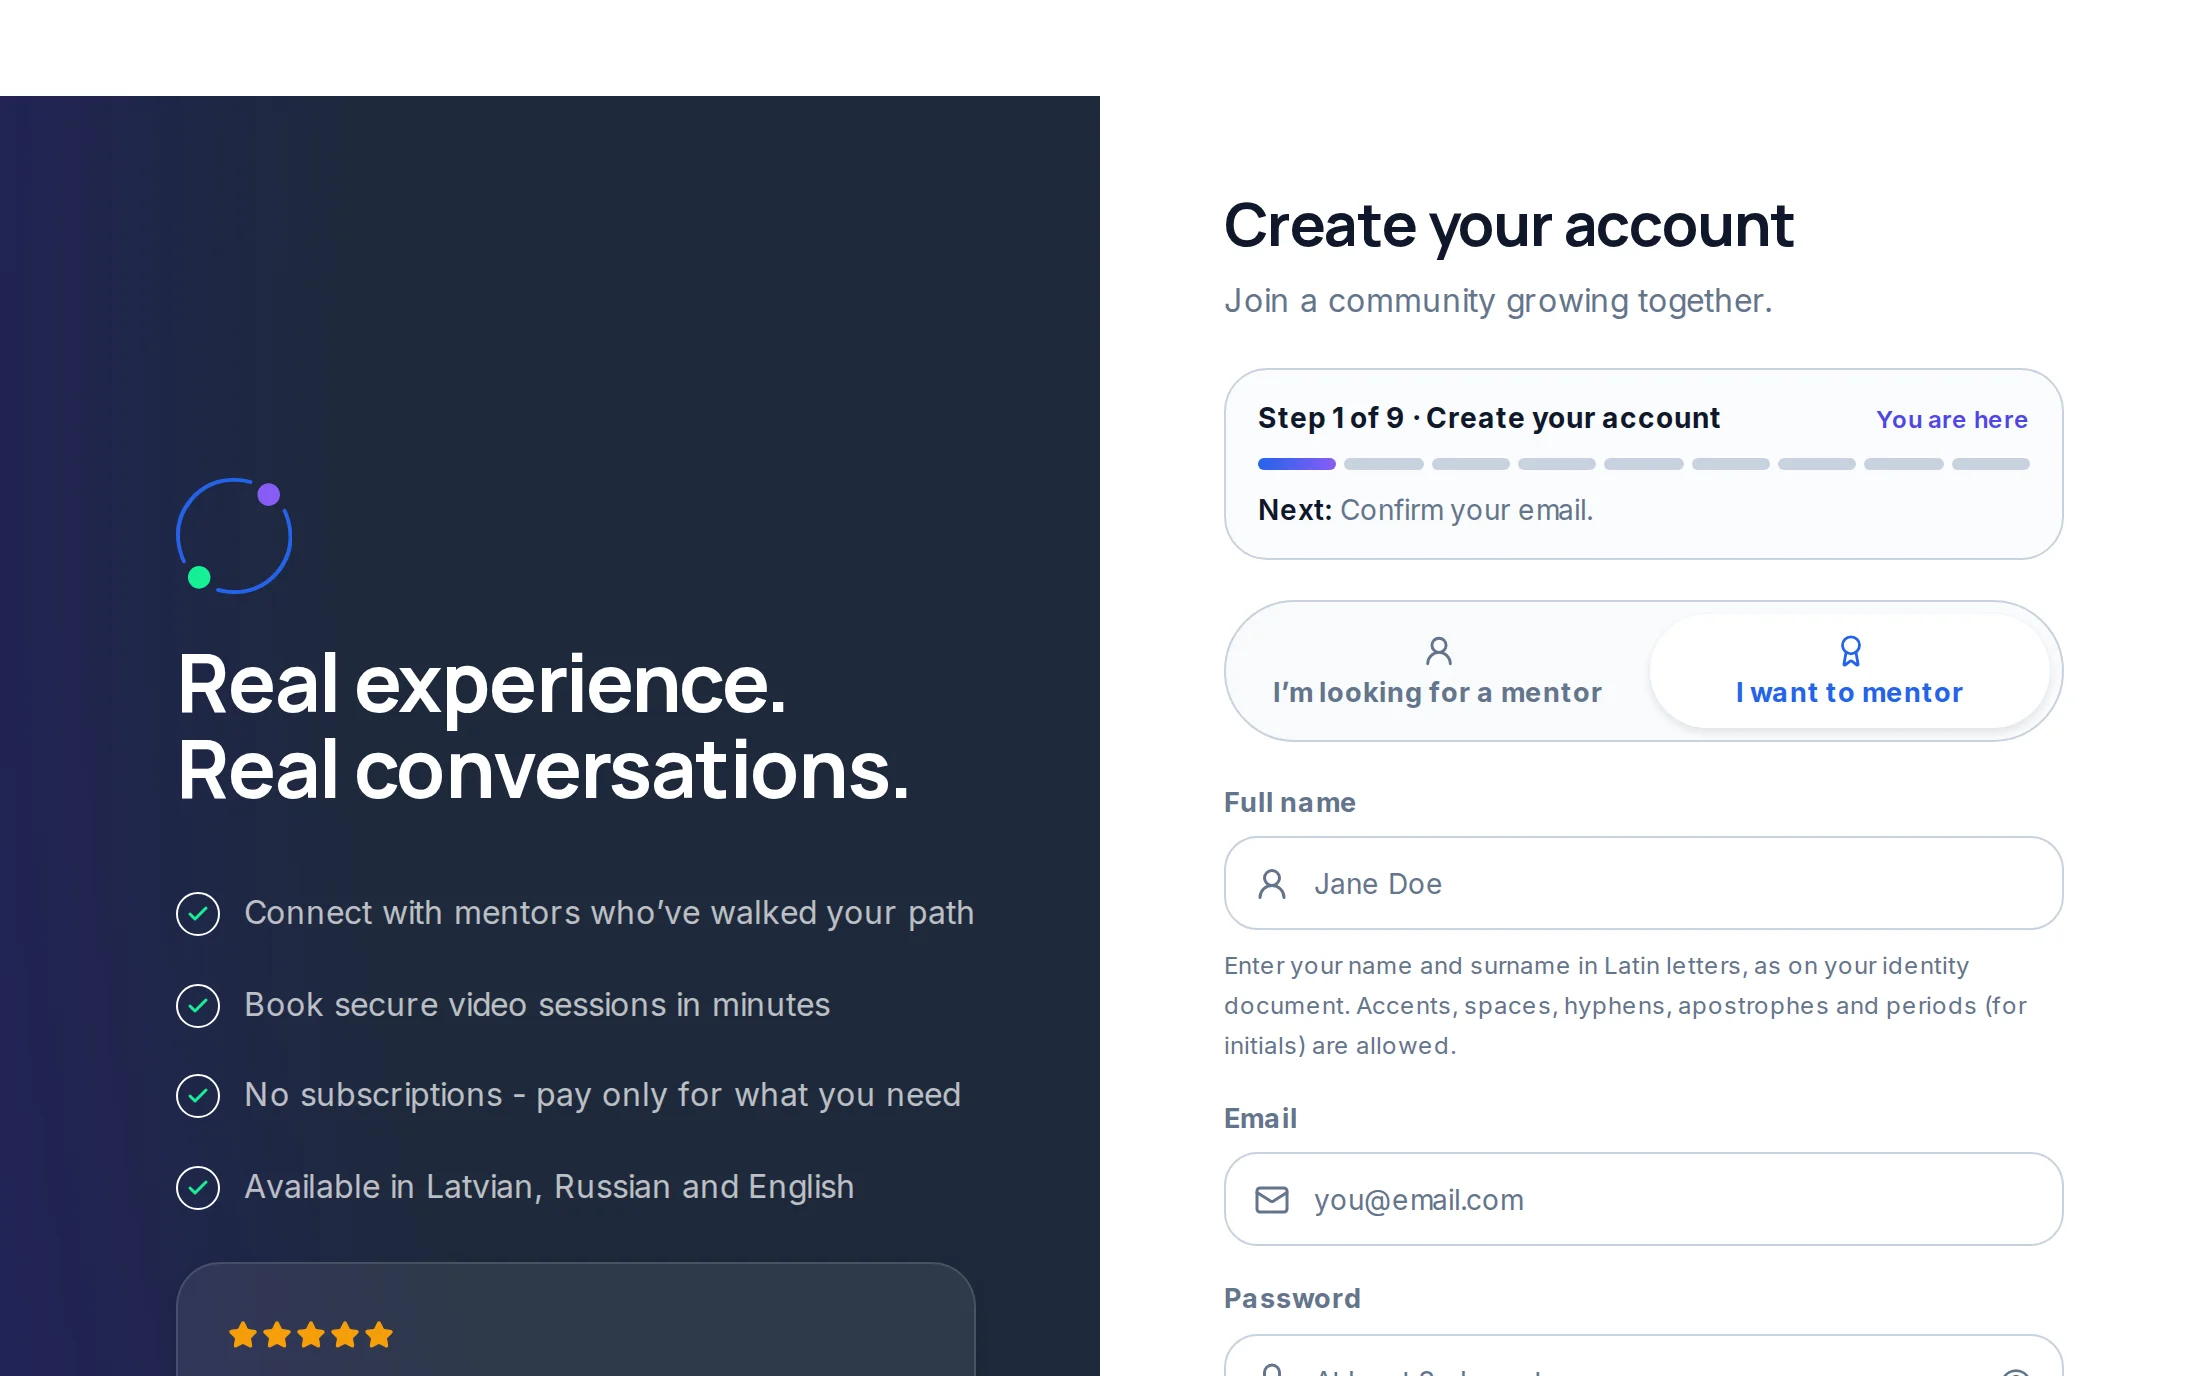
Press “Log in / Join”, choose “I want to mentor” and create your account with your full name in Latin letters as on your ID, your email and a password. Confirm the address with the link from our email. Your dashboard then shows your way to the catalog: nine steps, in this order.
2Fill in the application
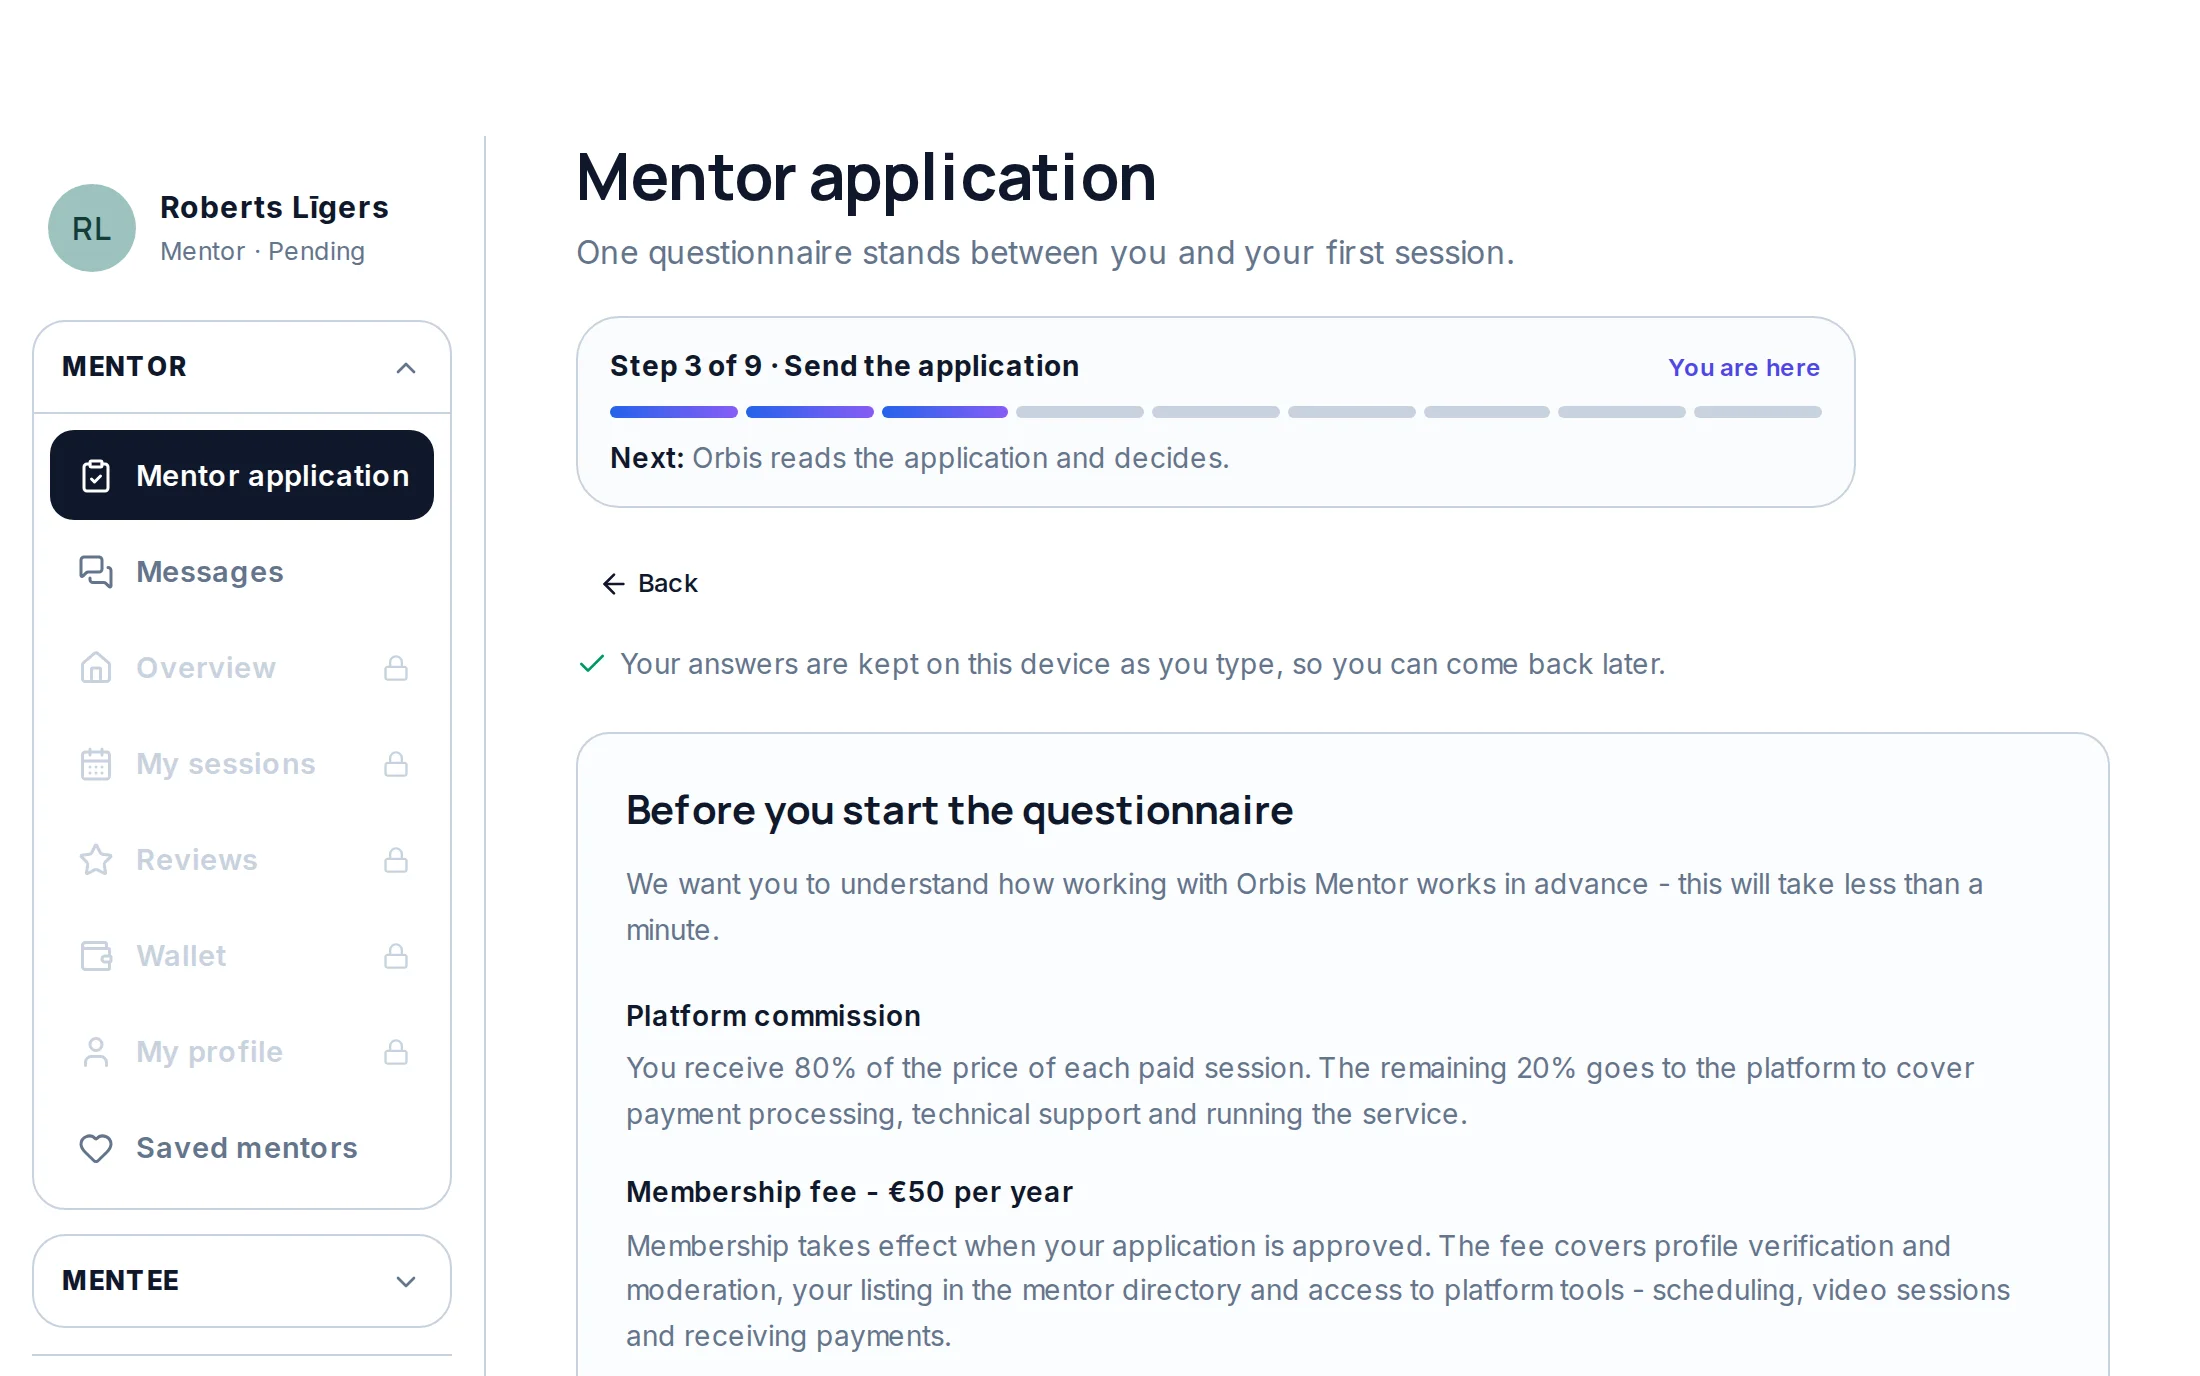
The questionnaire has three parts: about you (a real photo, your country and the languages you mentor in), categories and topics (up to 3 categories, who you help and your story) and confirmation, where you accept the Mentor Agreement and send it. Before you start, the page explains the terms: what share of every paid session you receive and what goes to the platform, and the yearly membership fee. Your answers are kept on this device as you type.
3Orbis reviews the application
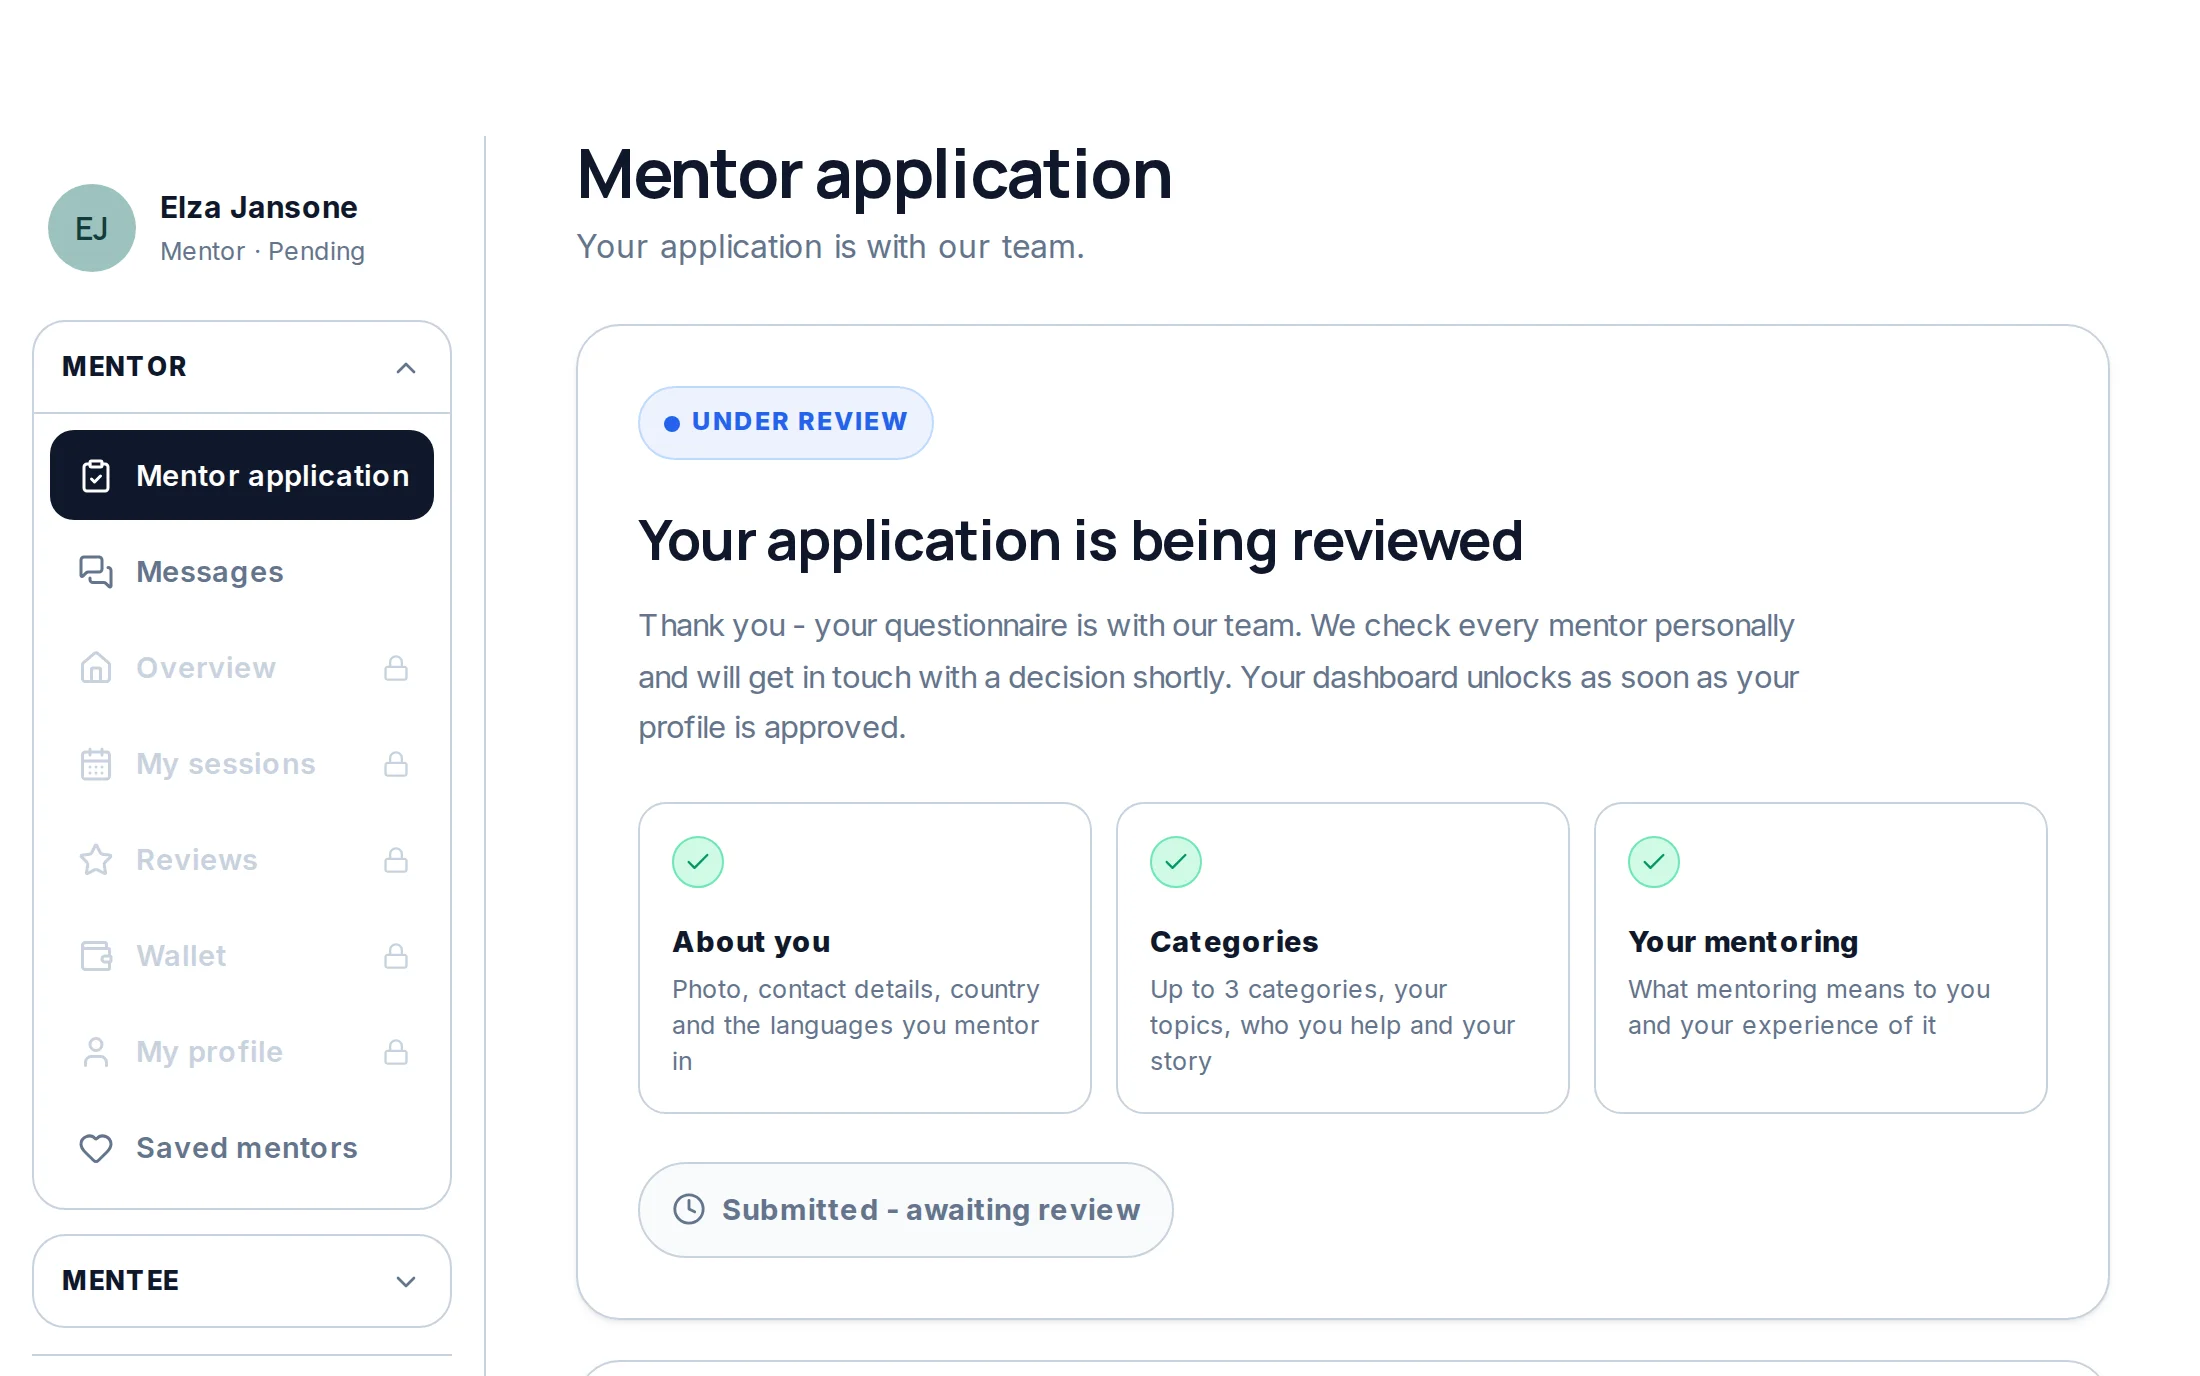
Every application is read by a person. Your dashboard shows that it is being reviewed; we email you the decision. If we ask for changes, you see our comment in the questionnaire - fix the answers and send them again.
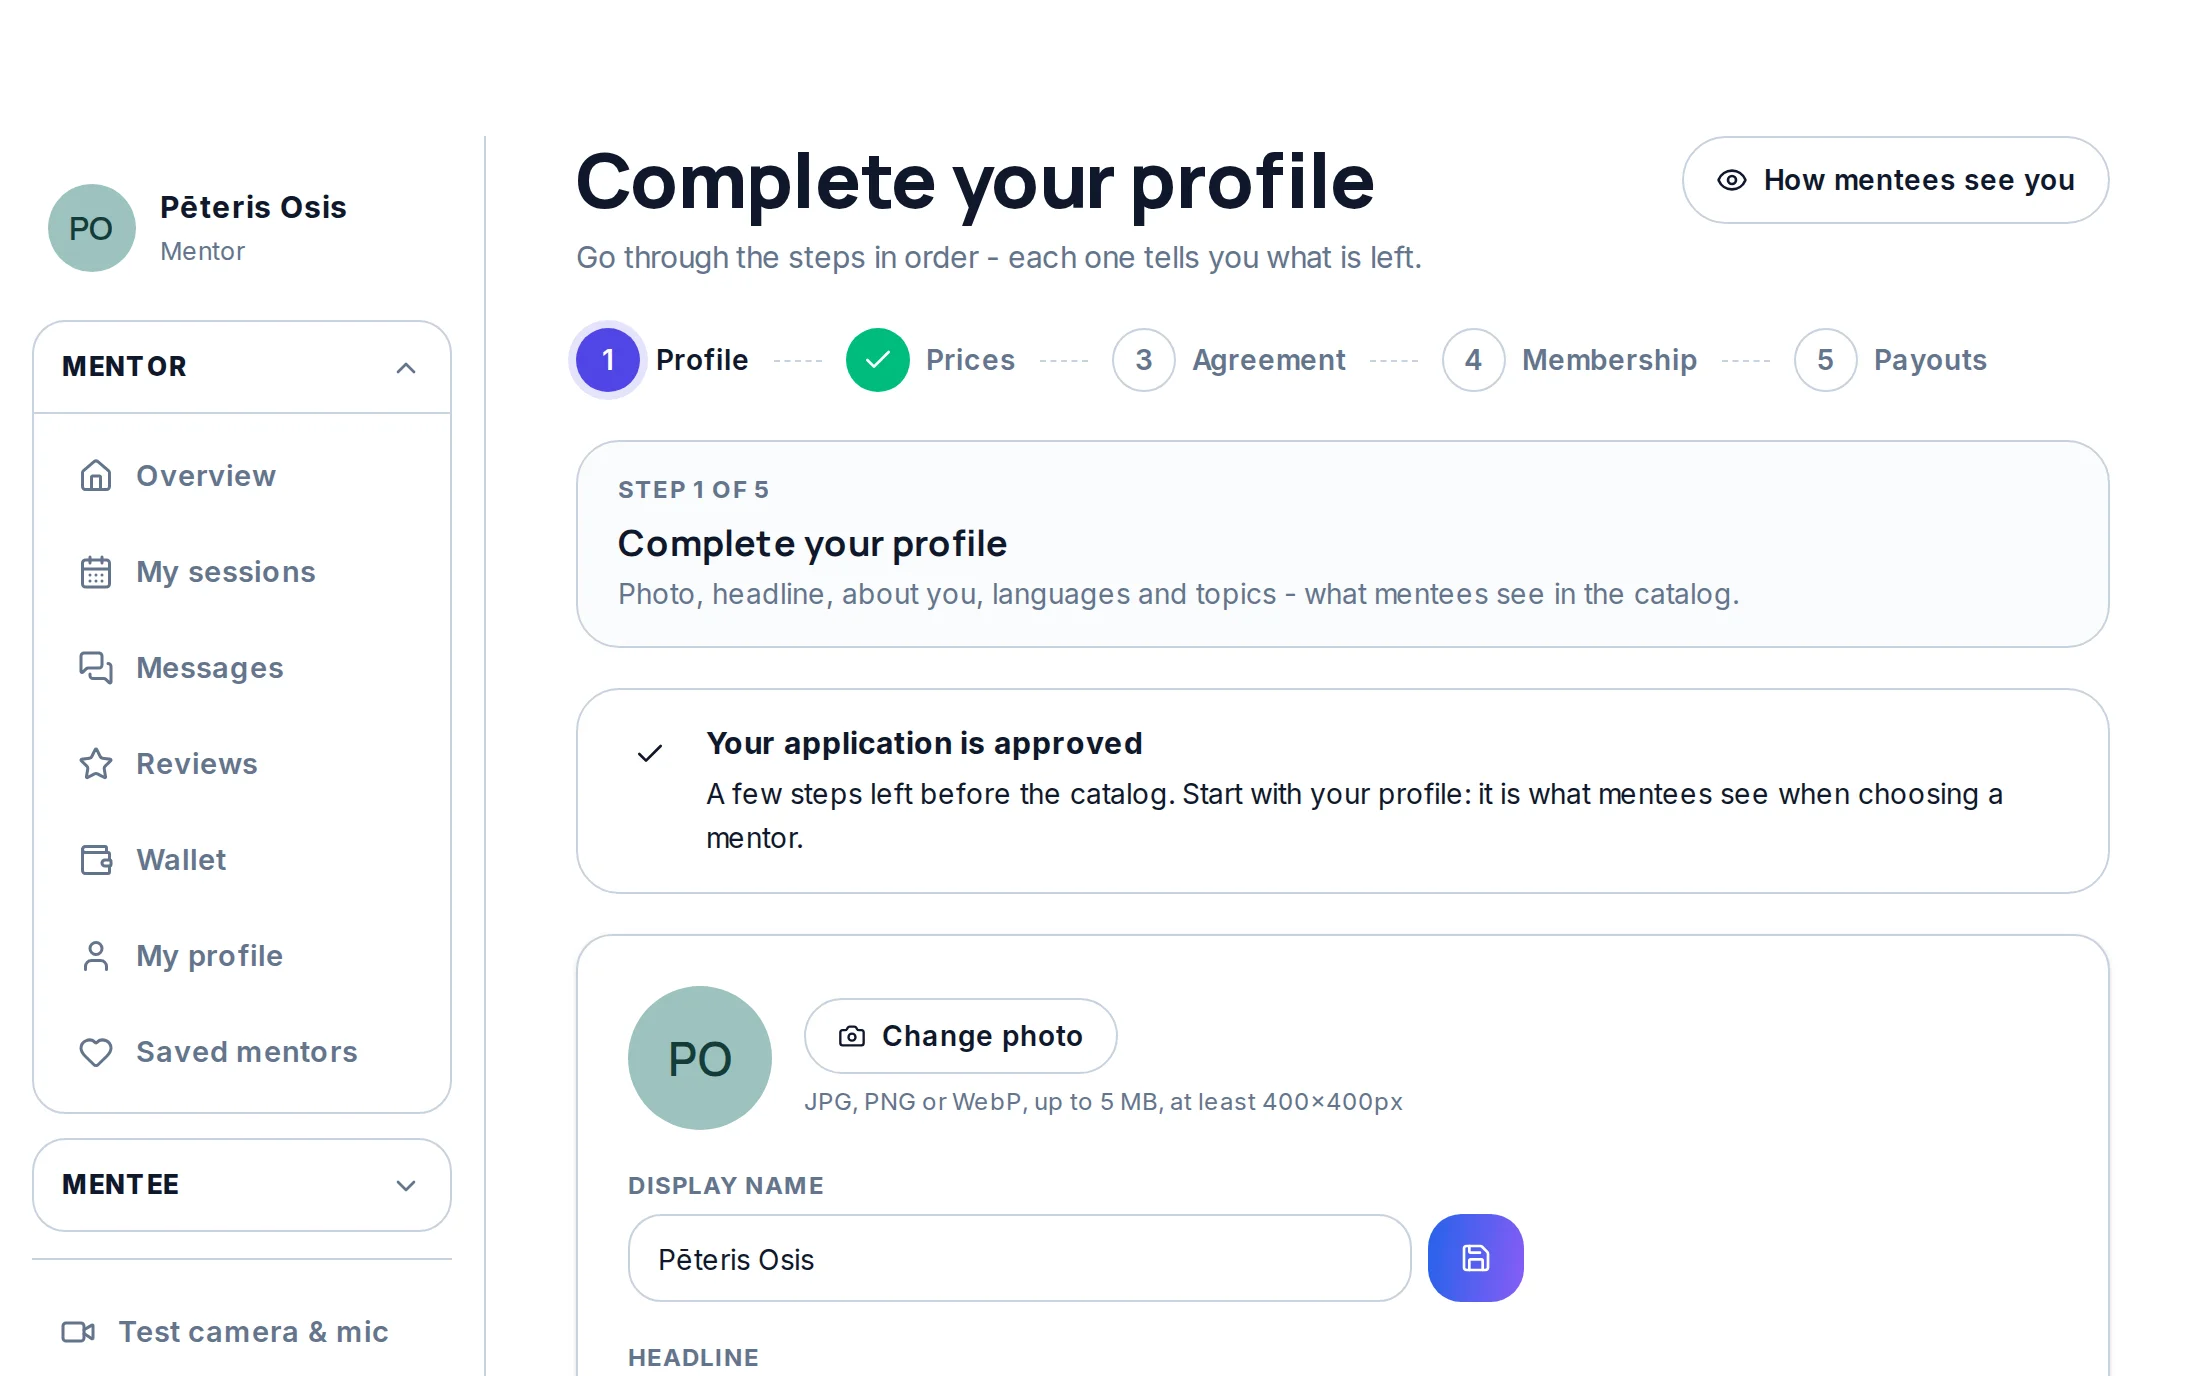
4Complete your profile
Once your application is approved, “Complete profile” on your dashboard opens “My profile”, which takes you through five steps in order. The first is your profile: a real photo, a headline, the text about you, the languages you mentor in and your topics - what mentees see in the catalog. “Continue” opens the next step, and “How mentees see you” shows your public page.
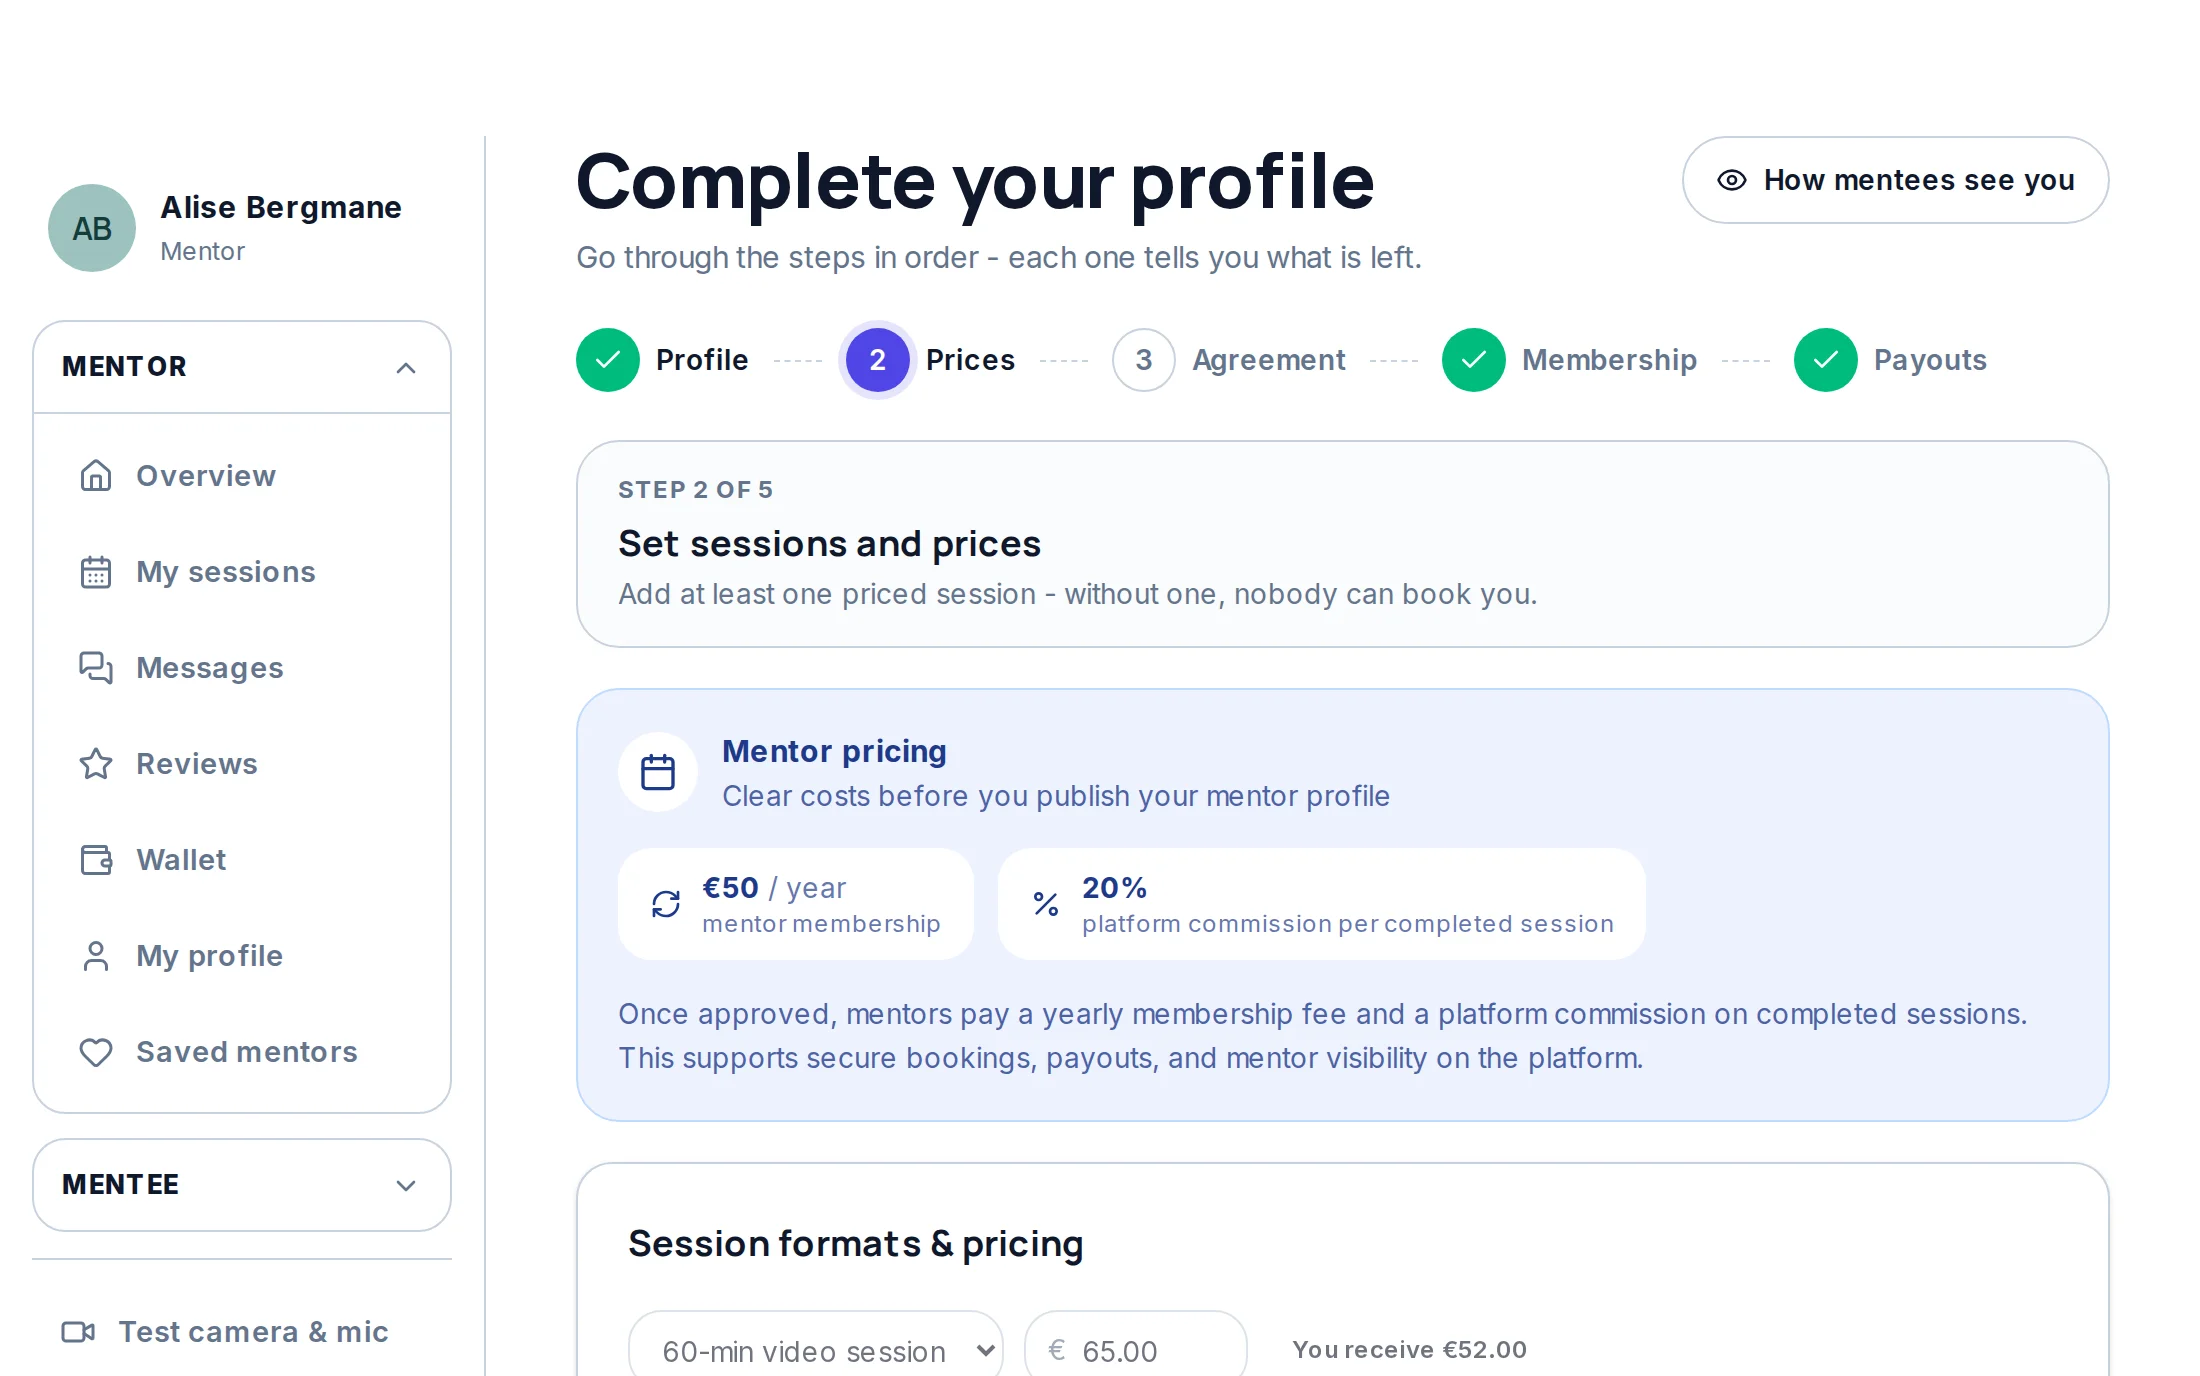
5Set sessions and prices
Under “Session formats & pricing”, choose the length of a video session and its price - next to it you see how much you receive after the platform commission. “+ Add session length” adds another format, and below you can add monthly packages of several sessions. Press “Save changes”: without at least one priced session nobody can book you.
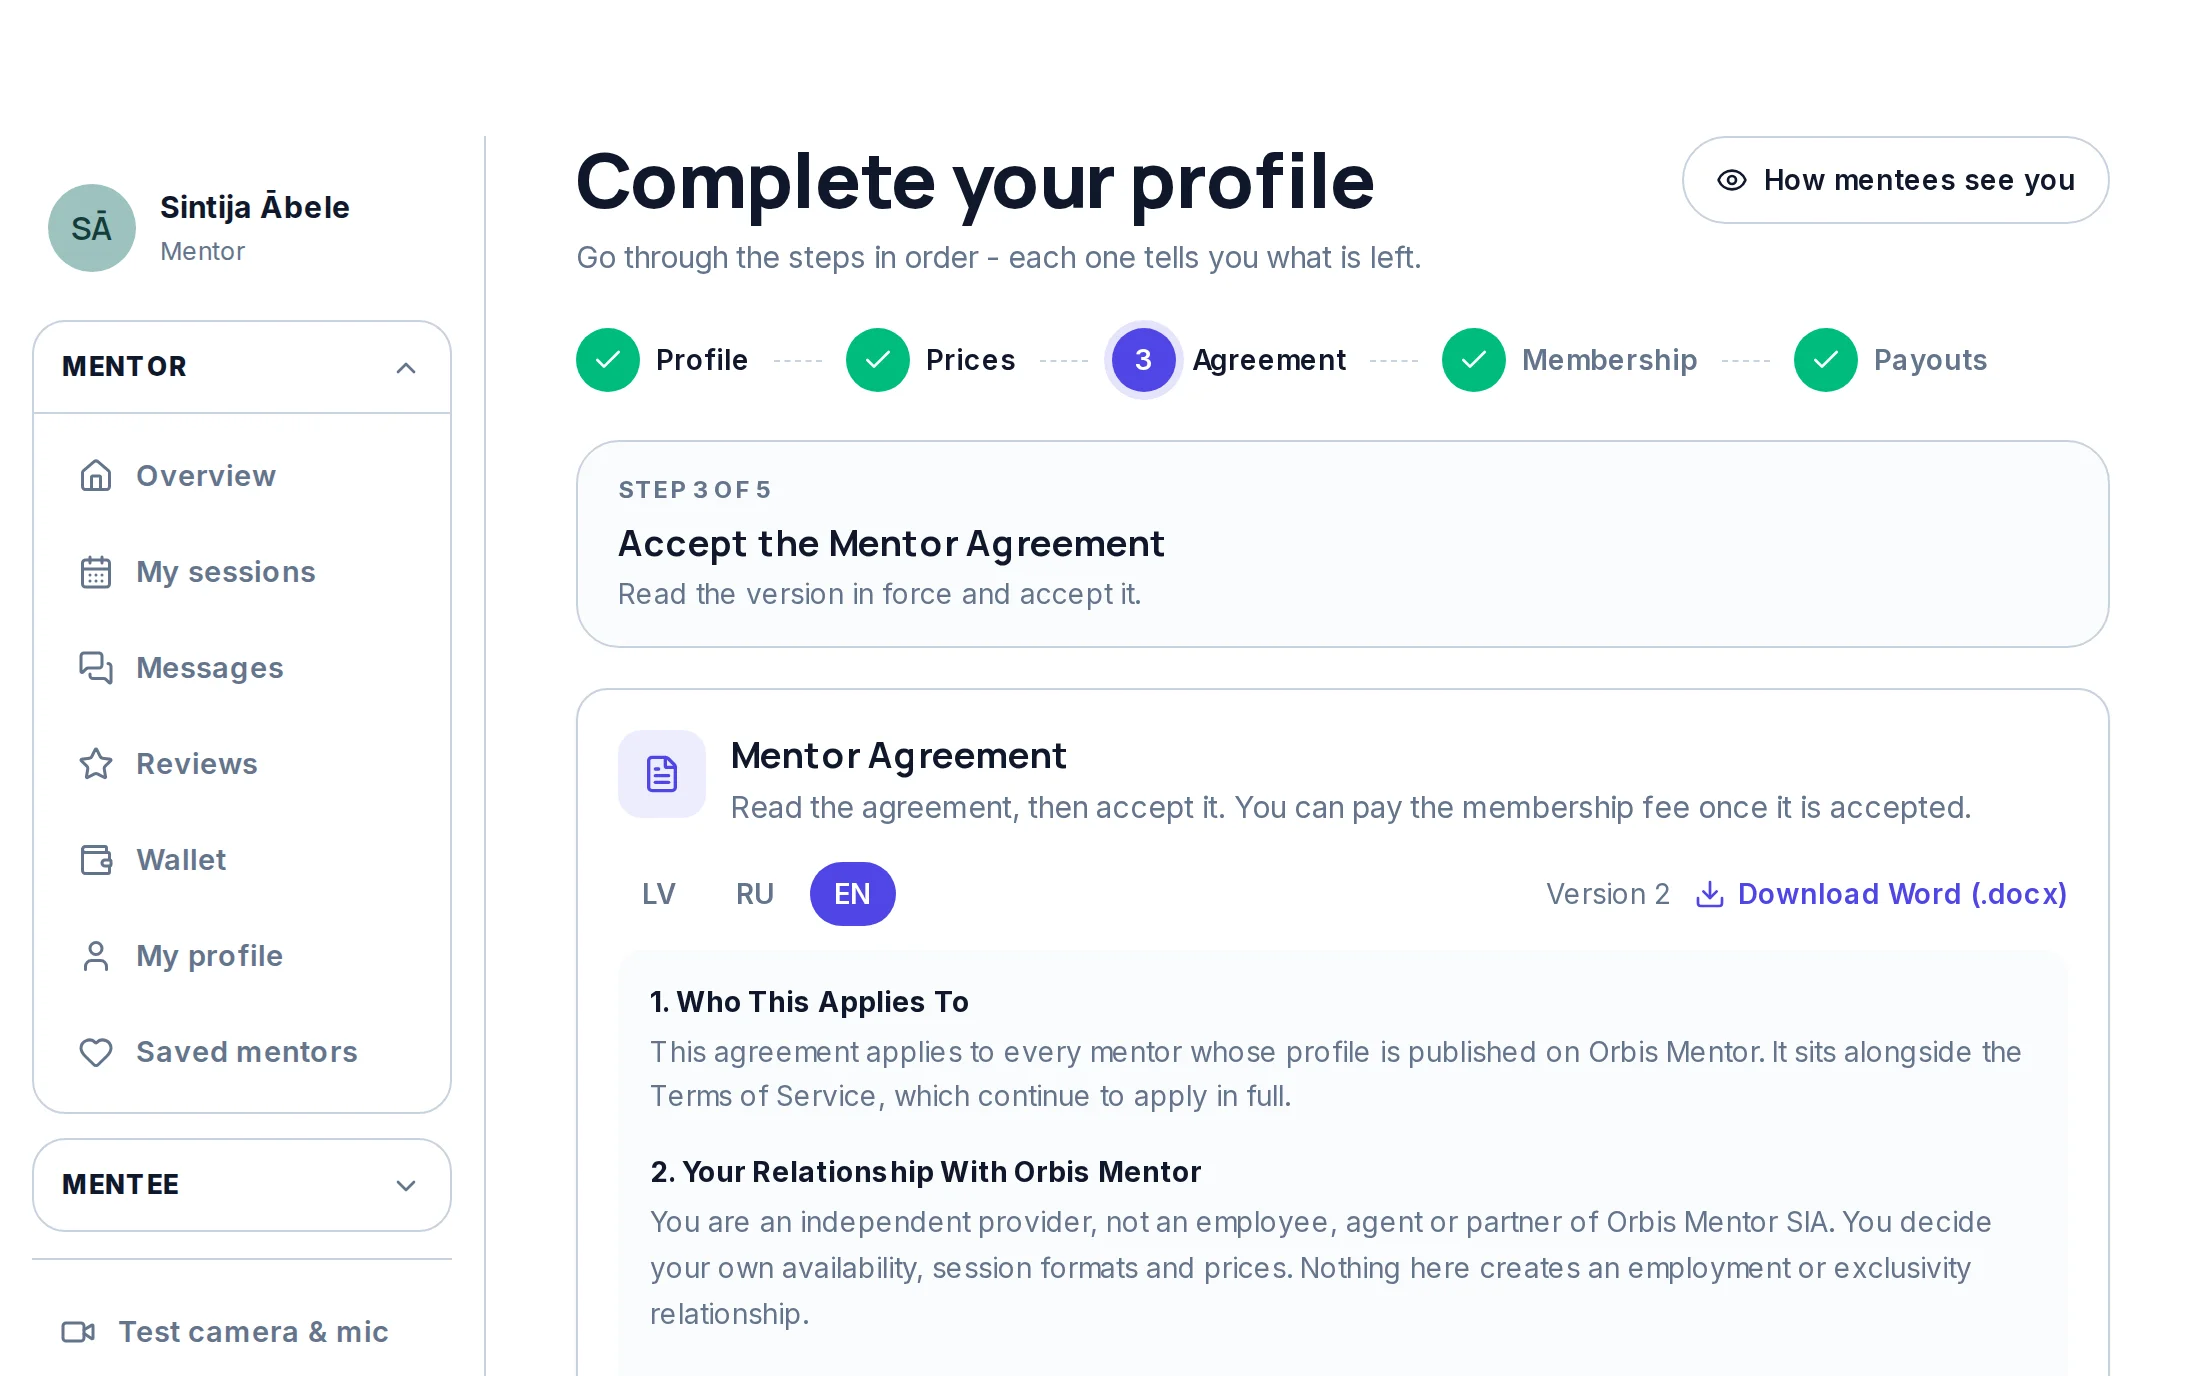
6Accept the Mentor Agreement
Read the agreement in force - in Latvian, Russian or English; “Download Word (.docx)” saves a copy - tick that you have read it and press “Accept agreement”.
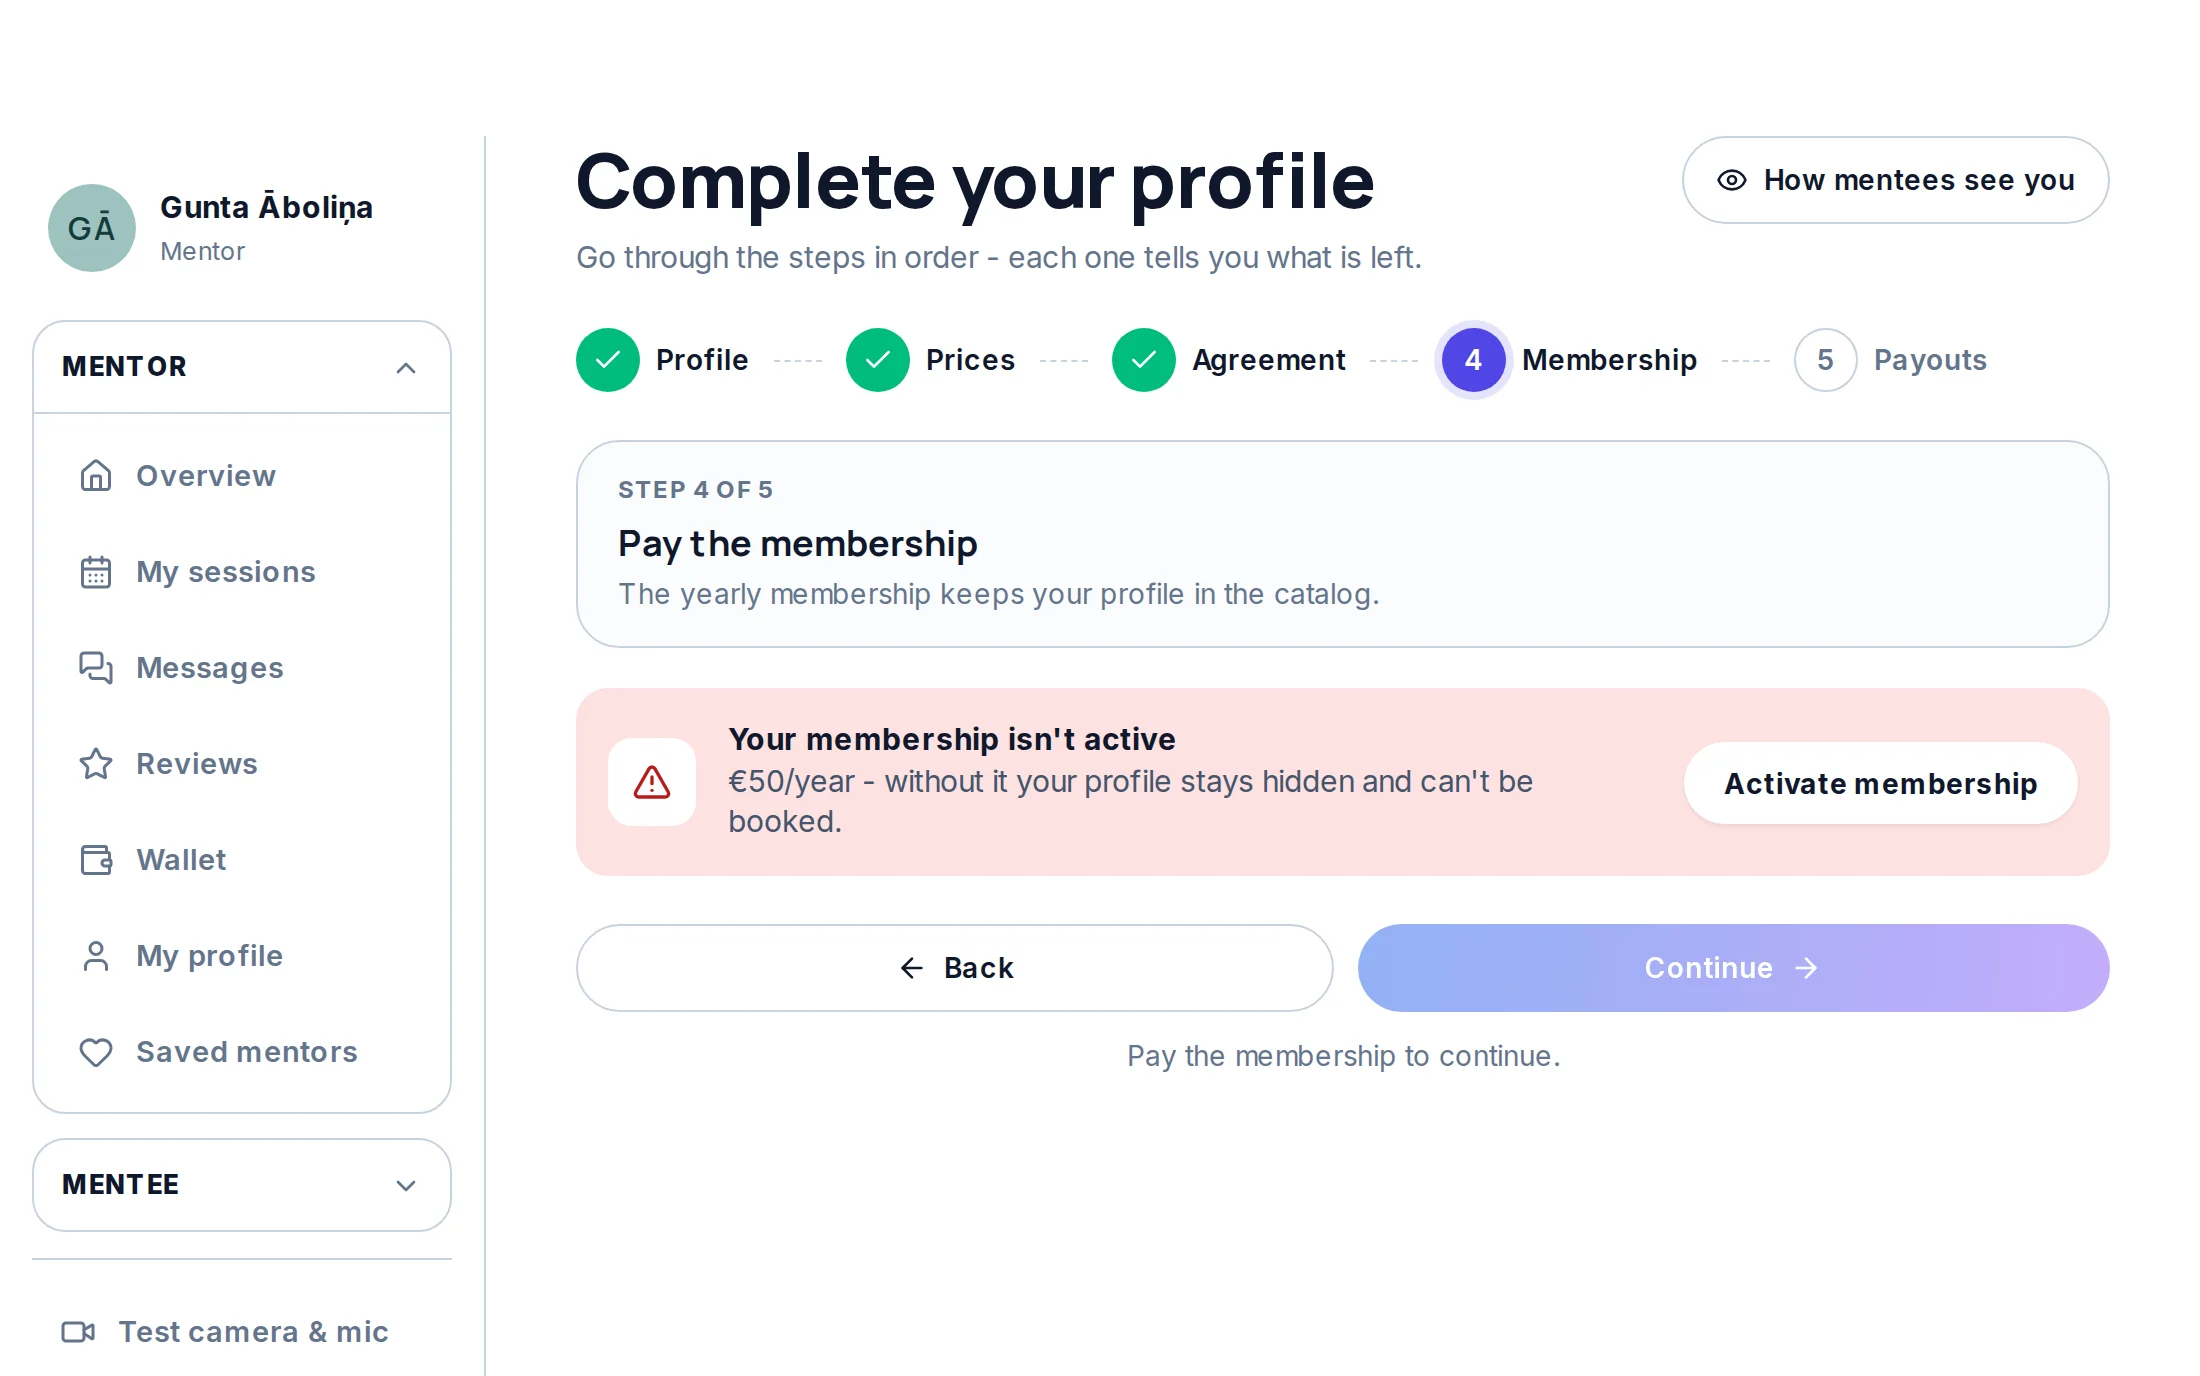
7Pay the membership
Press “Activate membership” and pay €50 by card. The membership is valid for 12 months and keeps your profile in the catalog; we email you a reminder 14 days before it renews.
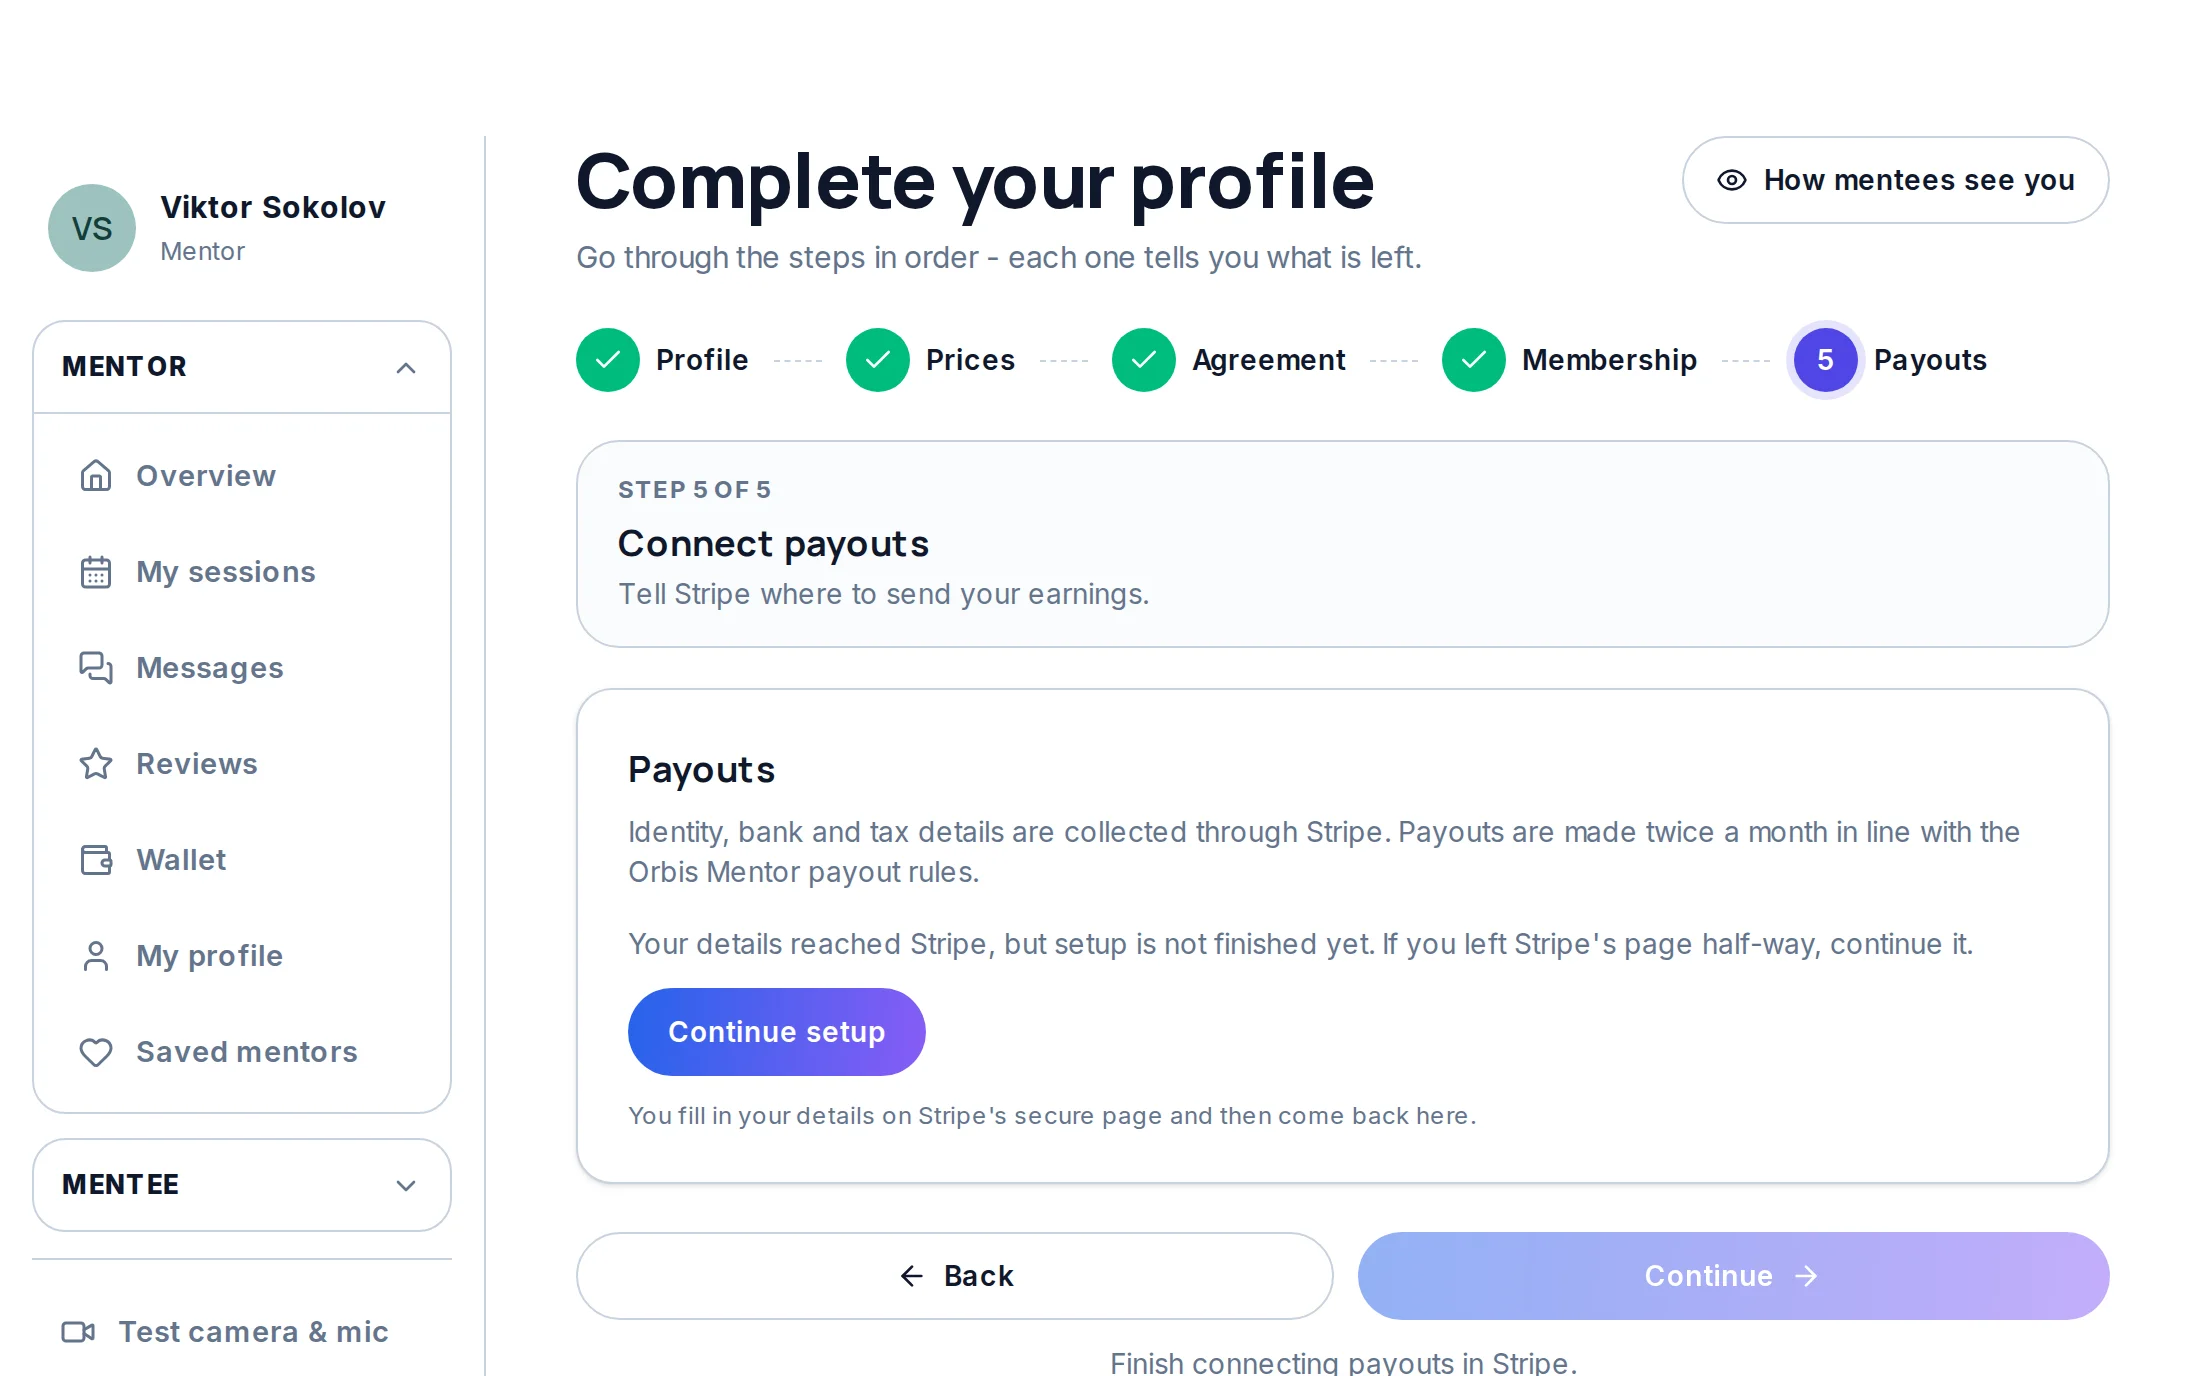
8Connect payouts
The last step: press “Connect payouts” and Stripe's secure page opens in the same tab. Confirm your phone number and give the details of the account your earnings should go to - then Stripe brings you back to Orbis Mentor. As soon as payouts work, your profile appears in the catalog and mentees can book you.
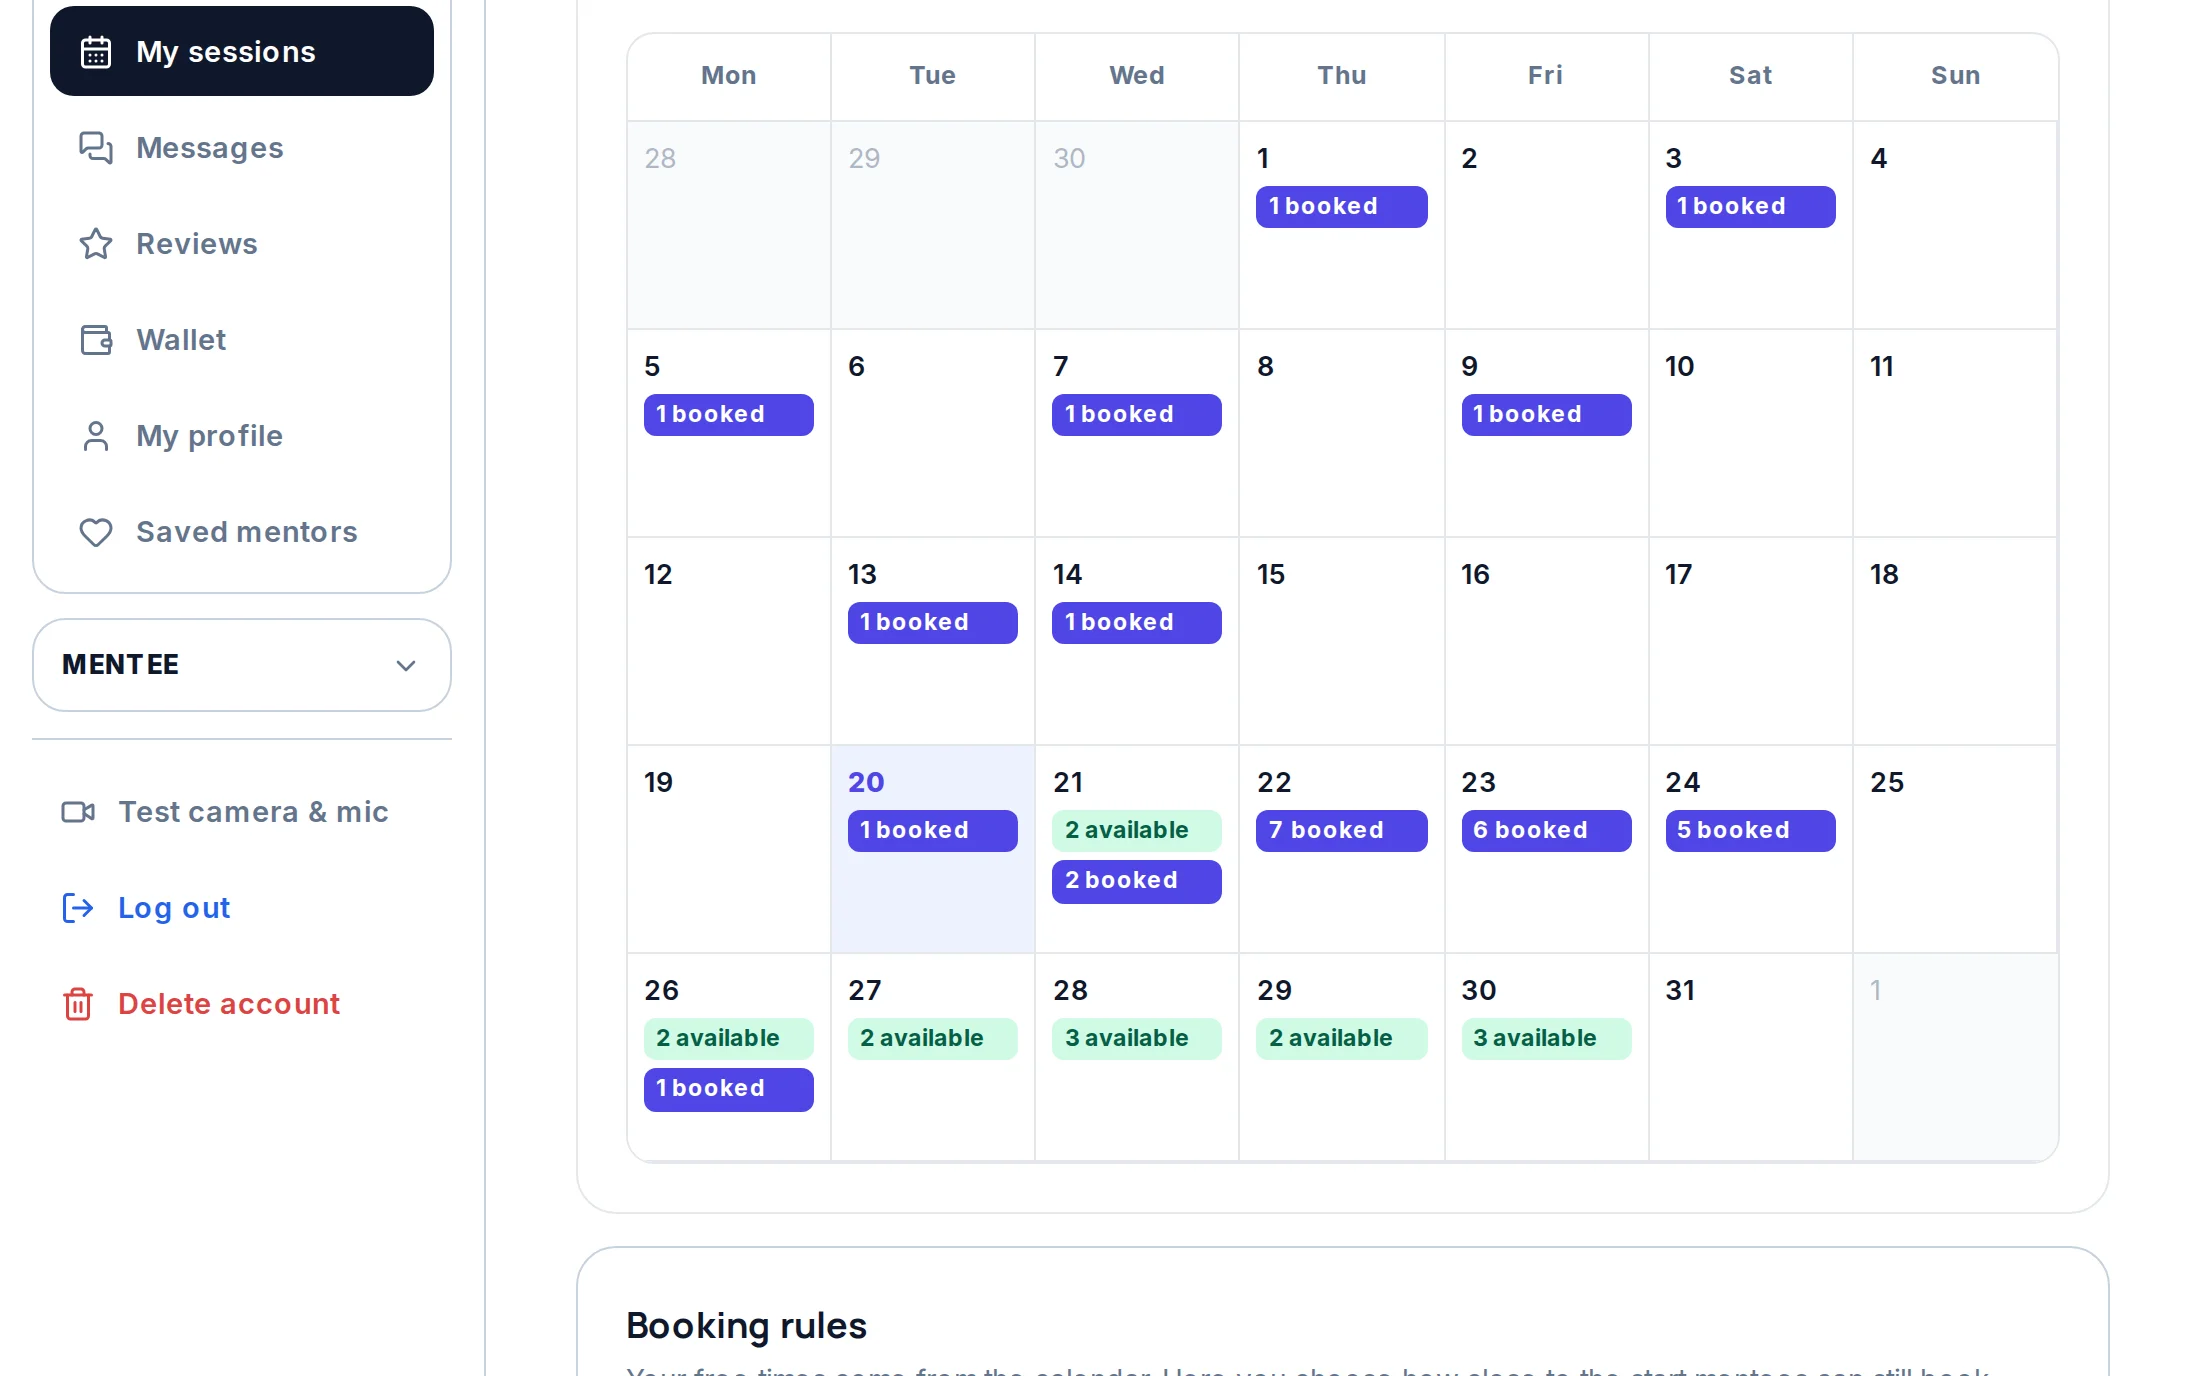
9Open times in the calendar
On “My sessions”, the calendar shows your free and booked times. “Add time” opens one time; “Template” saves a day or a week of working hours and puts them on the dates you choose.
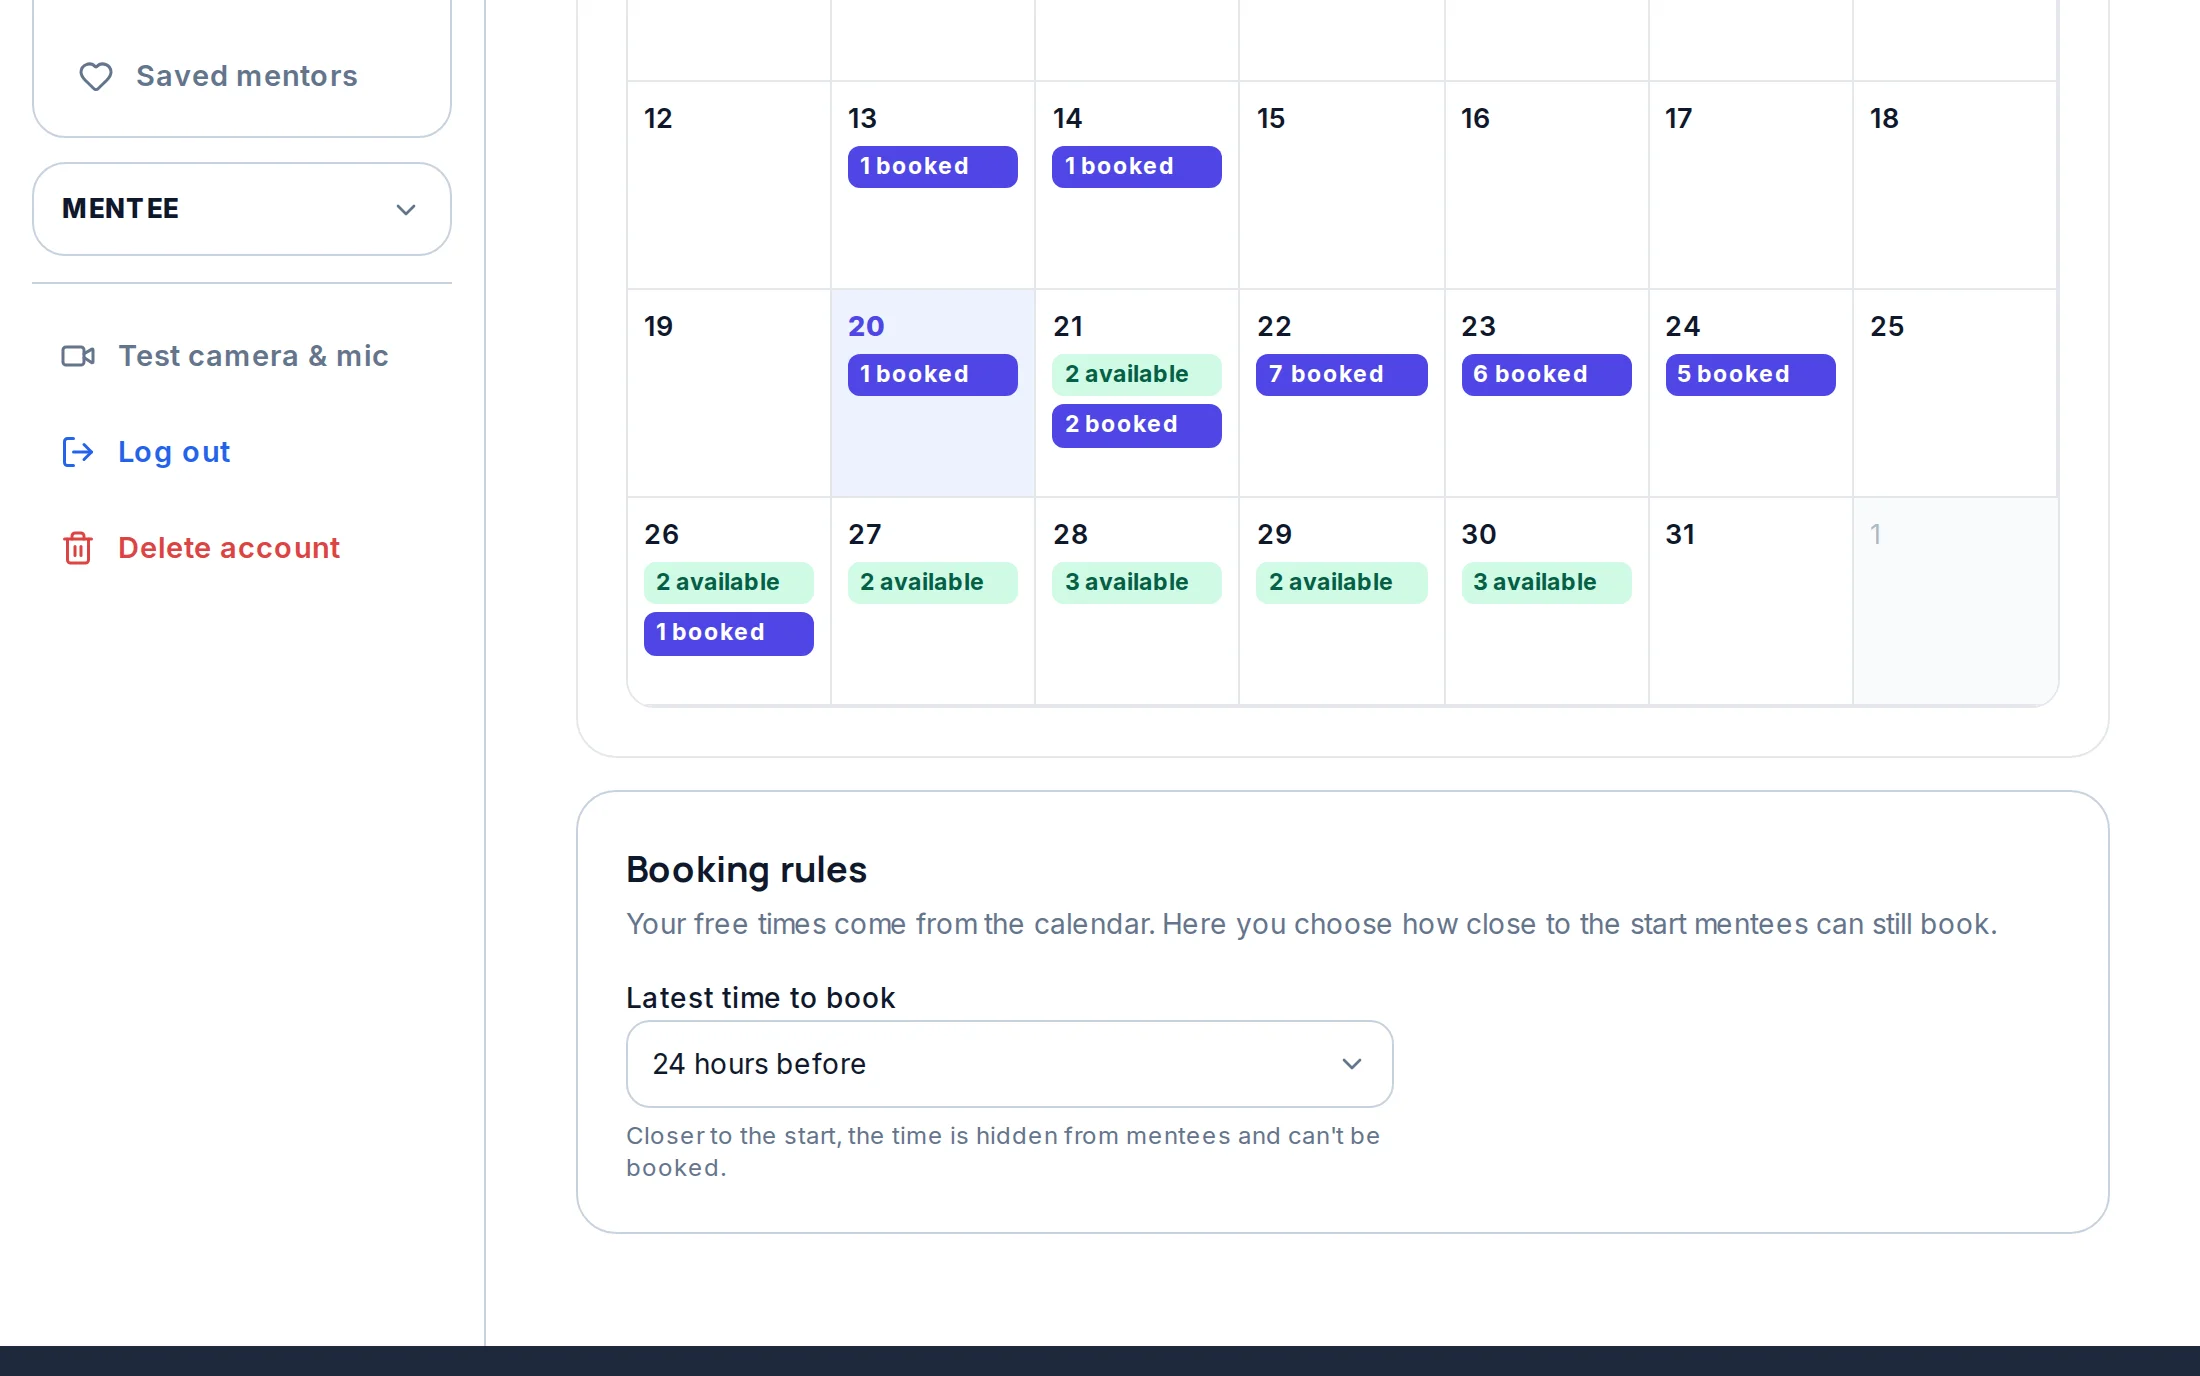
10Booking rules
Under the calendar, in “Booking rules”, choose the latest time to book: how long before the start a mentee can still book you. The choice is saved at once.
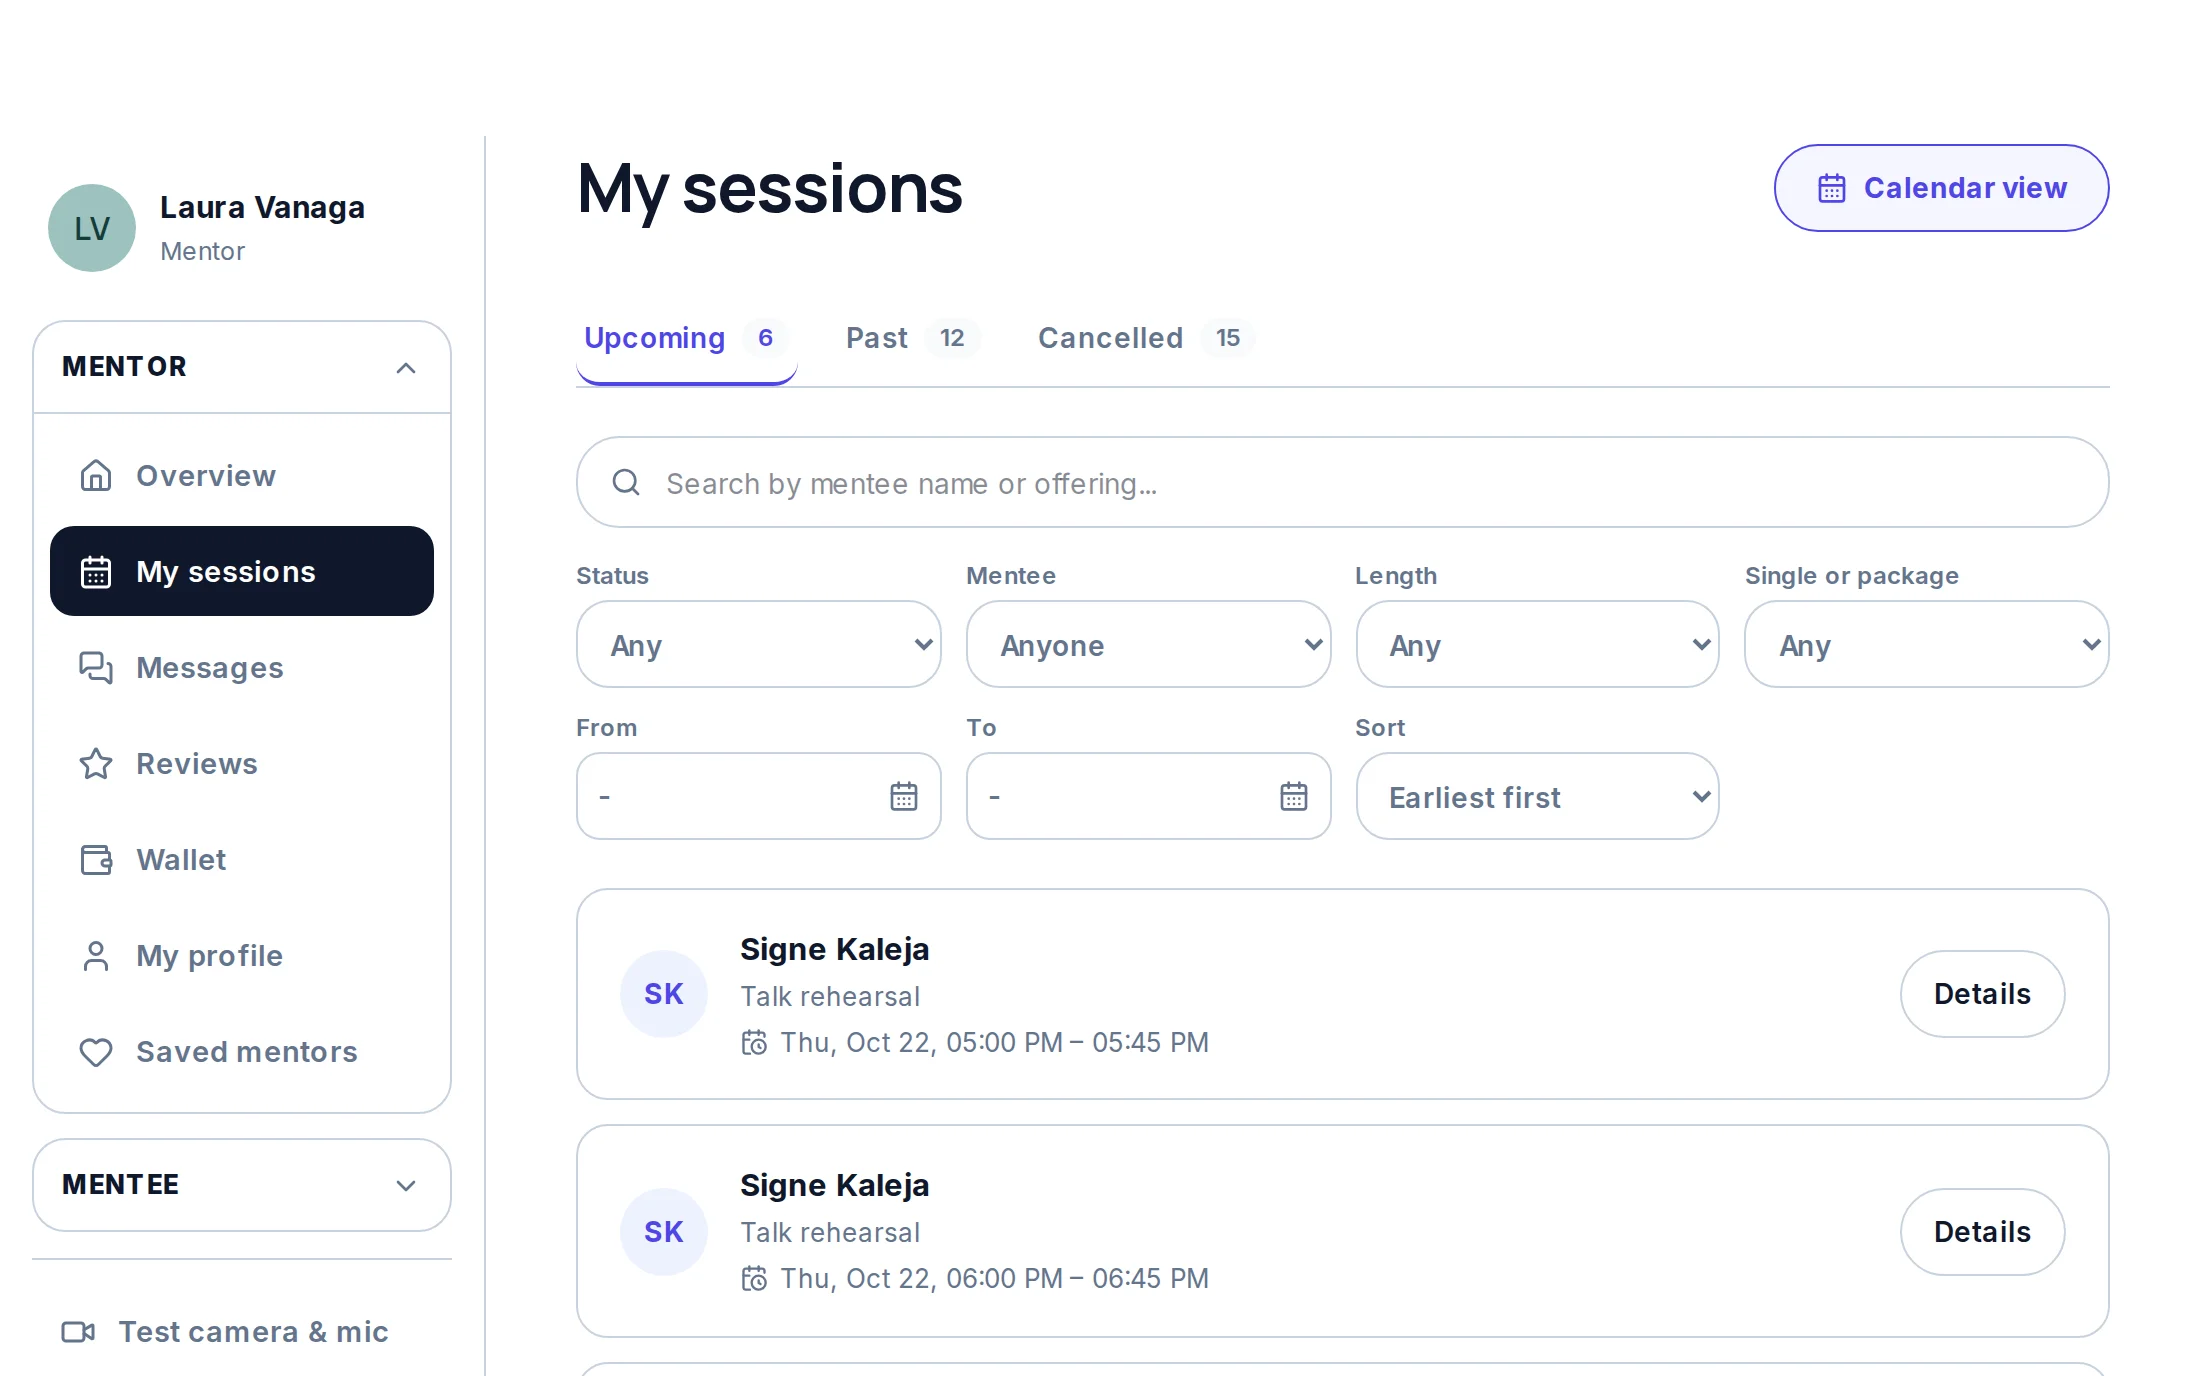
11Your sessions
“List view” shows your sessions with filters by status, mentee, length, single session or package, and dates. “Details” shows the session, lets you join it or cancel it - if you cancel, the mentee gets a full refund.
12Join the video session
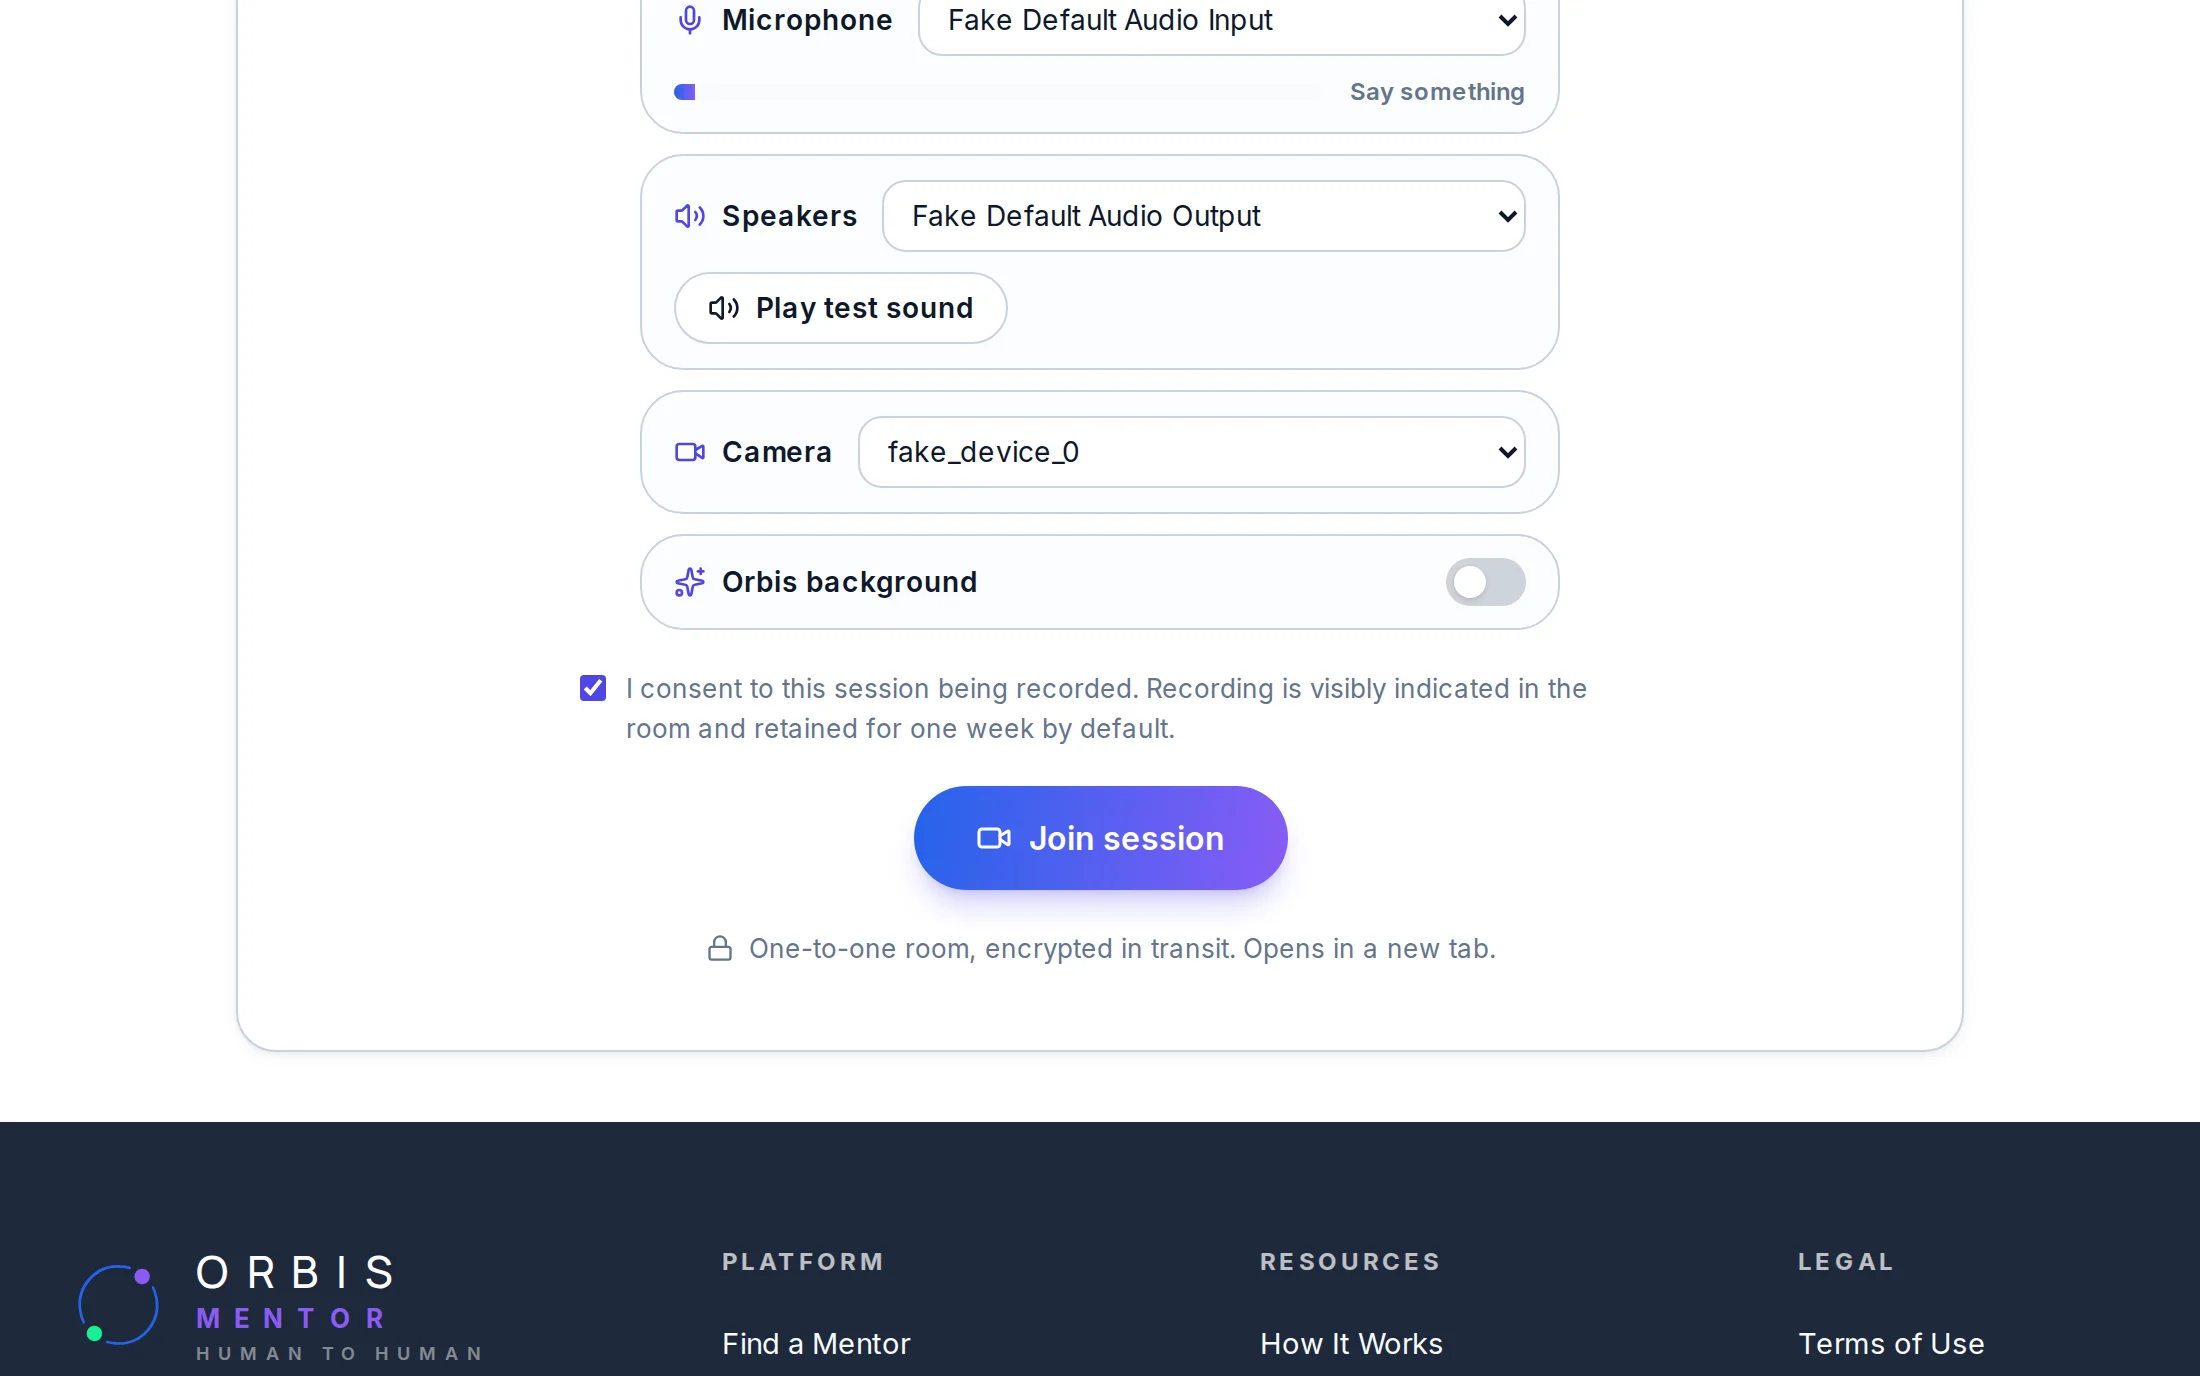
The room opens 10 minutes before the start. Press “Join session”: the page shows your camera image and microphone level, lets you choose the microphone, speakers (with “Play test sound”) and camera, and offers an optional Orbis background. Tick that you agree to the recording and press “Join session” - the call opens in a new tab in your browser.
13Reviews
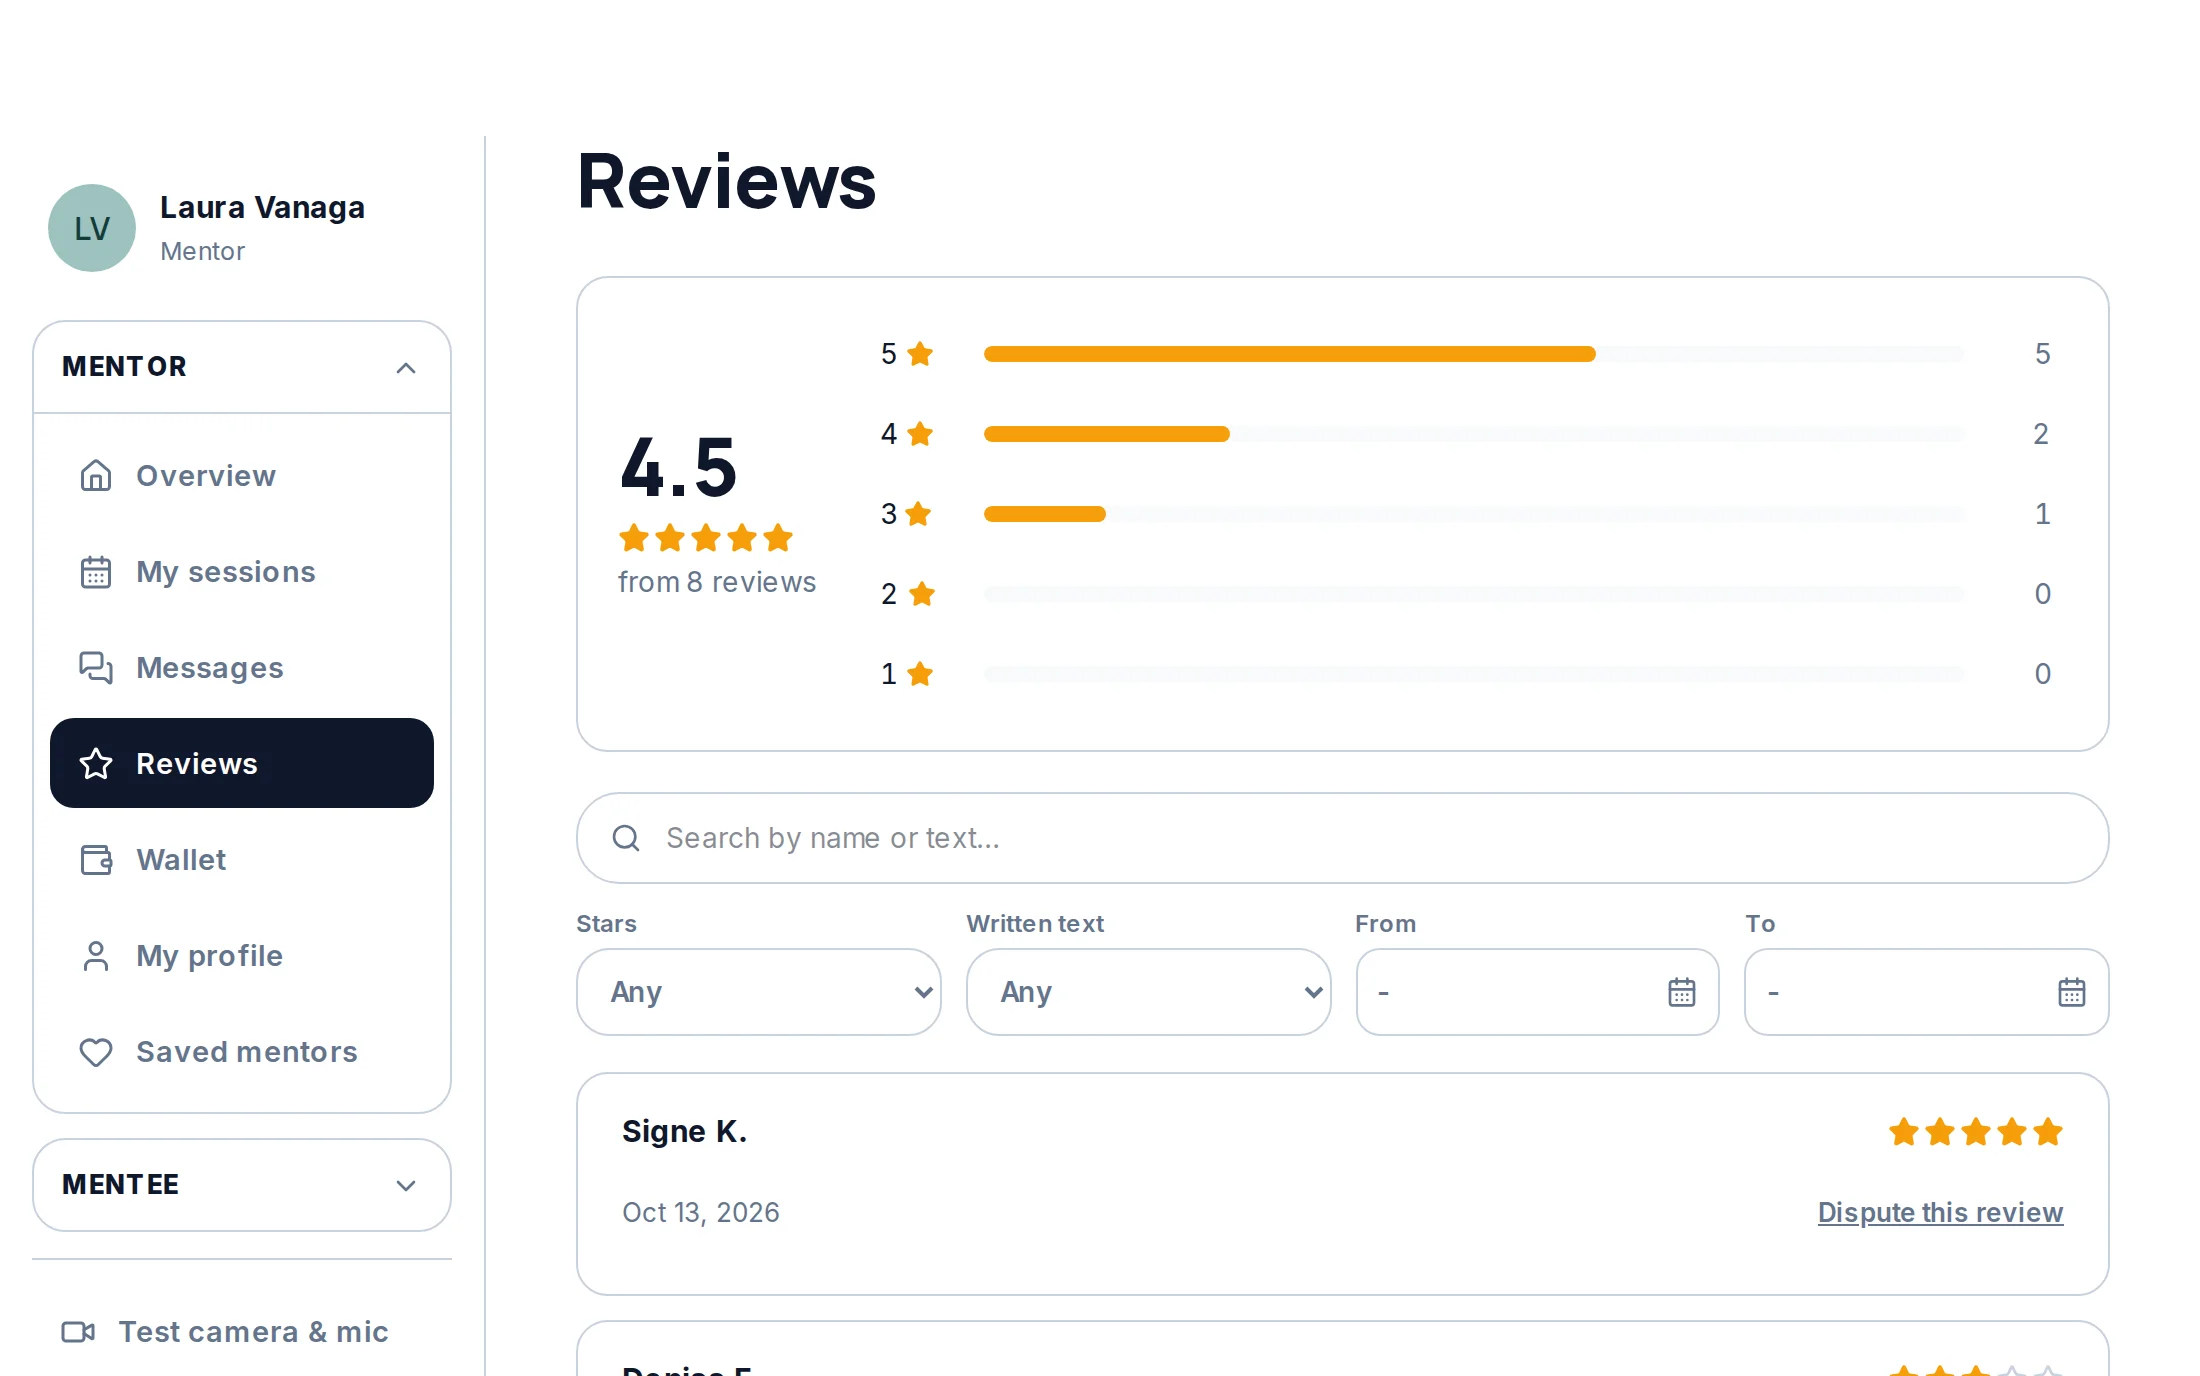
“Reviews” shows your average rating, how many reviews gave each number of stars and every review with filters. If you think a review is unfair, press “Dispute this review” and explain why: a moderator decides, and the review stays visible until then.
14Wallet
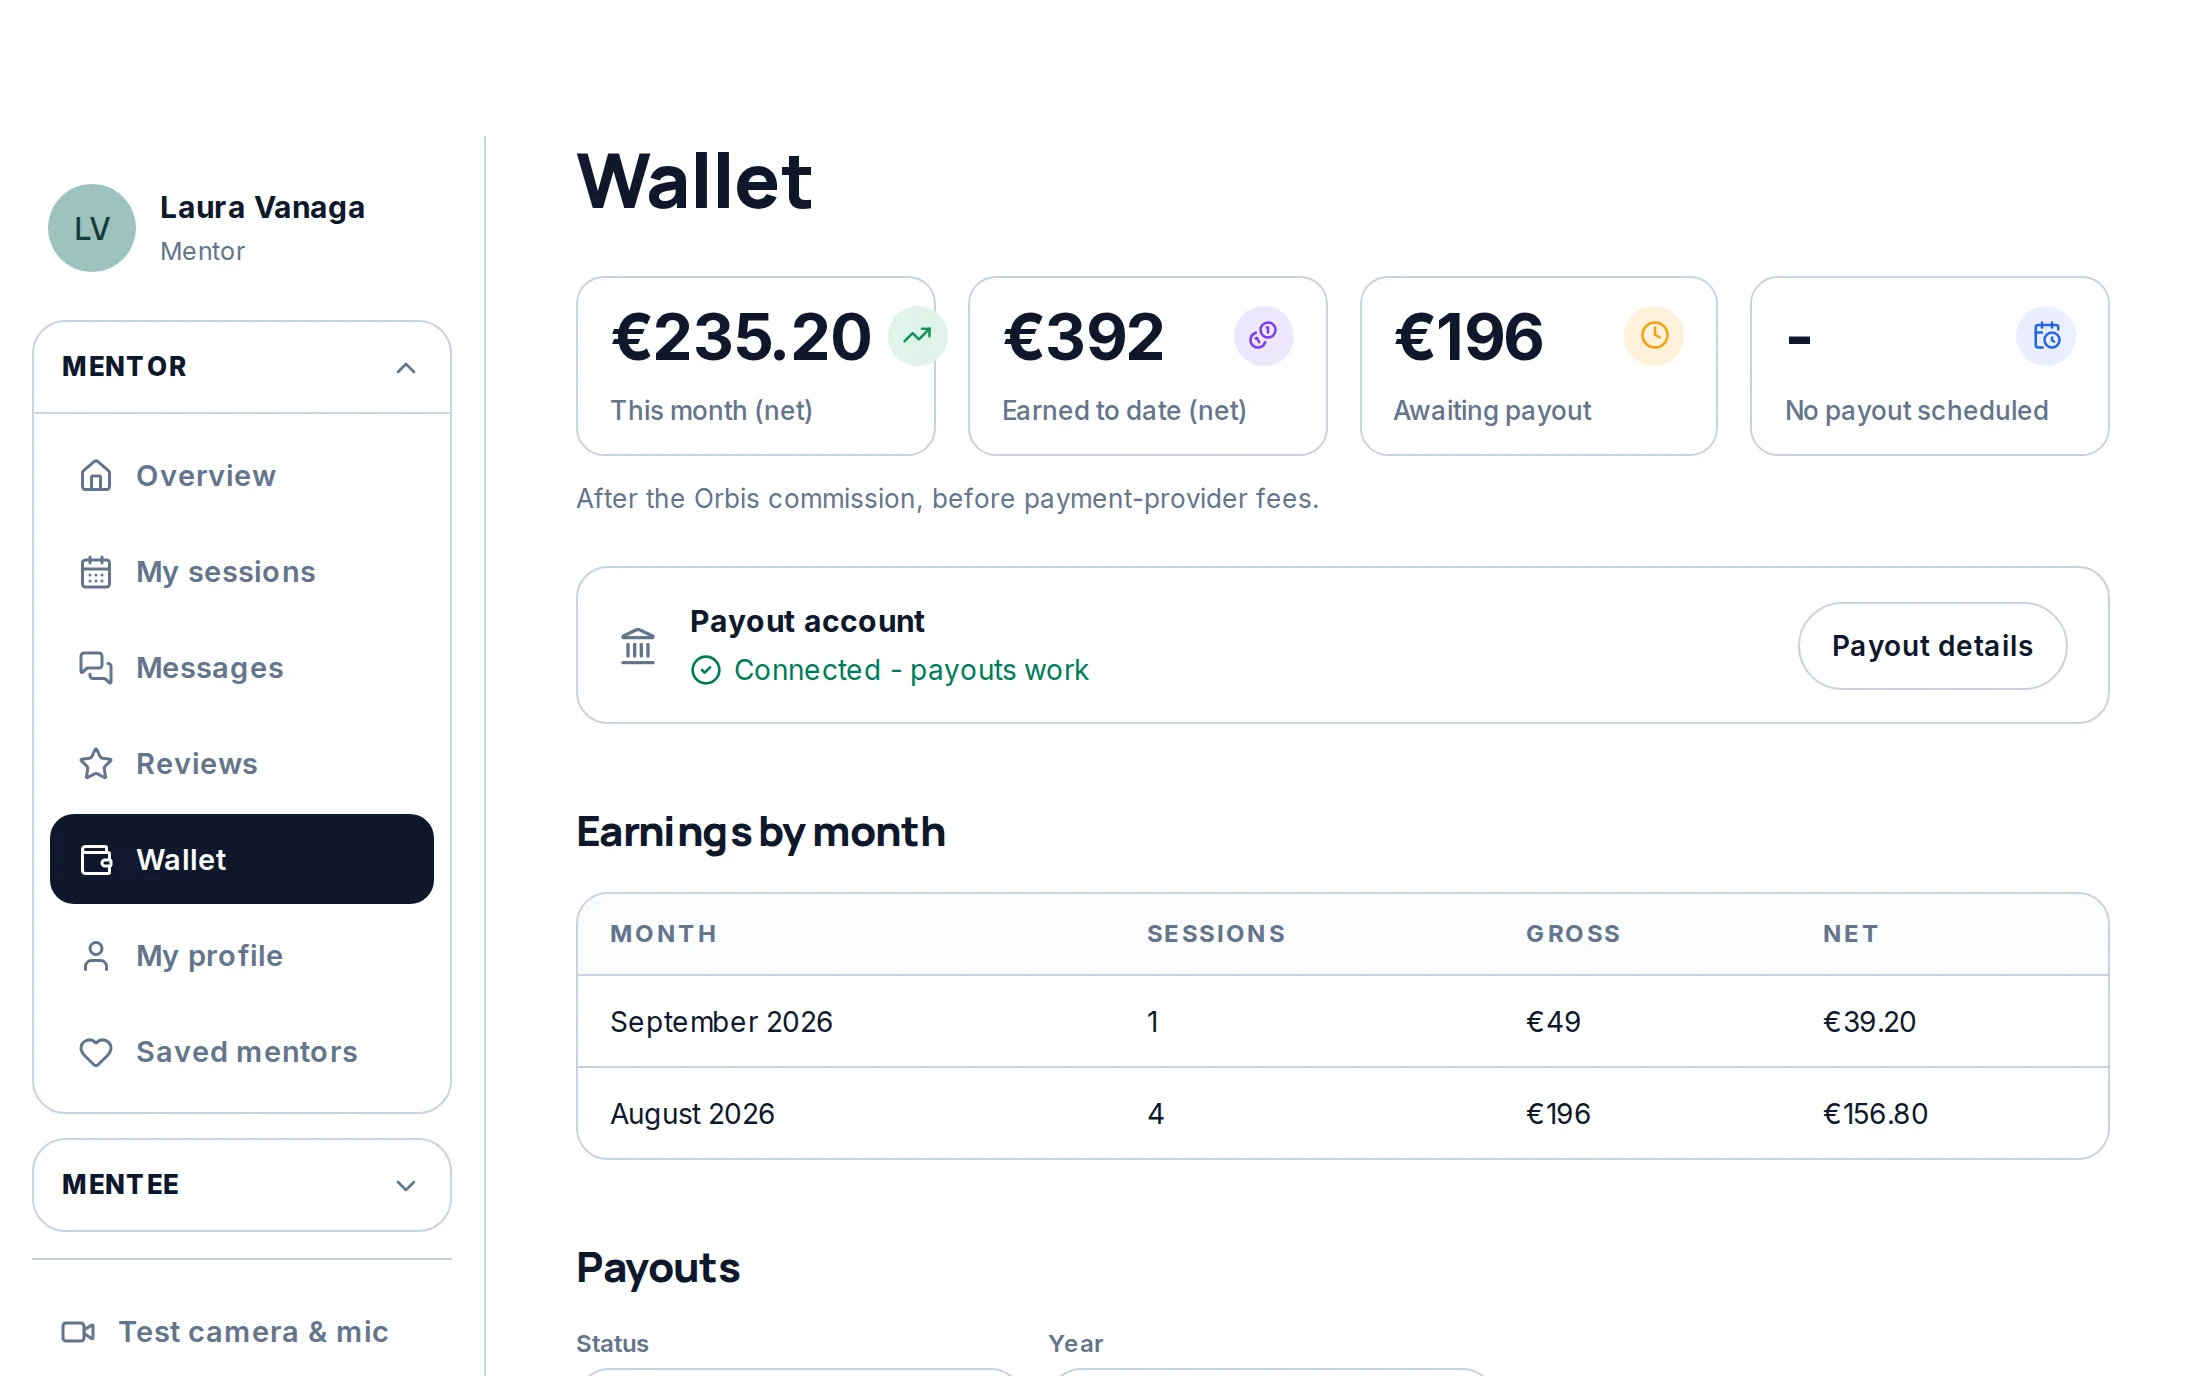
“Wallet” shows what you earned this month and so far, what waits for the next payout and when it is paid. Amounts are after the Orbis commission and before payment-provider fees. Payouts go out on the payout days shown in the Wallet; you can also ask for an early payout of what is already ready, for a small fee.
15Your profile and settings
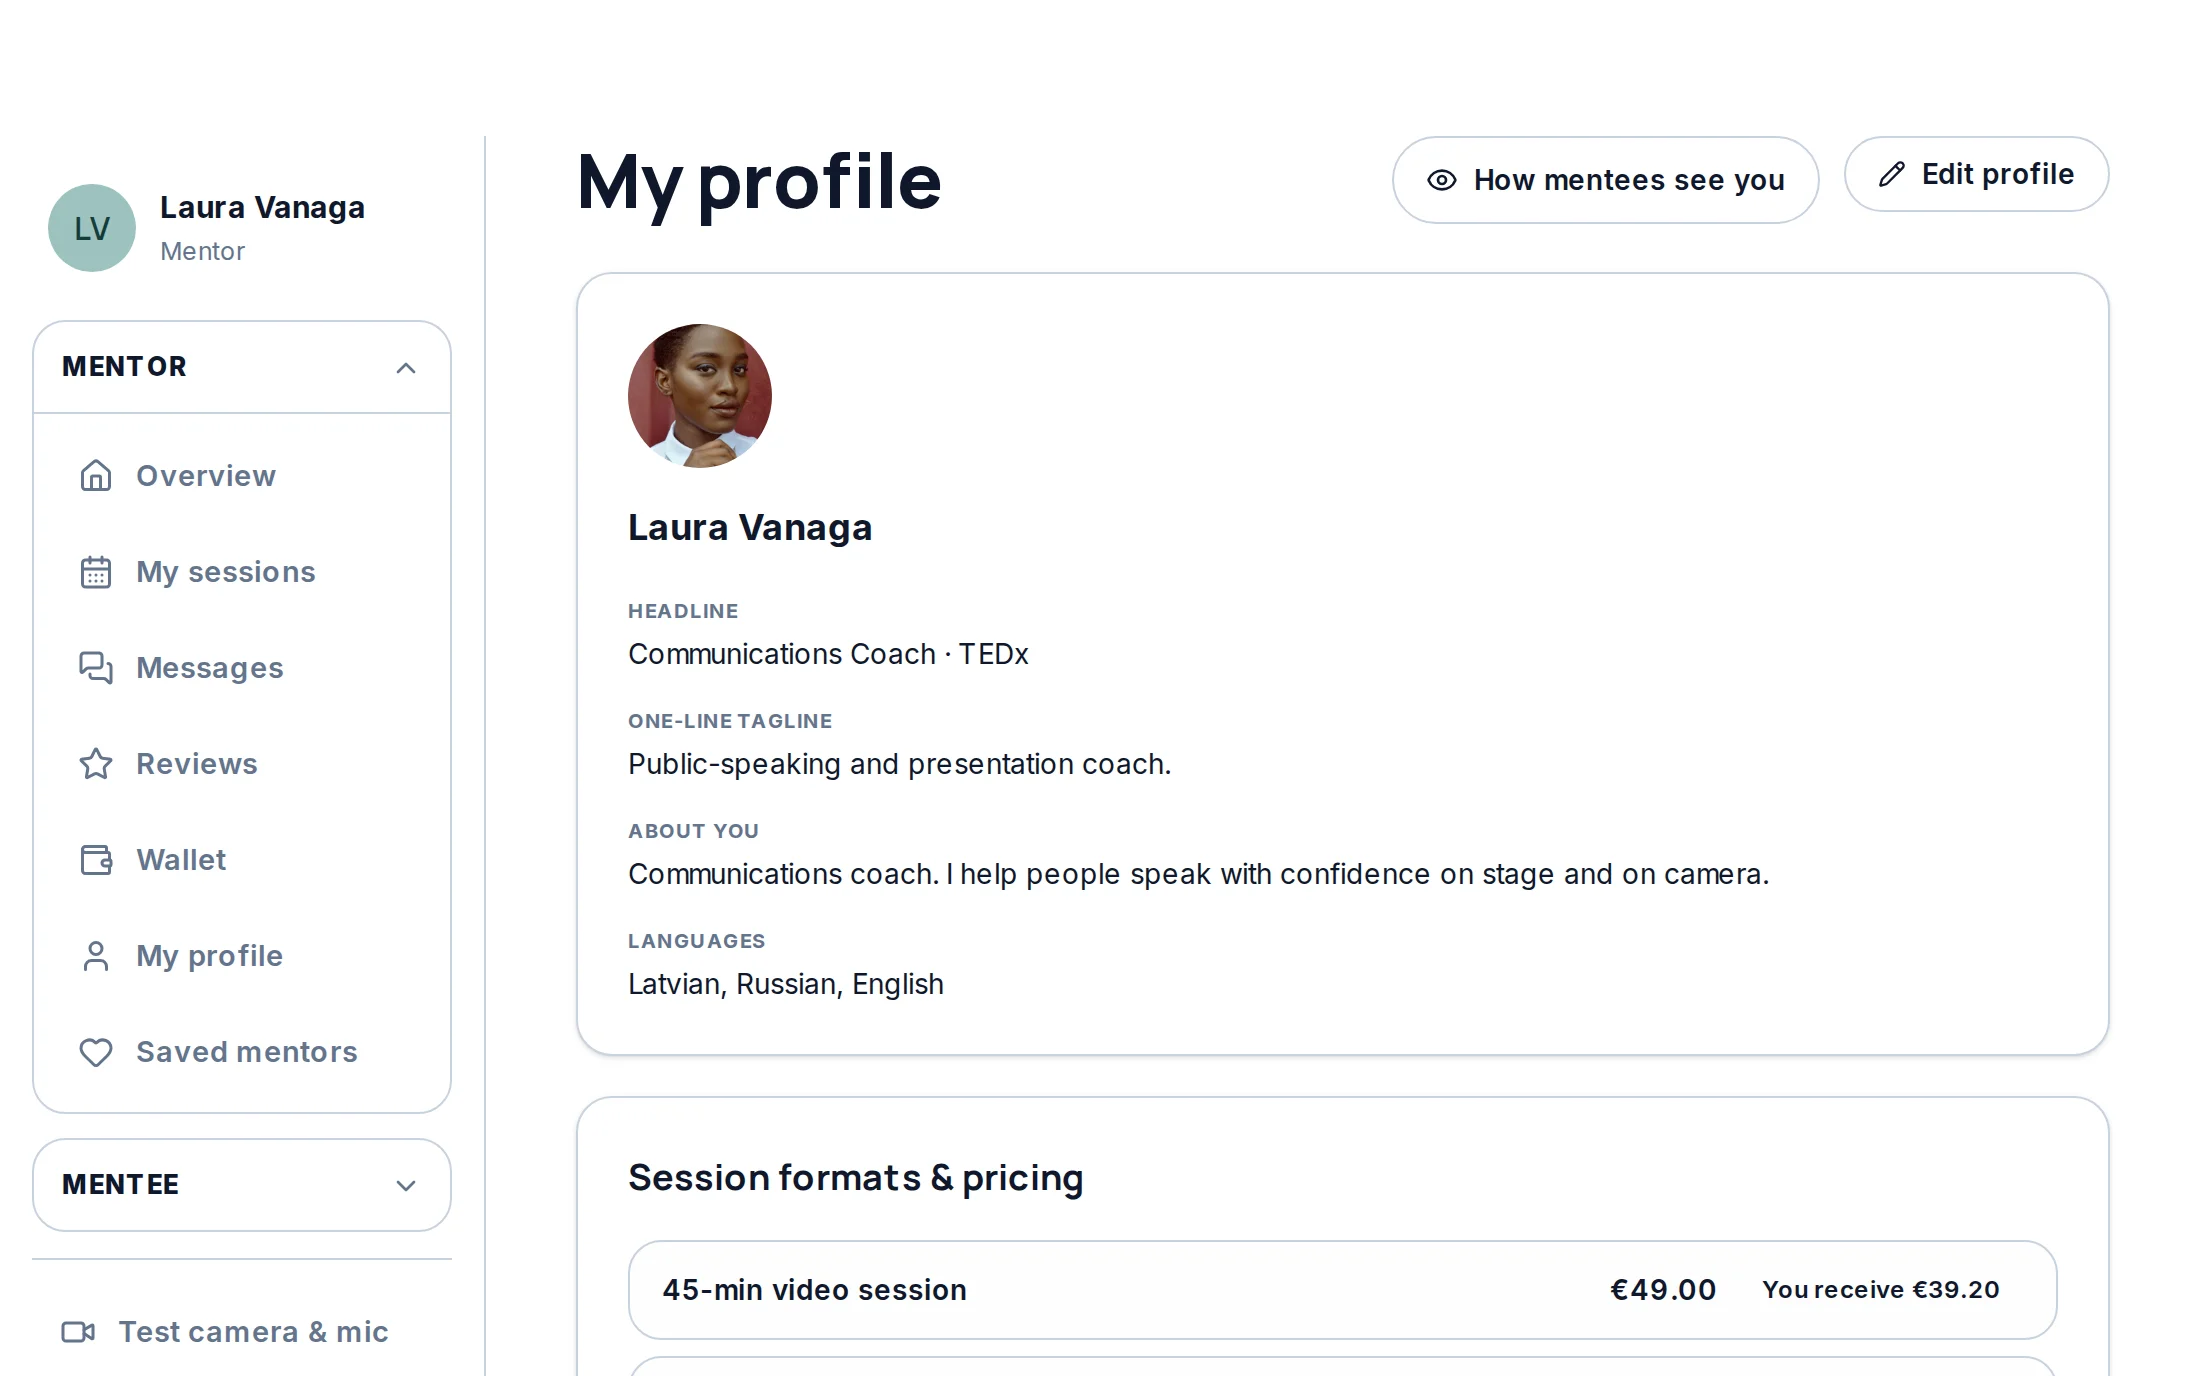
Later, “My profile” keeps it all in one place: “Edit profile” changes your photo, headline, texts, languages, topics, video greeting and prices, and “How mentees see you” opens your public page. Below are your account settings - email, country, time zone and password - and “Settings” with the theme, the language and your membership: when it renews, the fee and when we remind you.